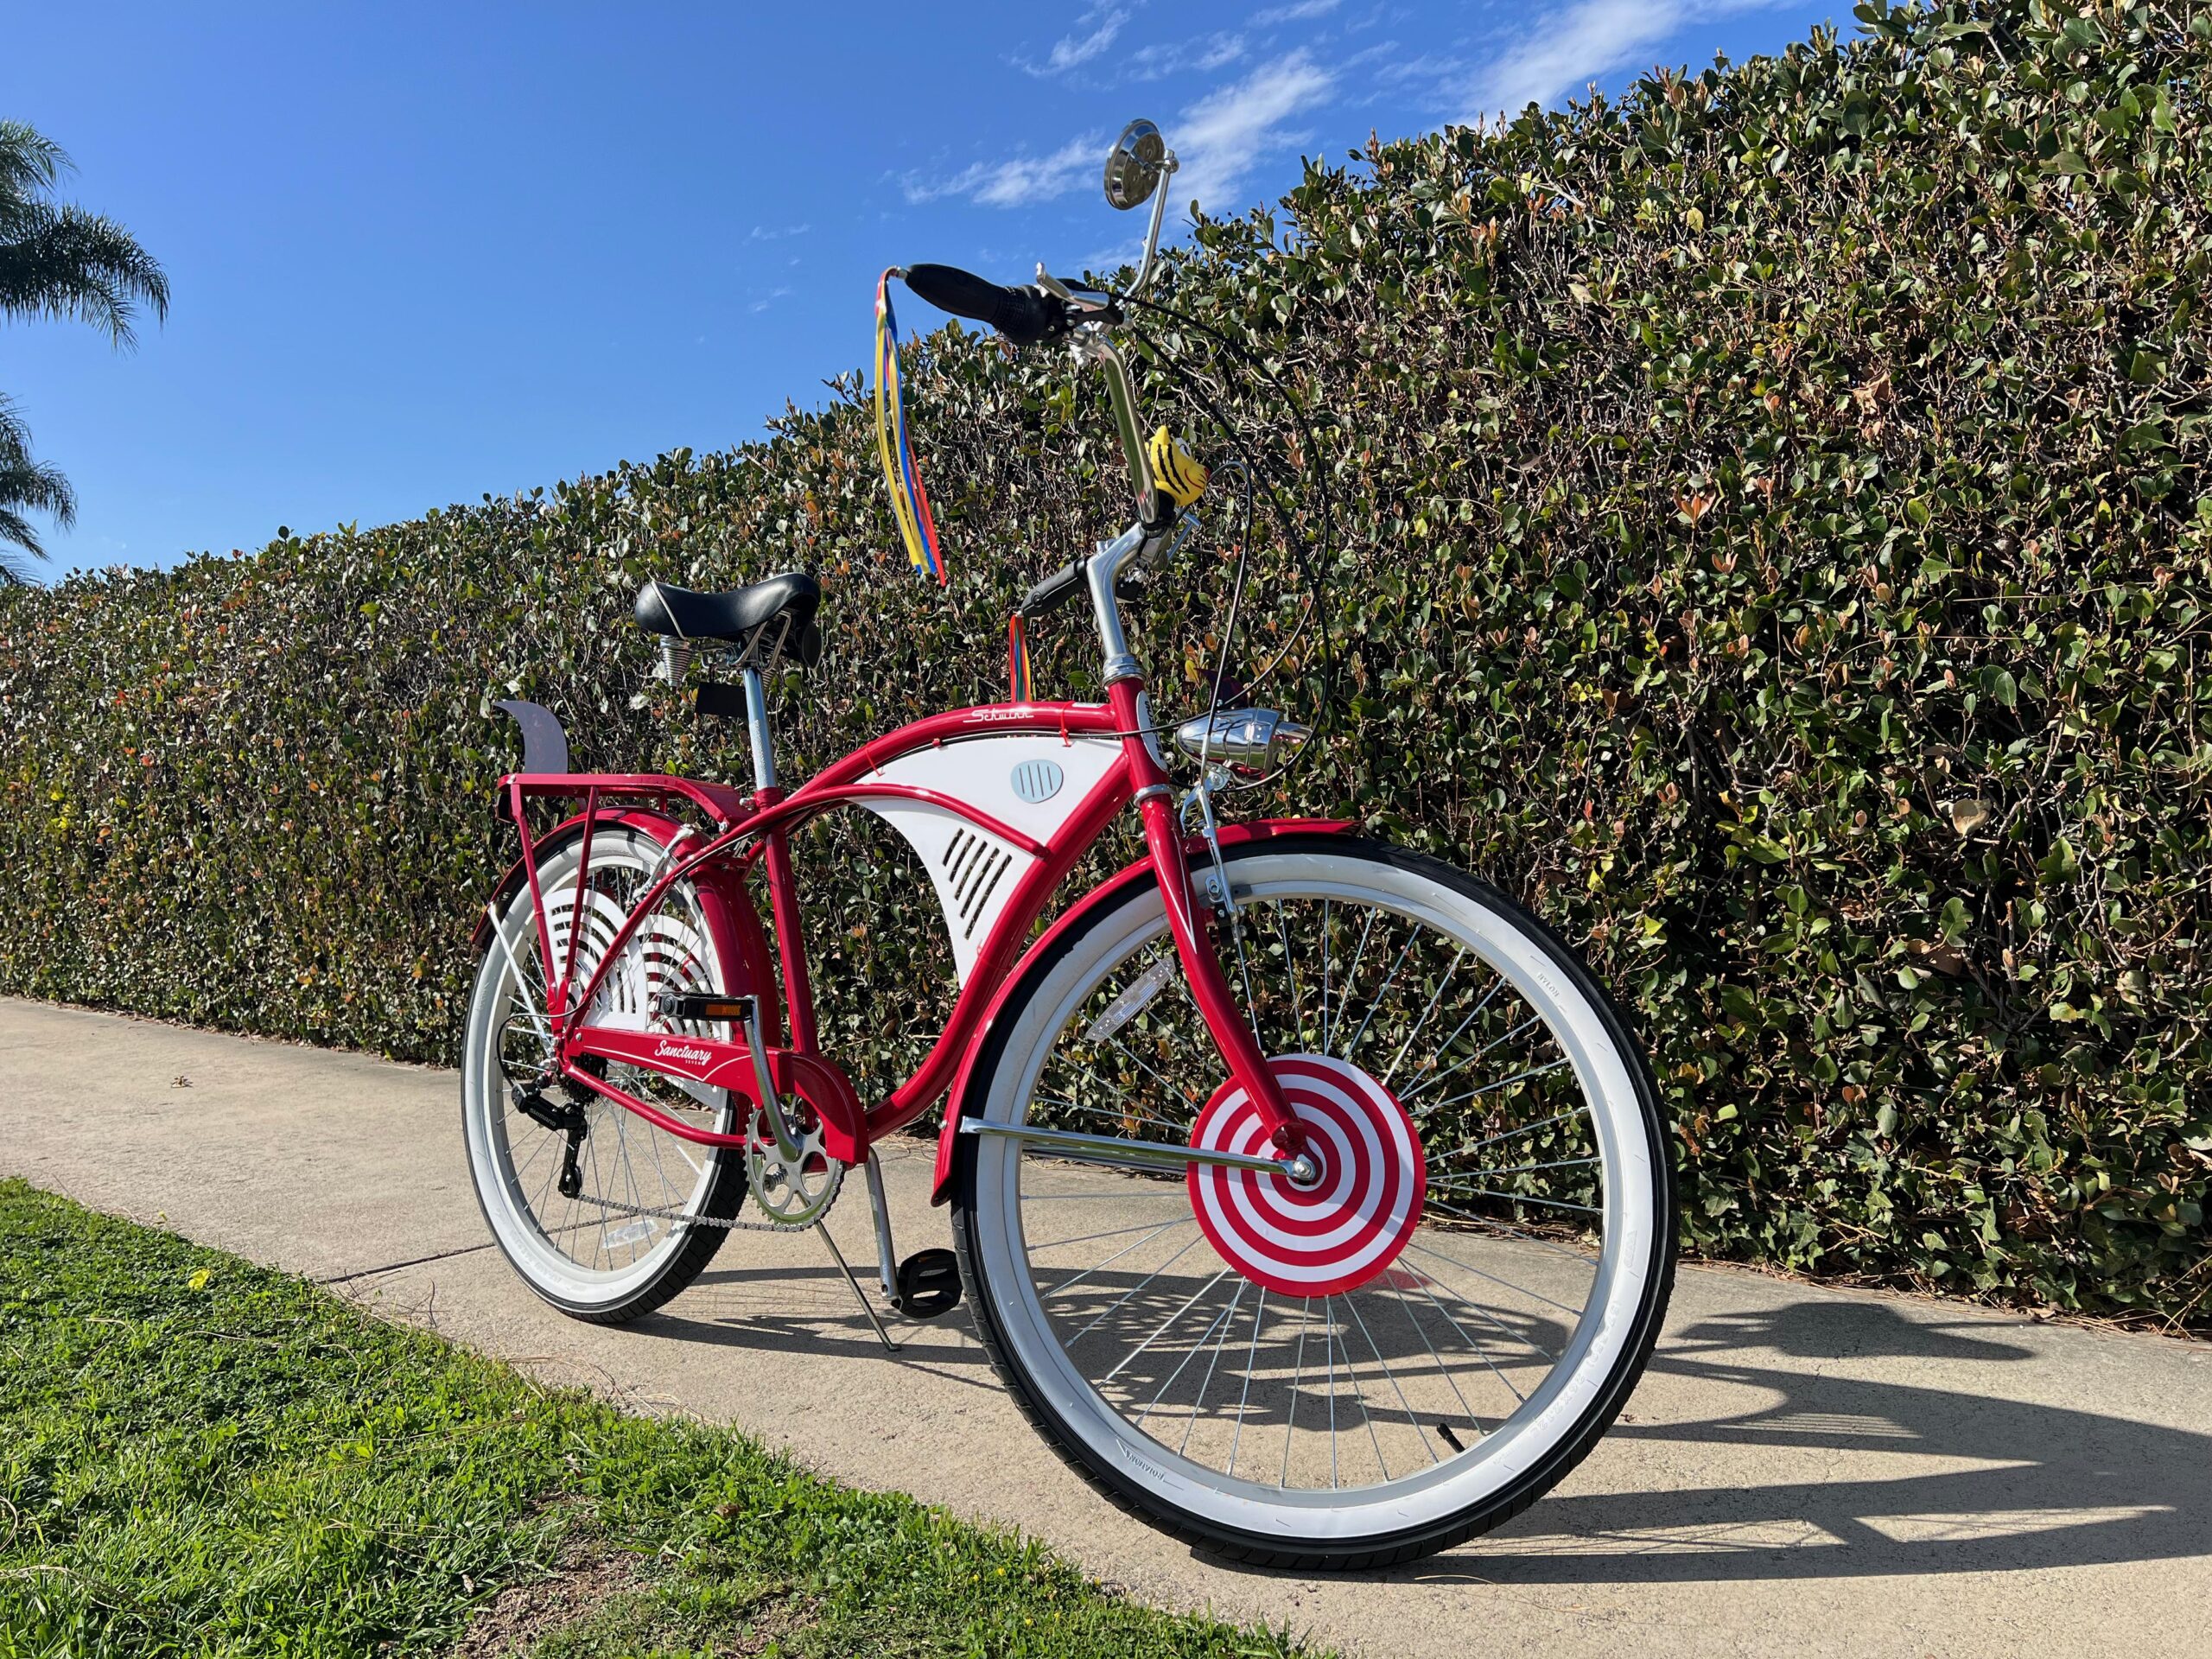
Pee-wee Herman Bike

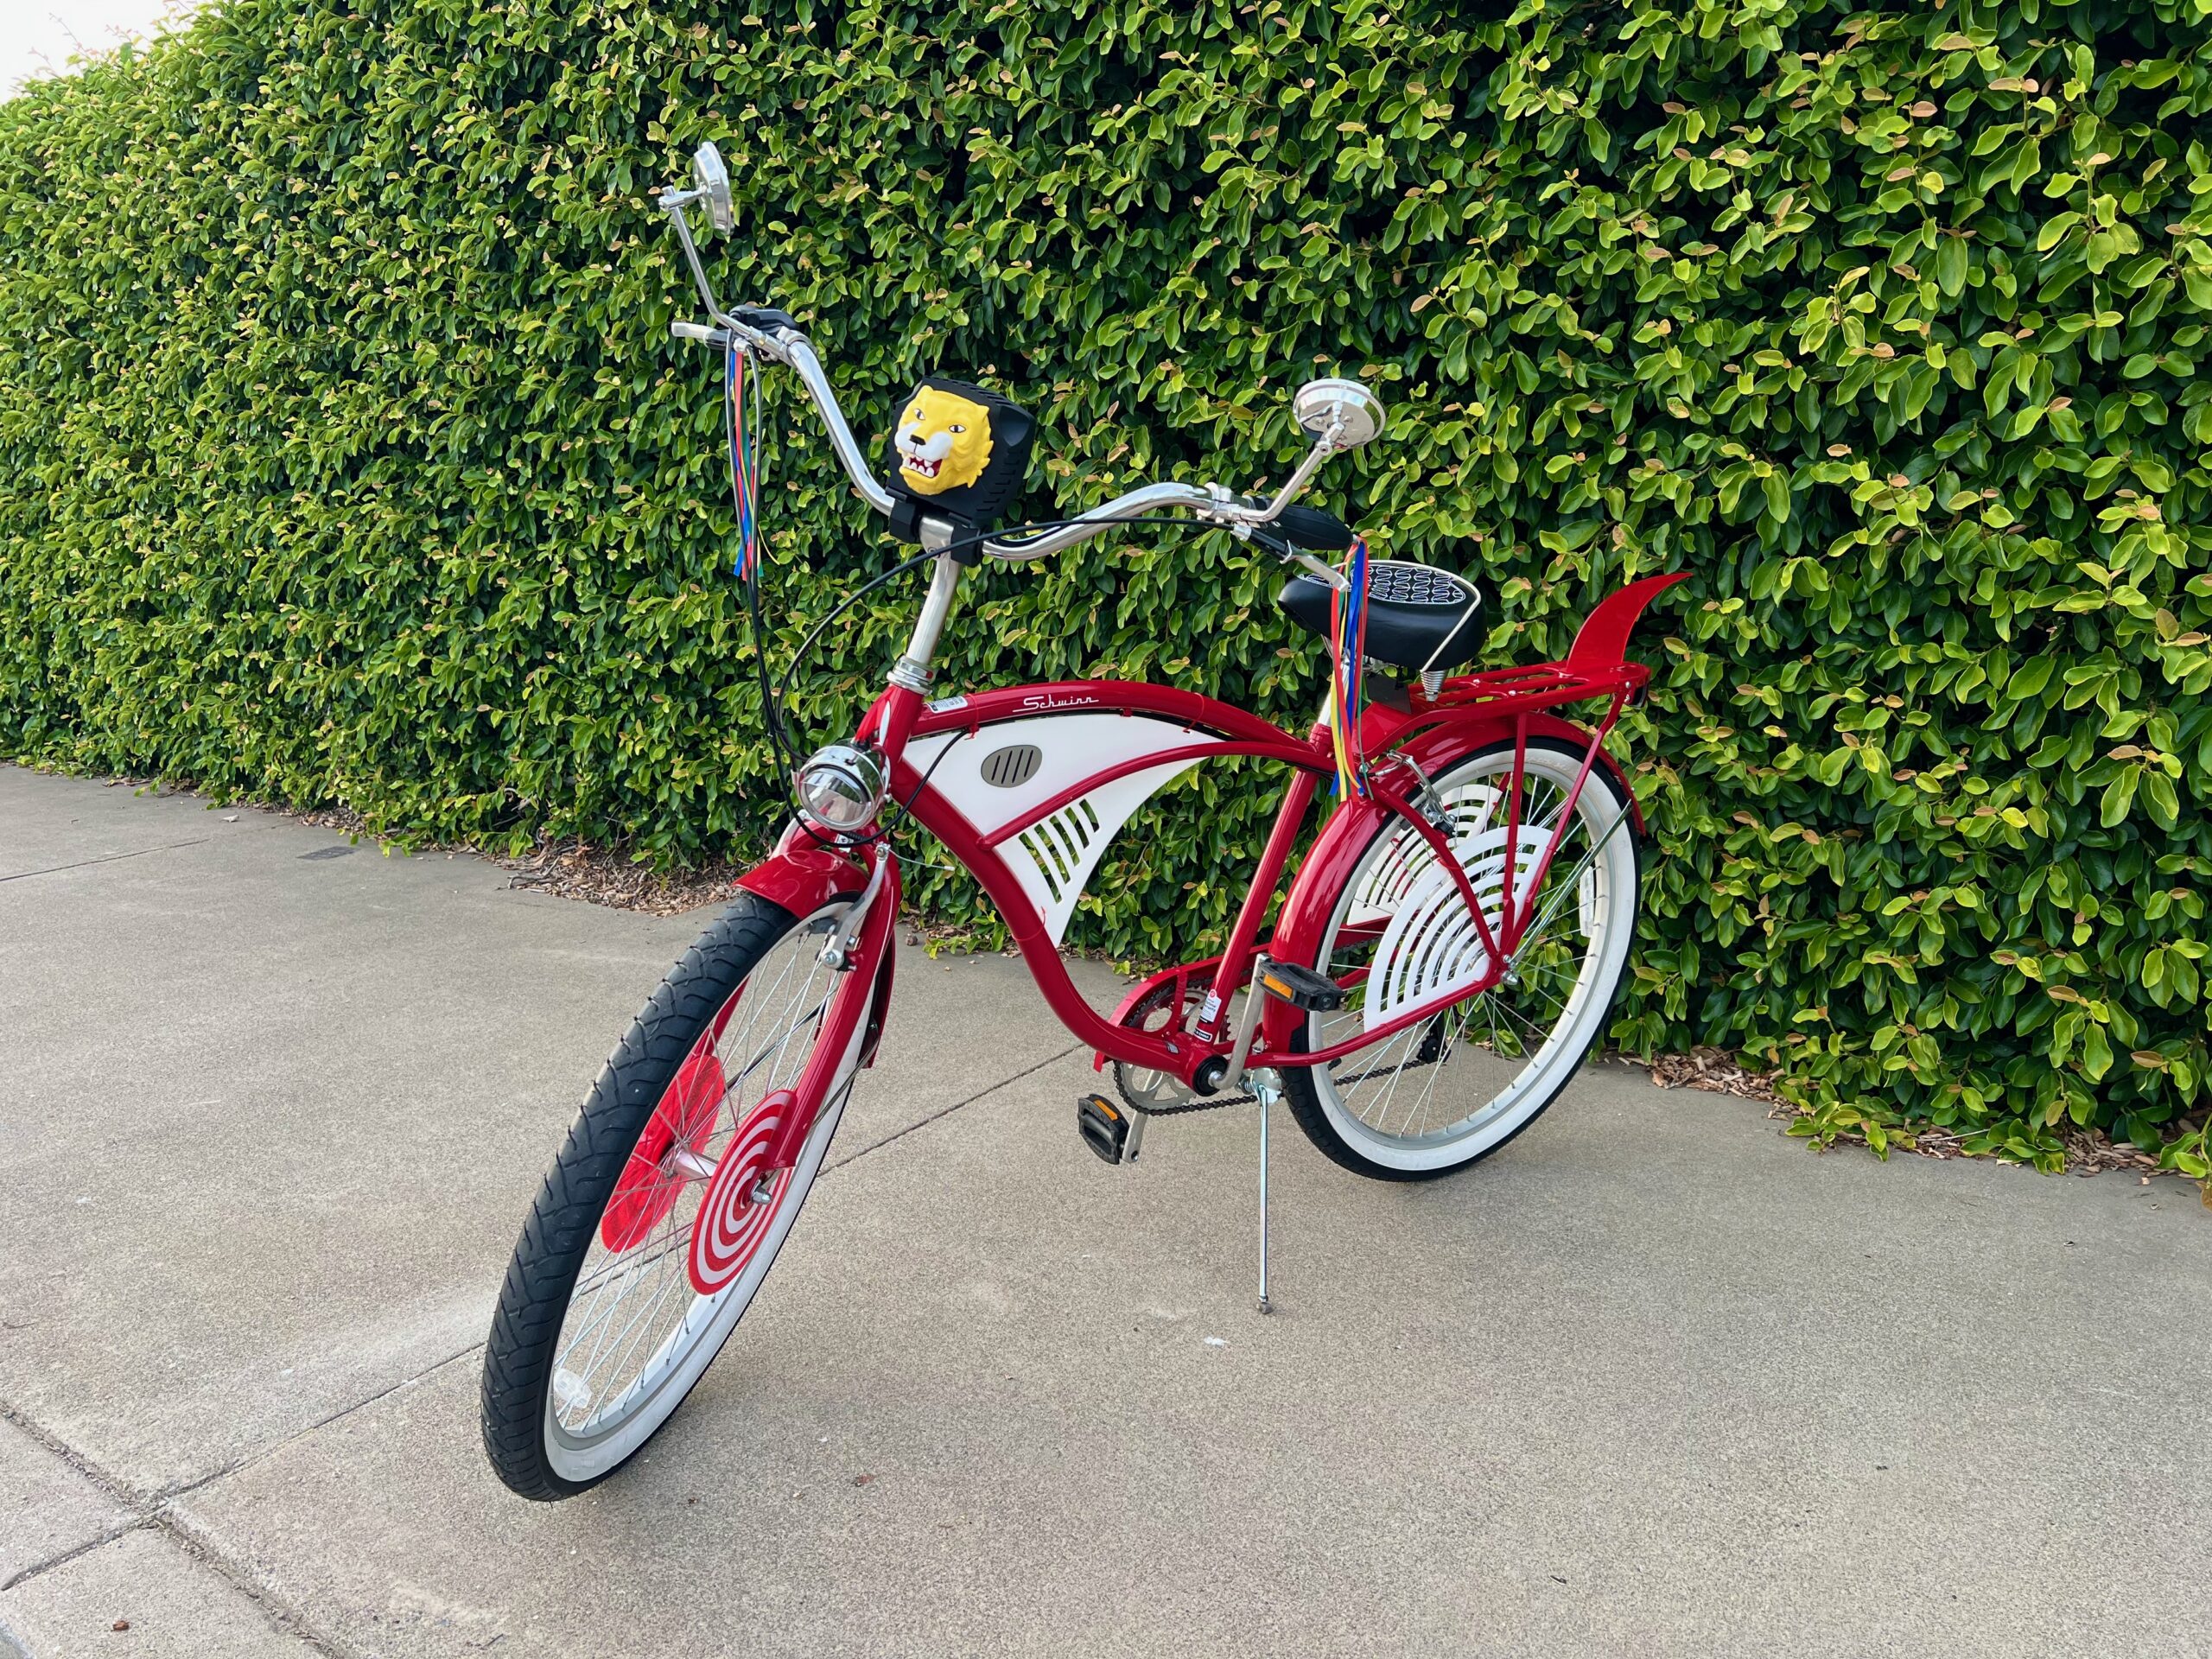
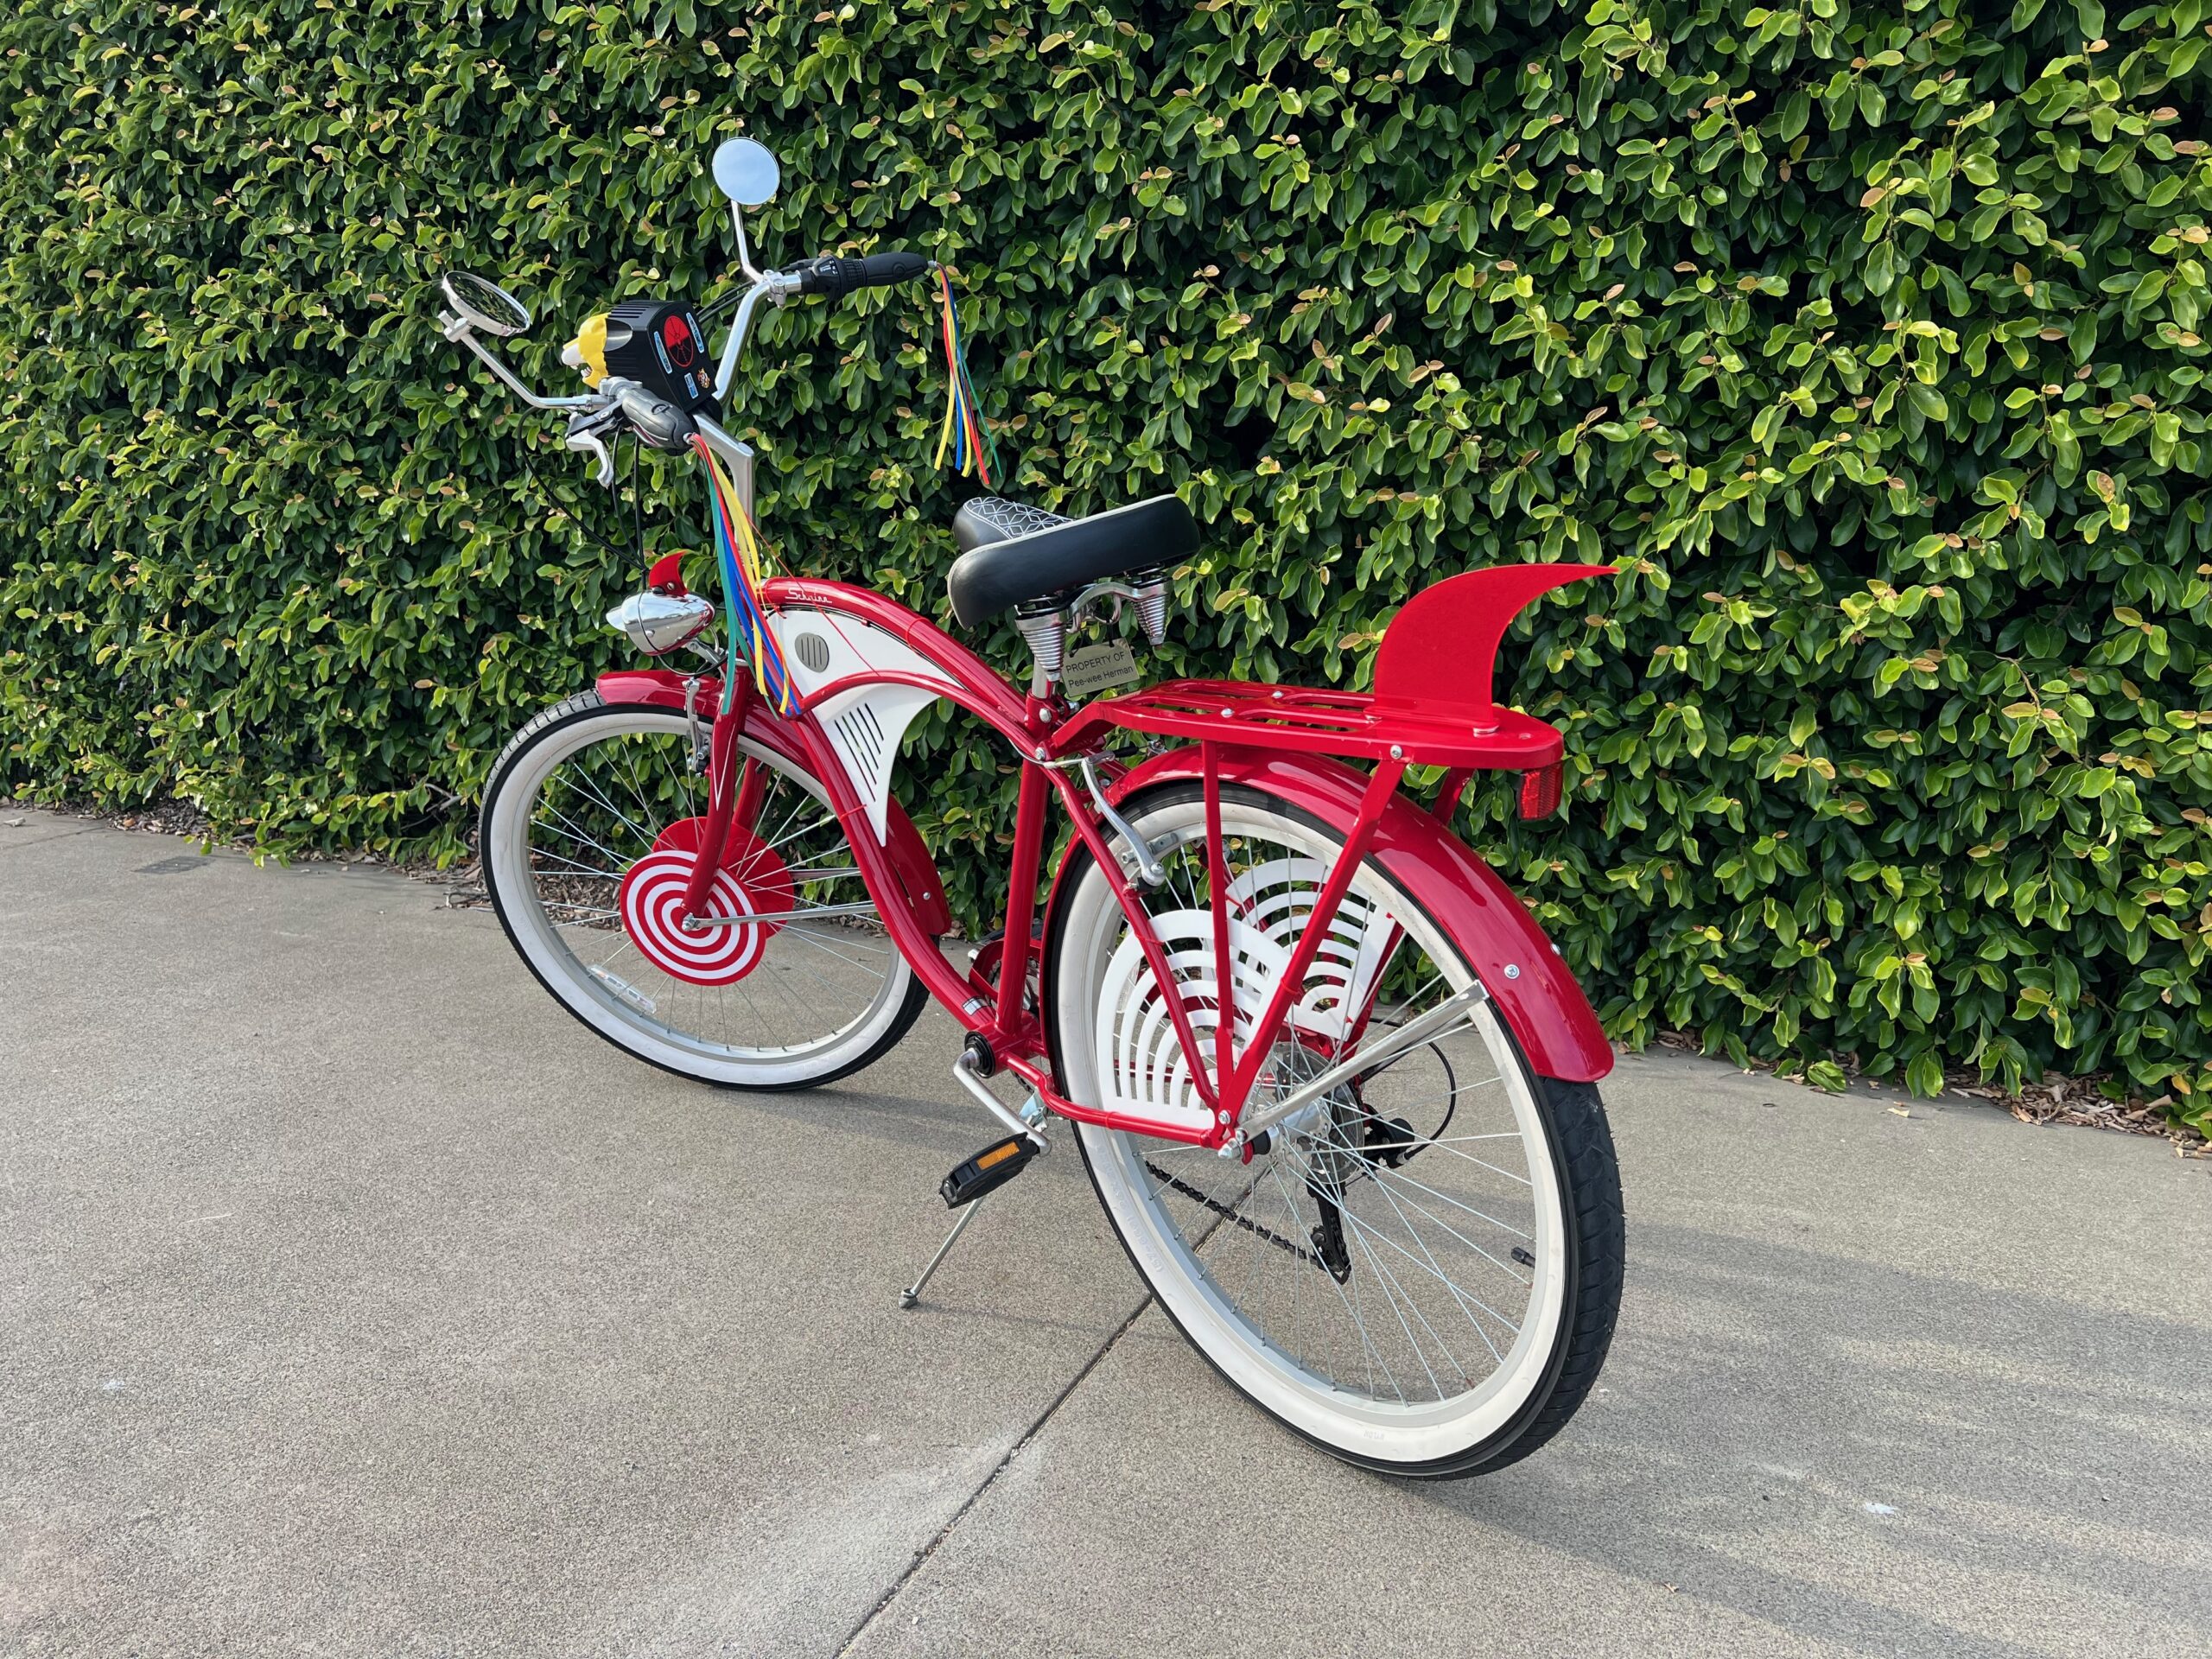
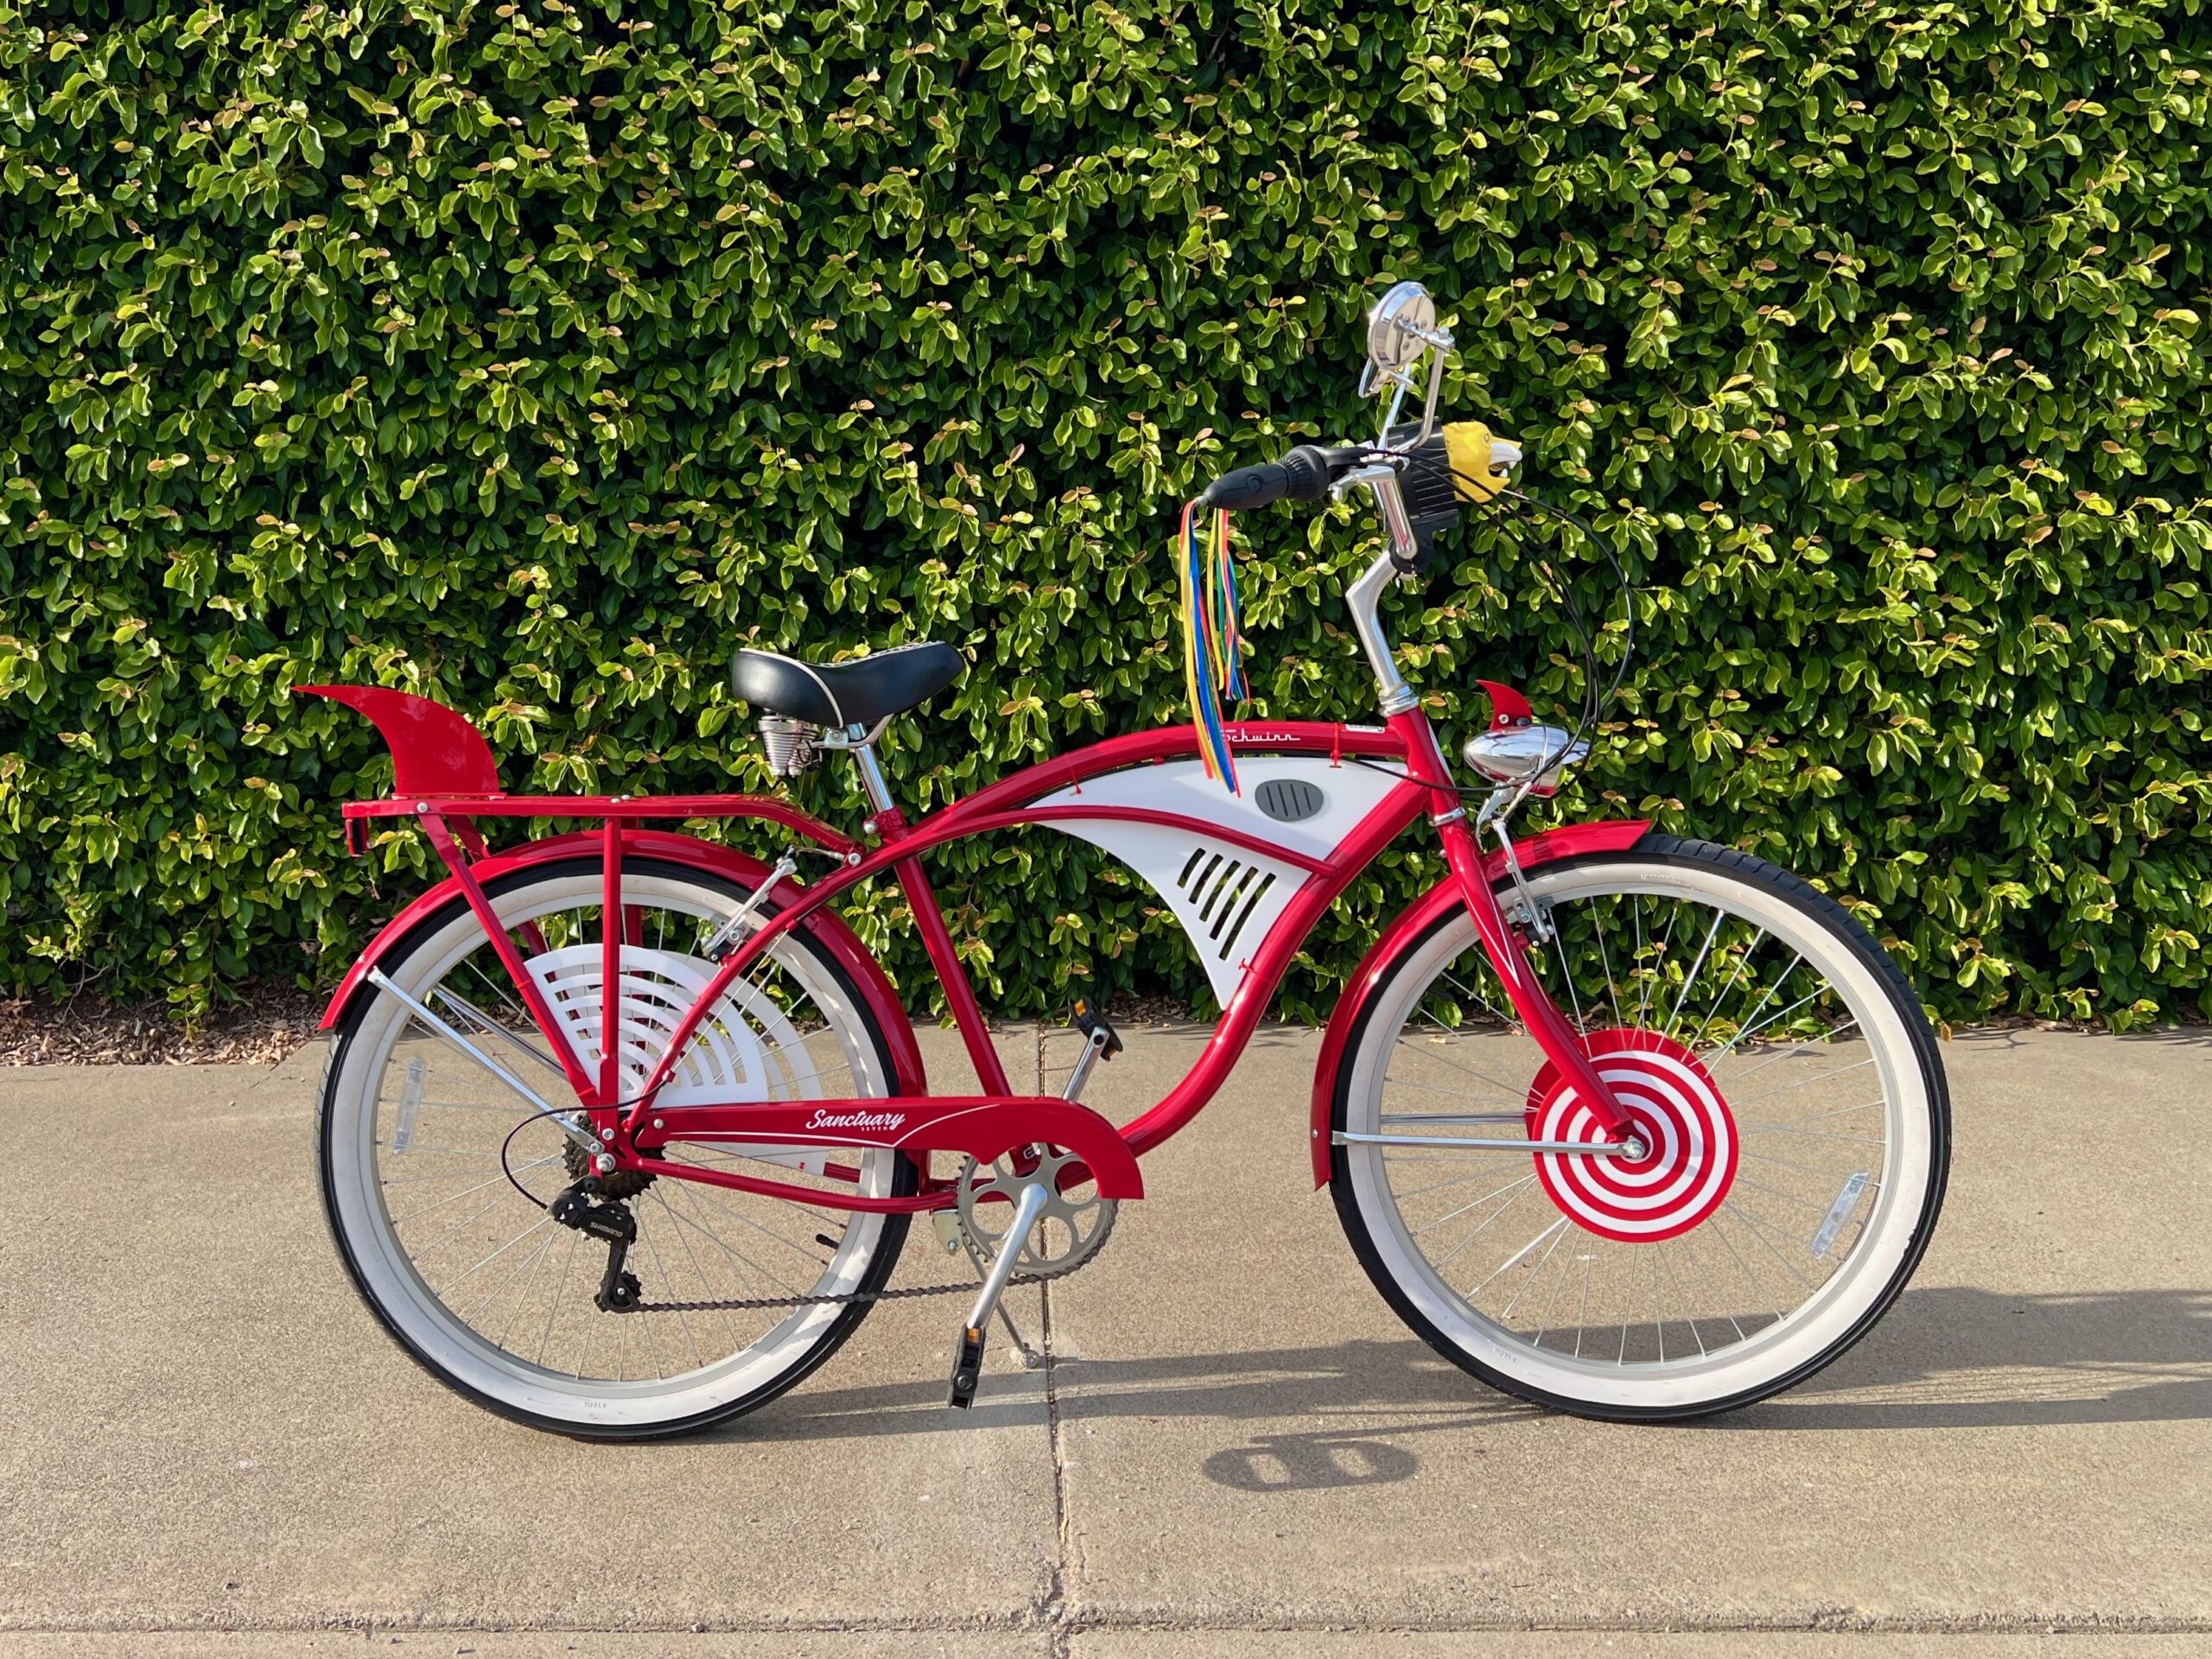
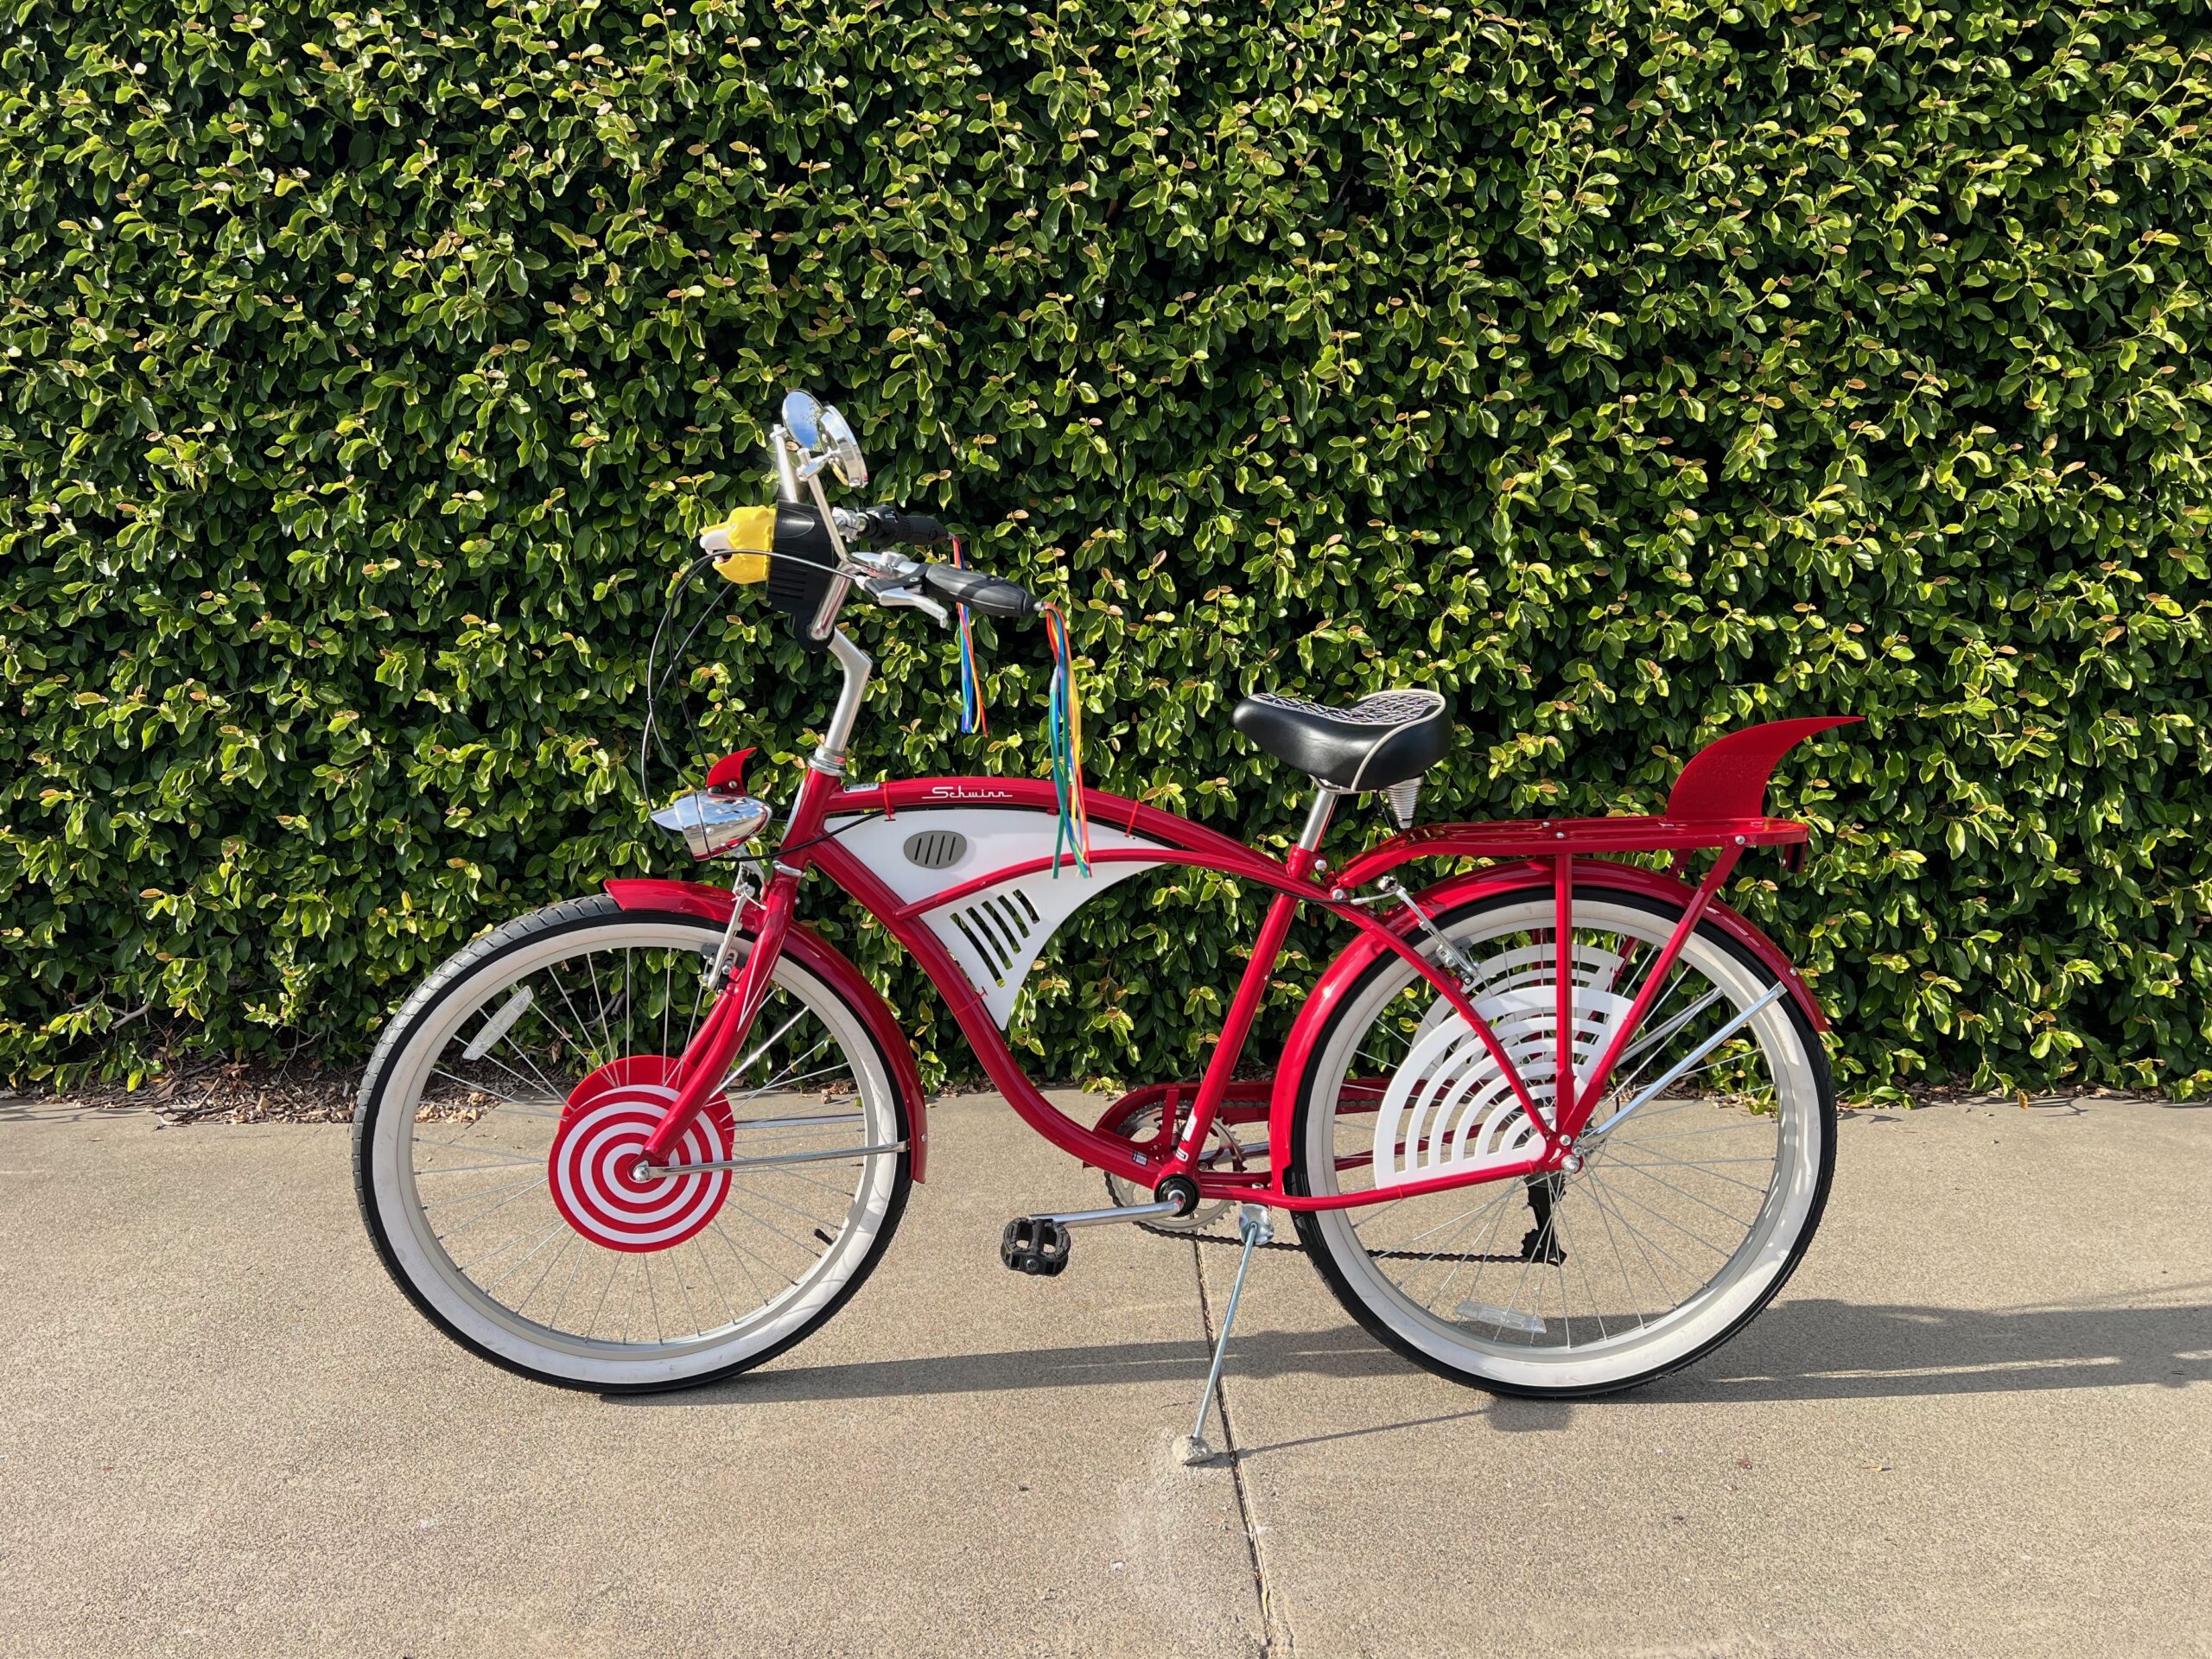
I’ve wanted a bike like Pee-wee’s from the moment I saw the movie! It’s one of the most iconic movie props of all time, and an important part of pop culture and cinema history from the later 20th century (1950–1999).
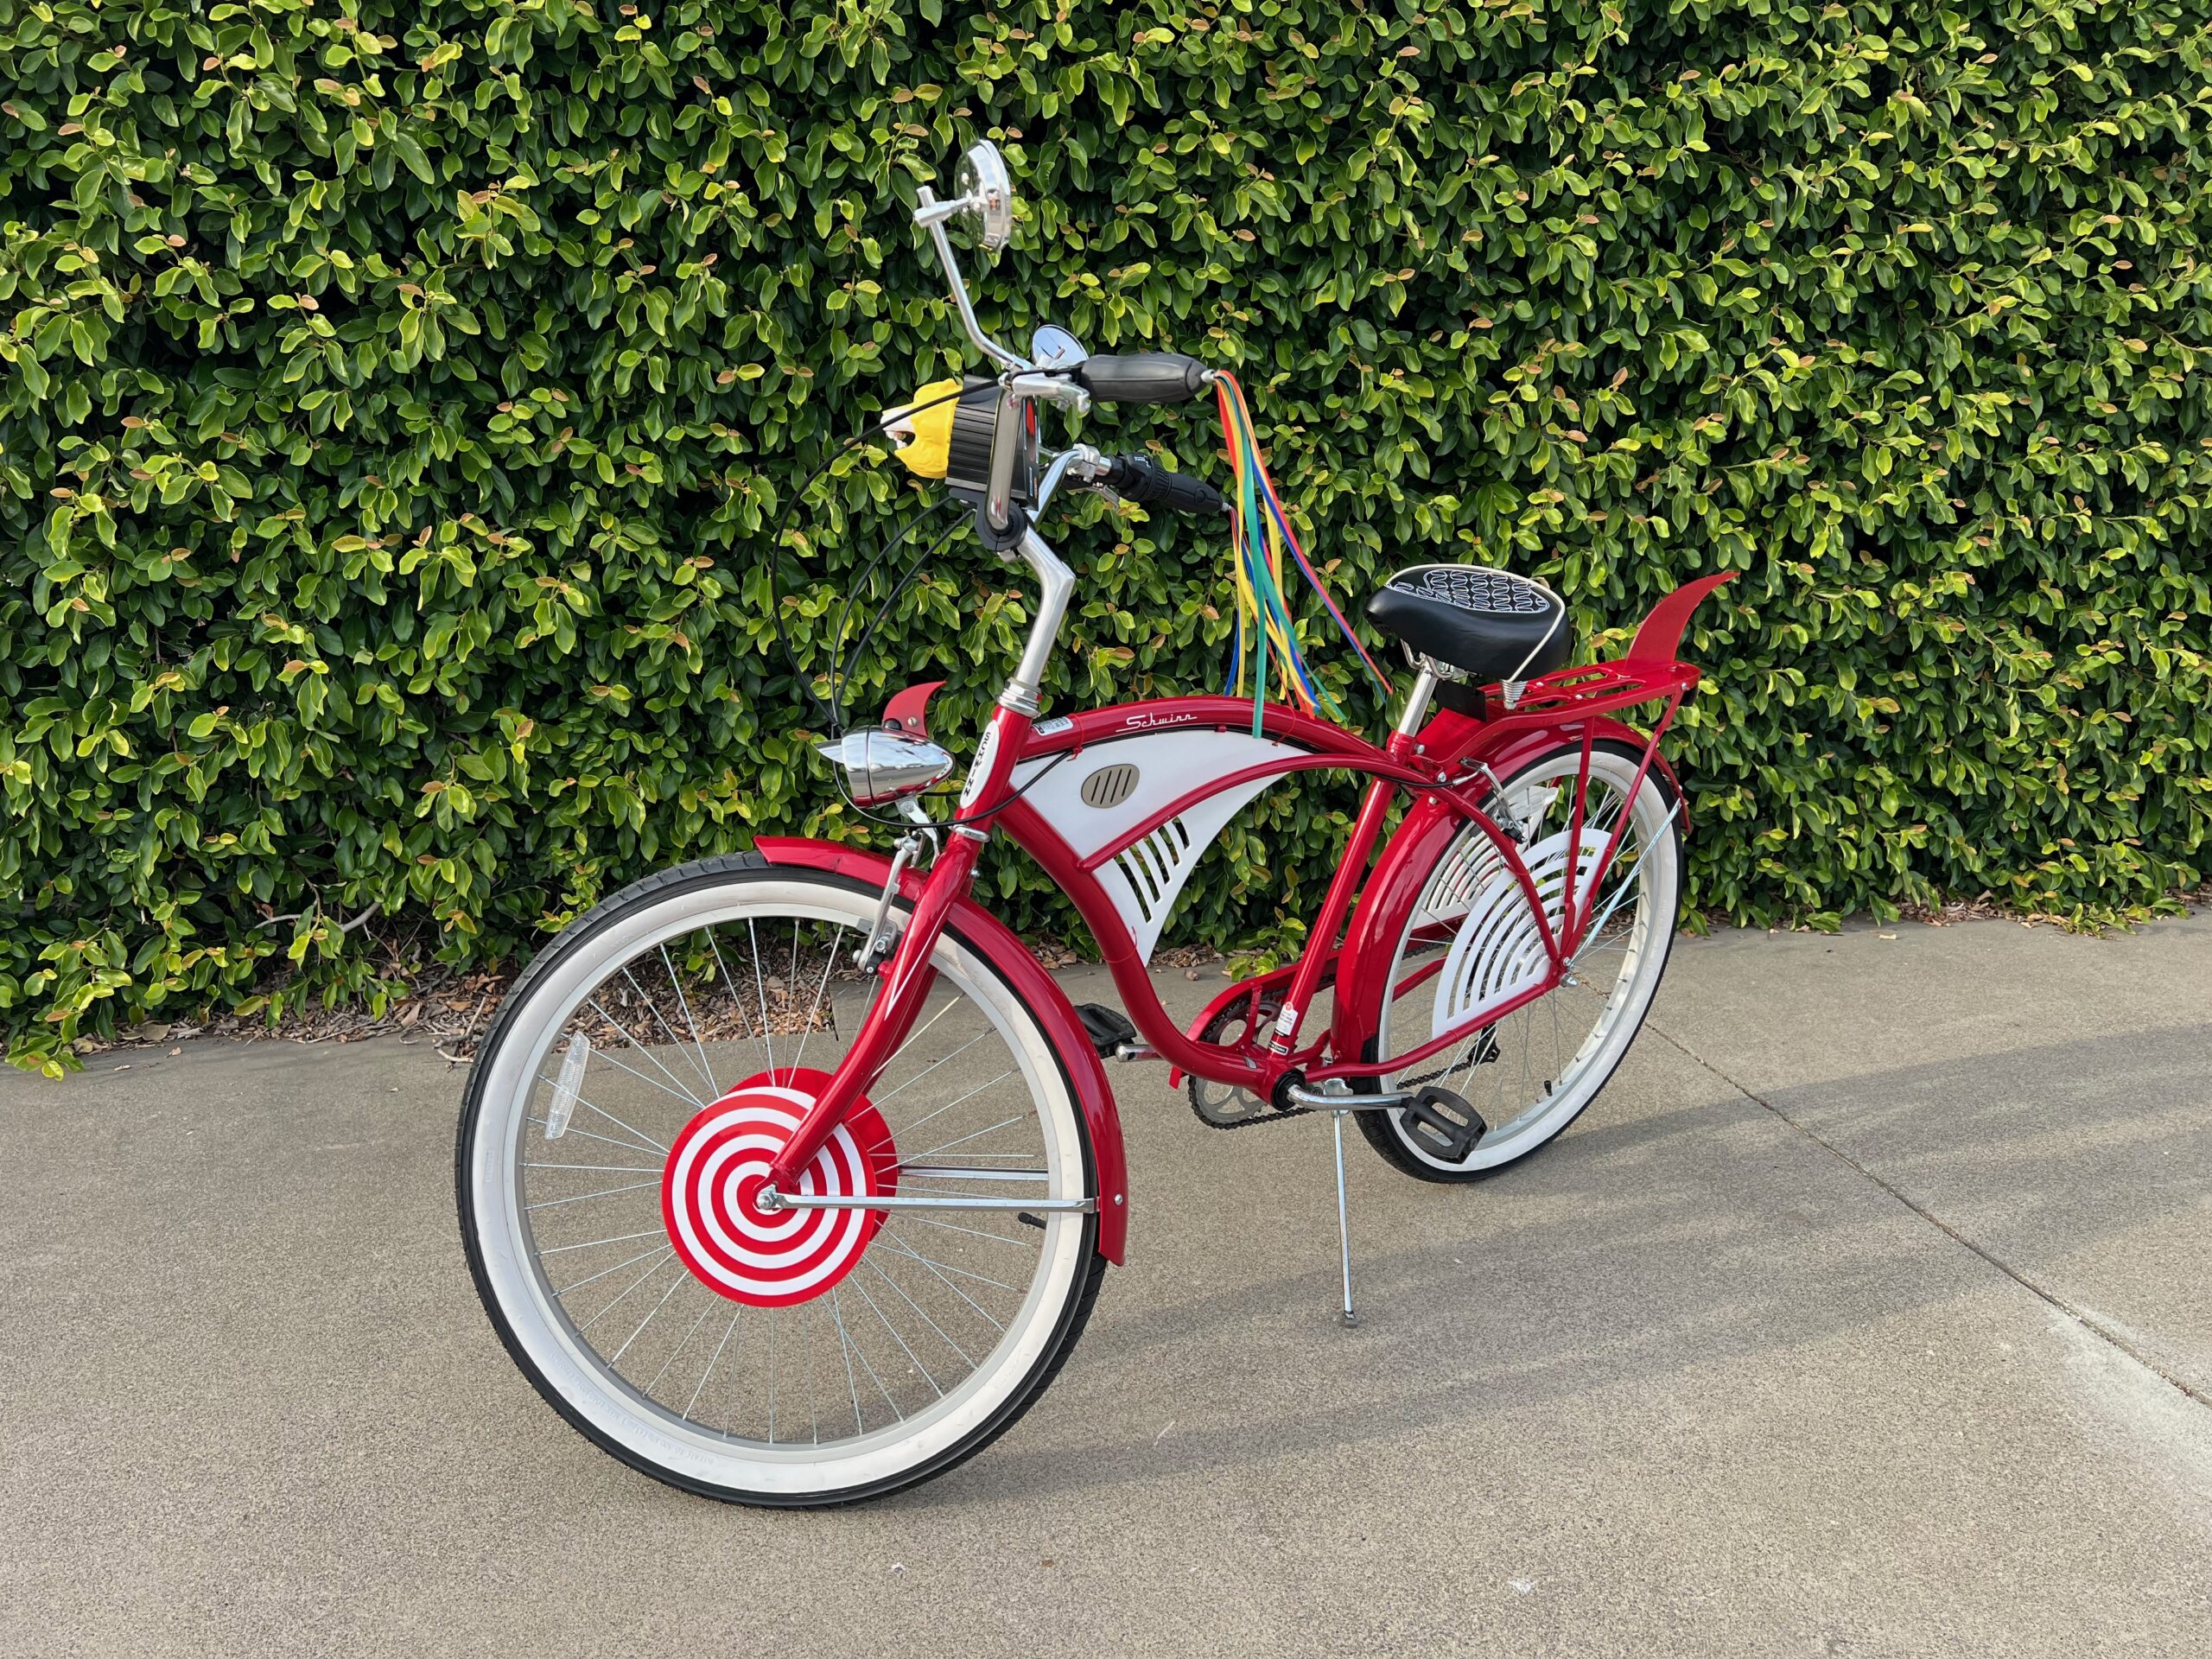
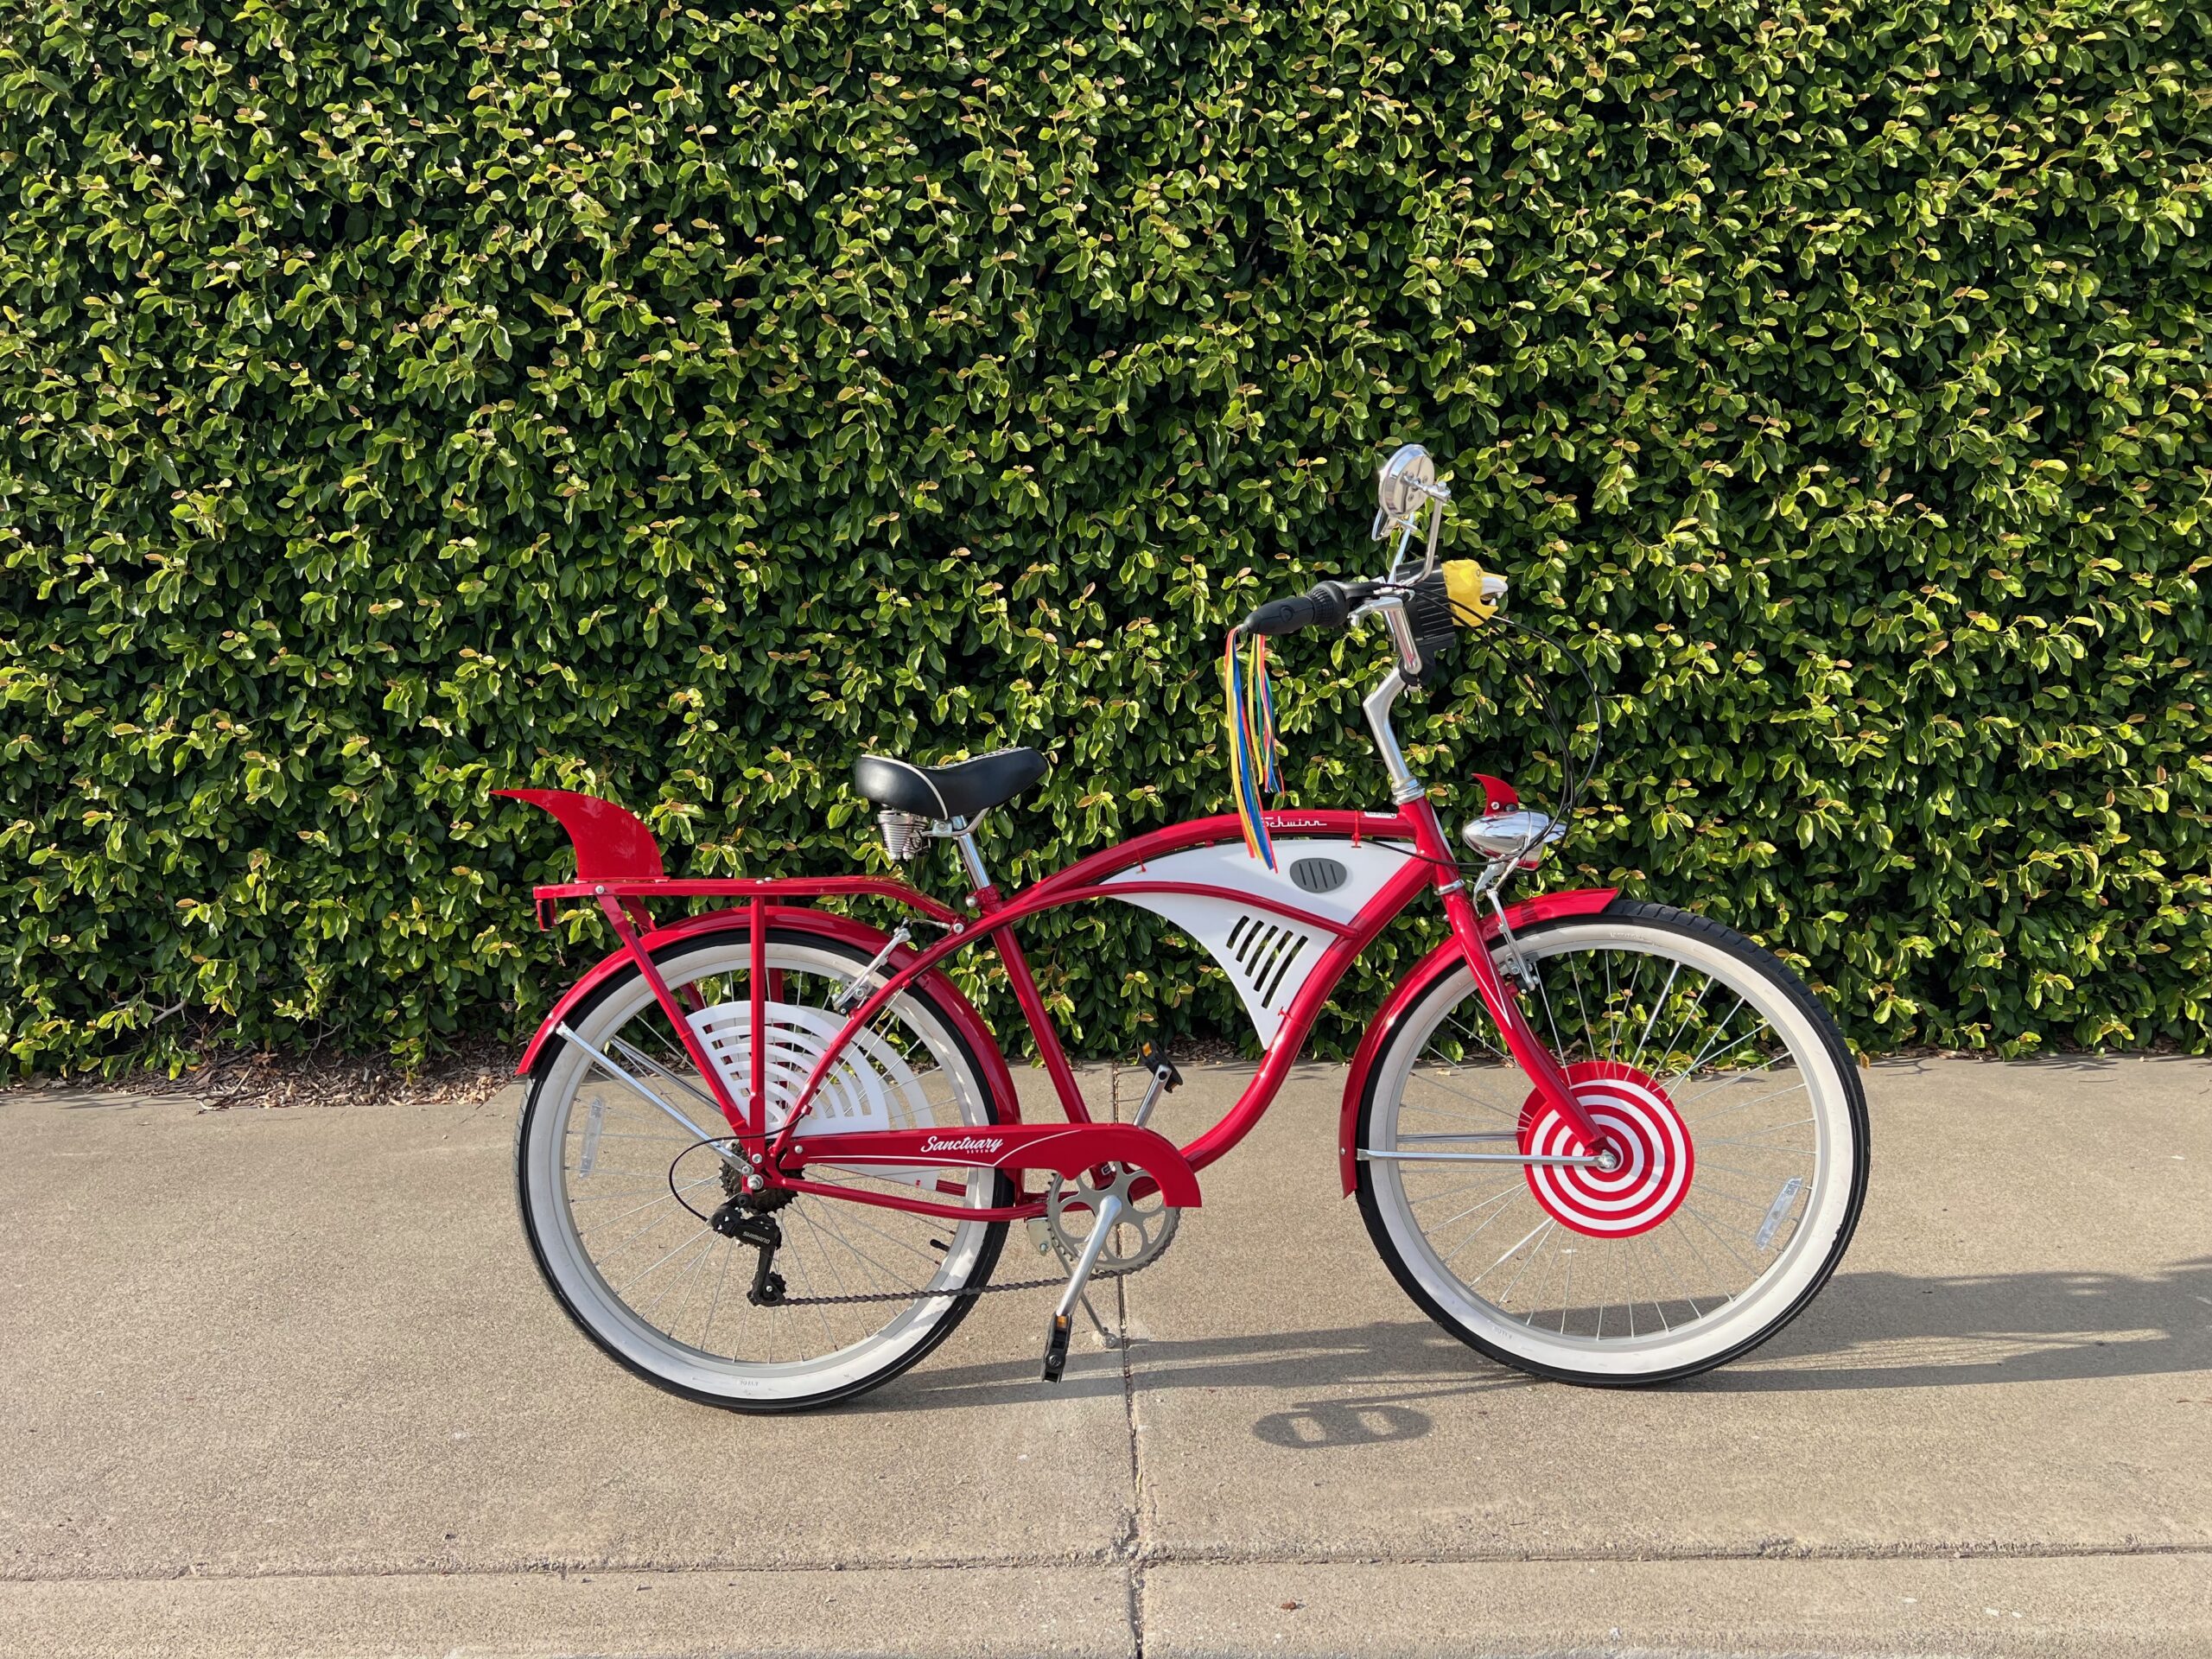
But building an exact replica can be expensive and time-consuming, so instead, I designed a tribute bike—one that captures the essence of Pee-wee’s ride while being much easier and more affordable to build. Best of all, you can actually ride it without worrying about it being a fragile showpiece or being stolen by Francis!
To make things even simpler, I created a DIY kit with the custom acrylic pieces you’ll need, available for purchase on my website or Etsy store. That way, you don’t need a laser cutter or any special tools—just order the kit, grab a few extra accessories, and you can put this together in less than a day!
Let’s get started!
Supplies


Base Bike:
- Schwinn retro-style cruiser (18 inch step-over frame) available on Amazon: https://amzn.to/4kx7Jmz
Acrylic Components:
- You can laser cut these yourself or I have them available for purchase as a kit on my website (https://derosedesign.co/product/pee-wee-herman-bike-kit/) or Etsy shop (https://travisderose.etsy.com/listing/1861861706)
- White acrylic center piece
- Metallic circular acrylic pieces (to attach to each side of the white acrylic center piece)
- Transparent red acrylic rear fin
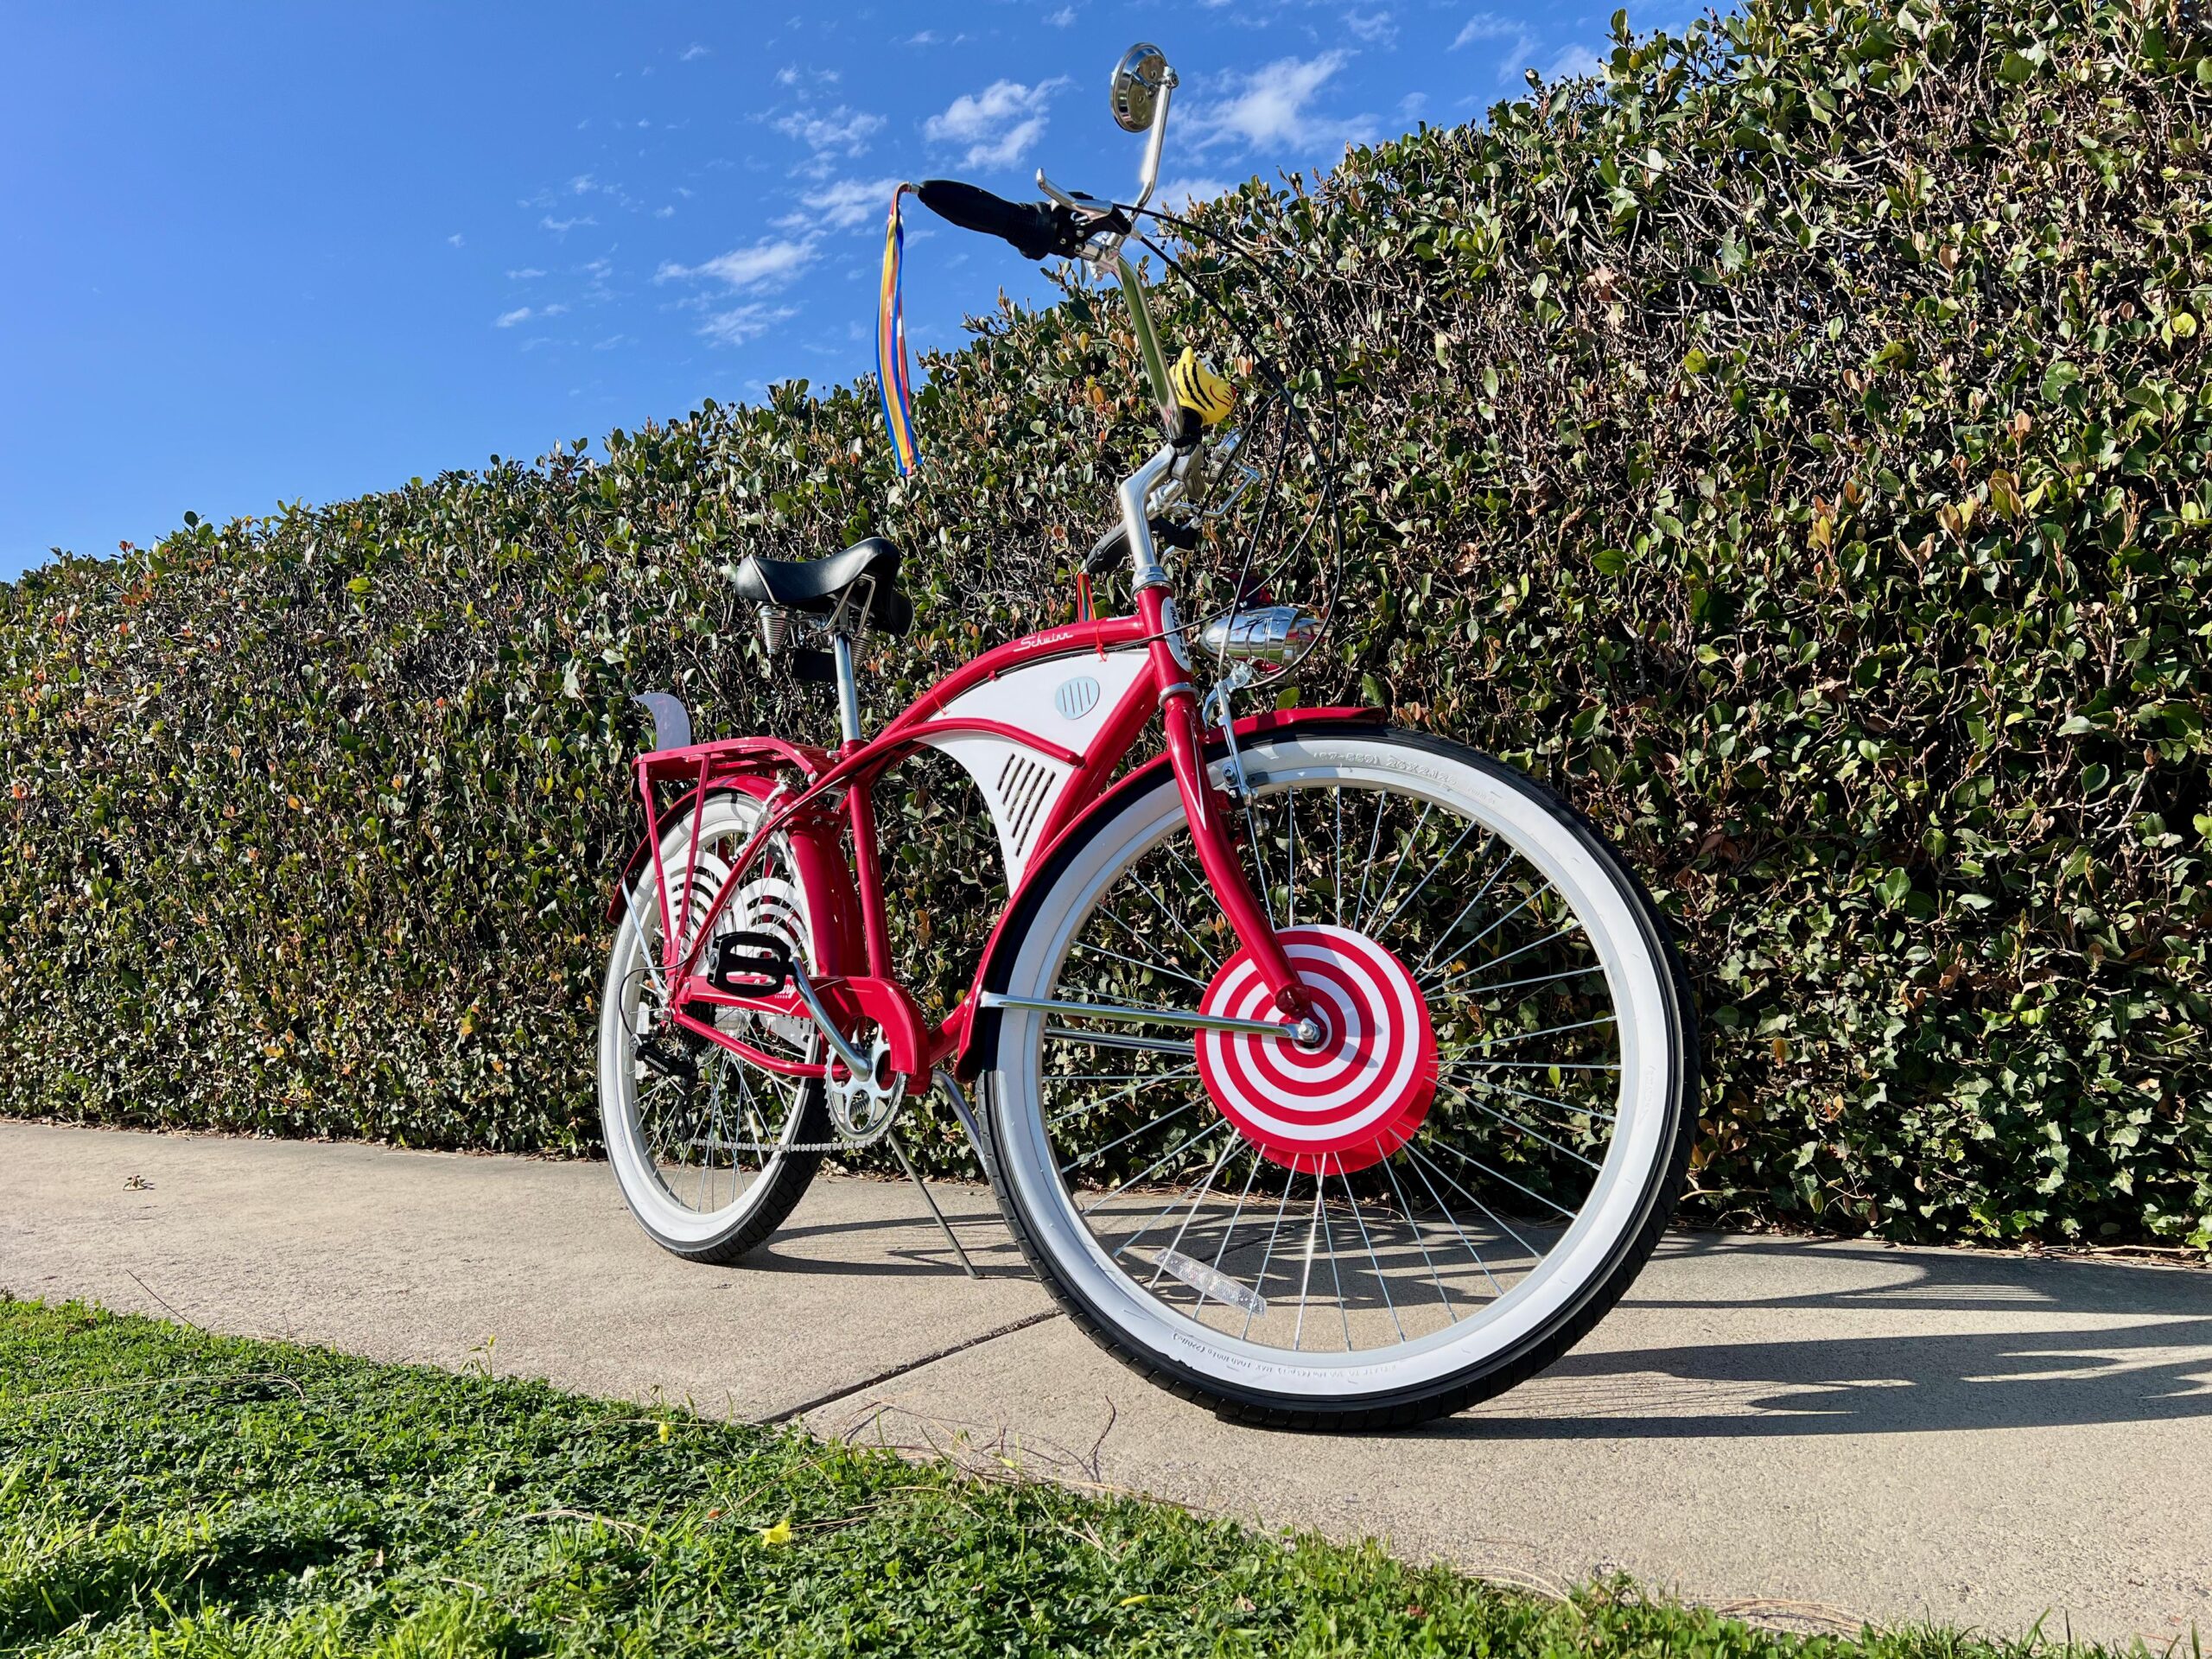
- Red acrylic circle pieces for the front wheel
- White spiral vinyl stickers for the front wheel
- White arched acrylic piece (left of rear wheel)
- White arched acrylic piece (right of rear wheel)
- Transparent red acrylic fin for front headlight
- “Property of Pee-wee Herman” sign
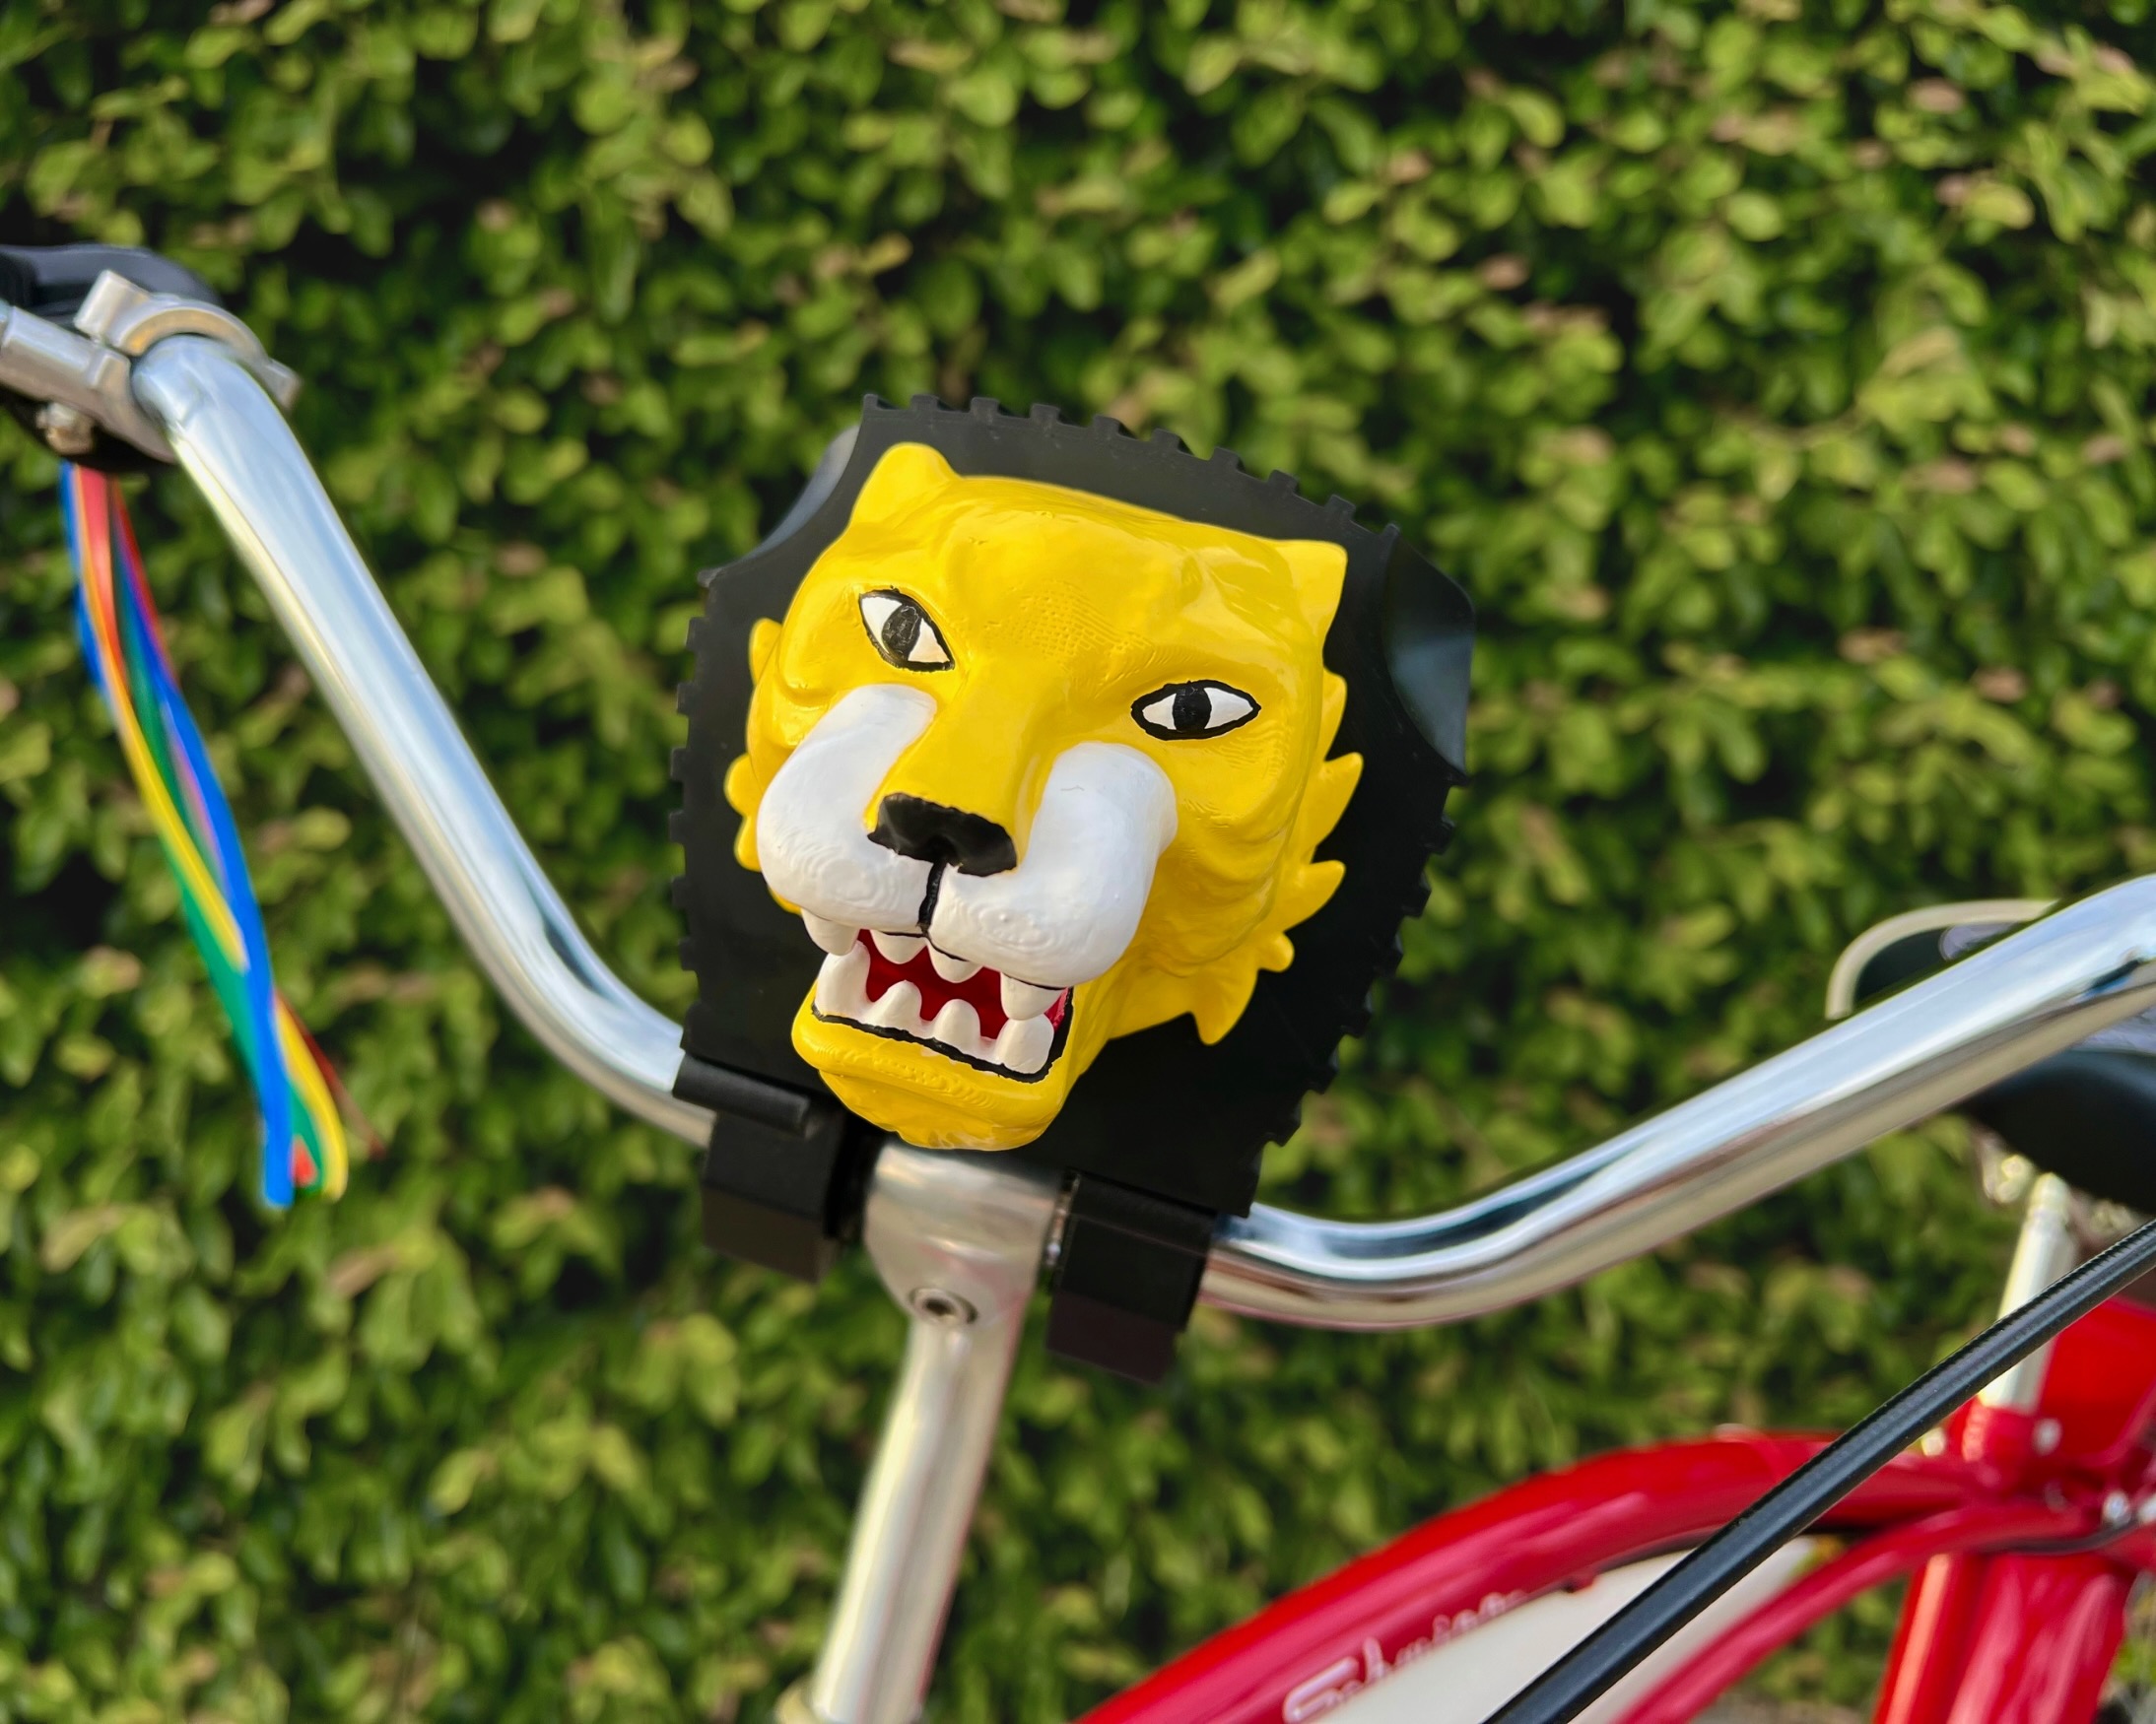
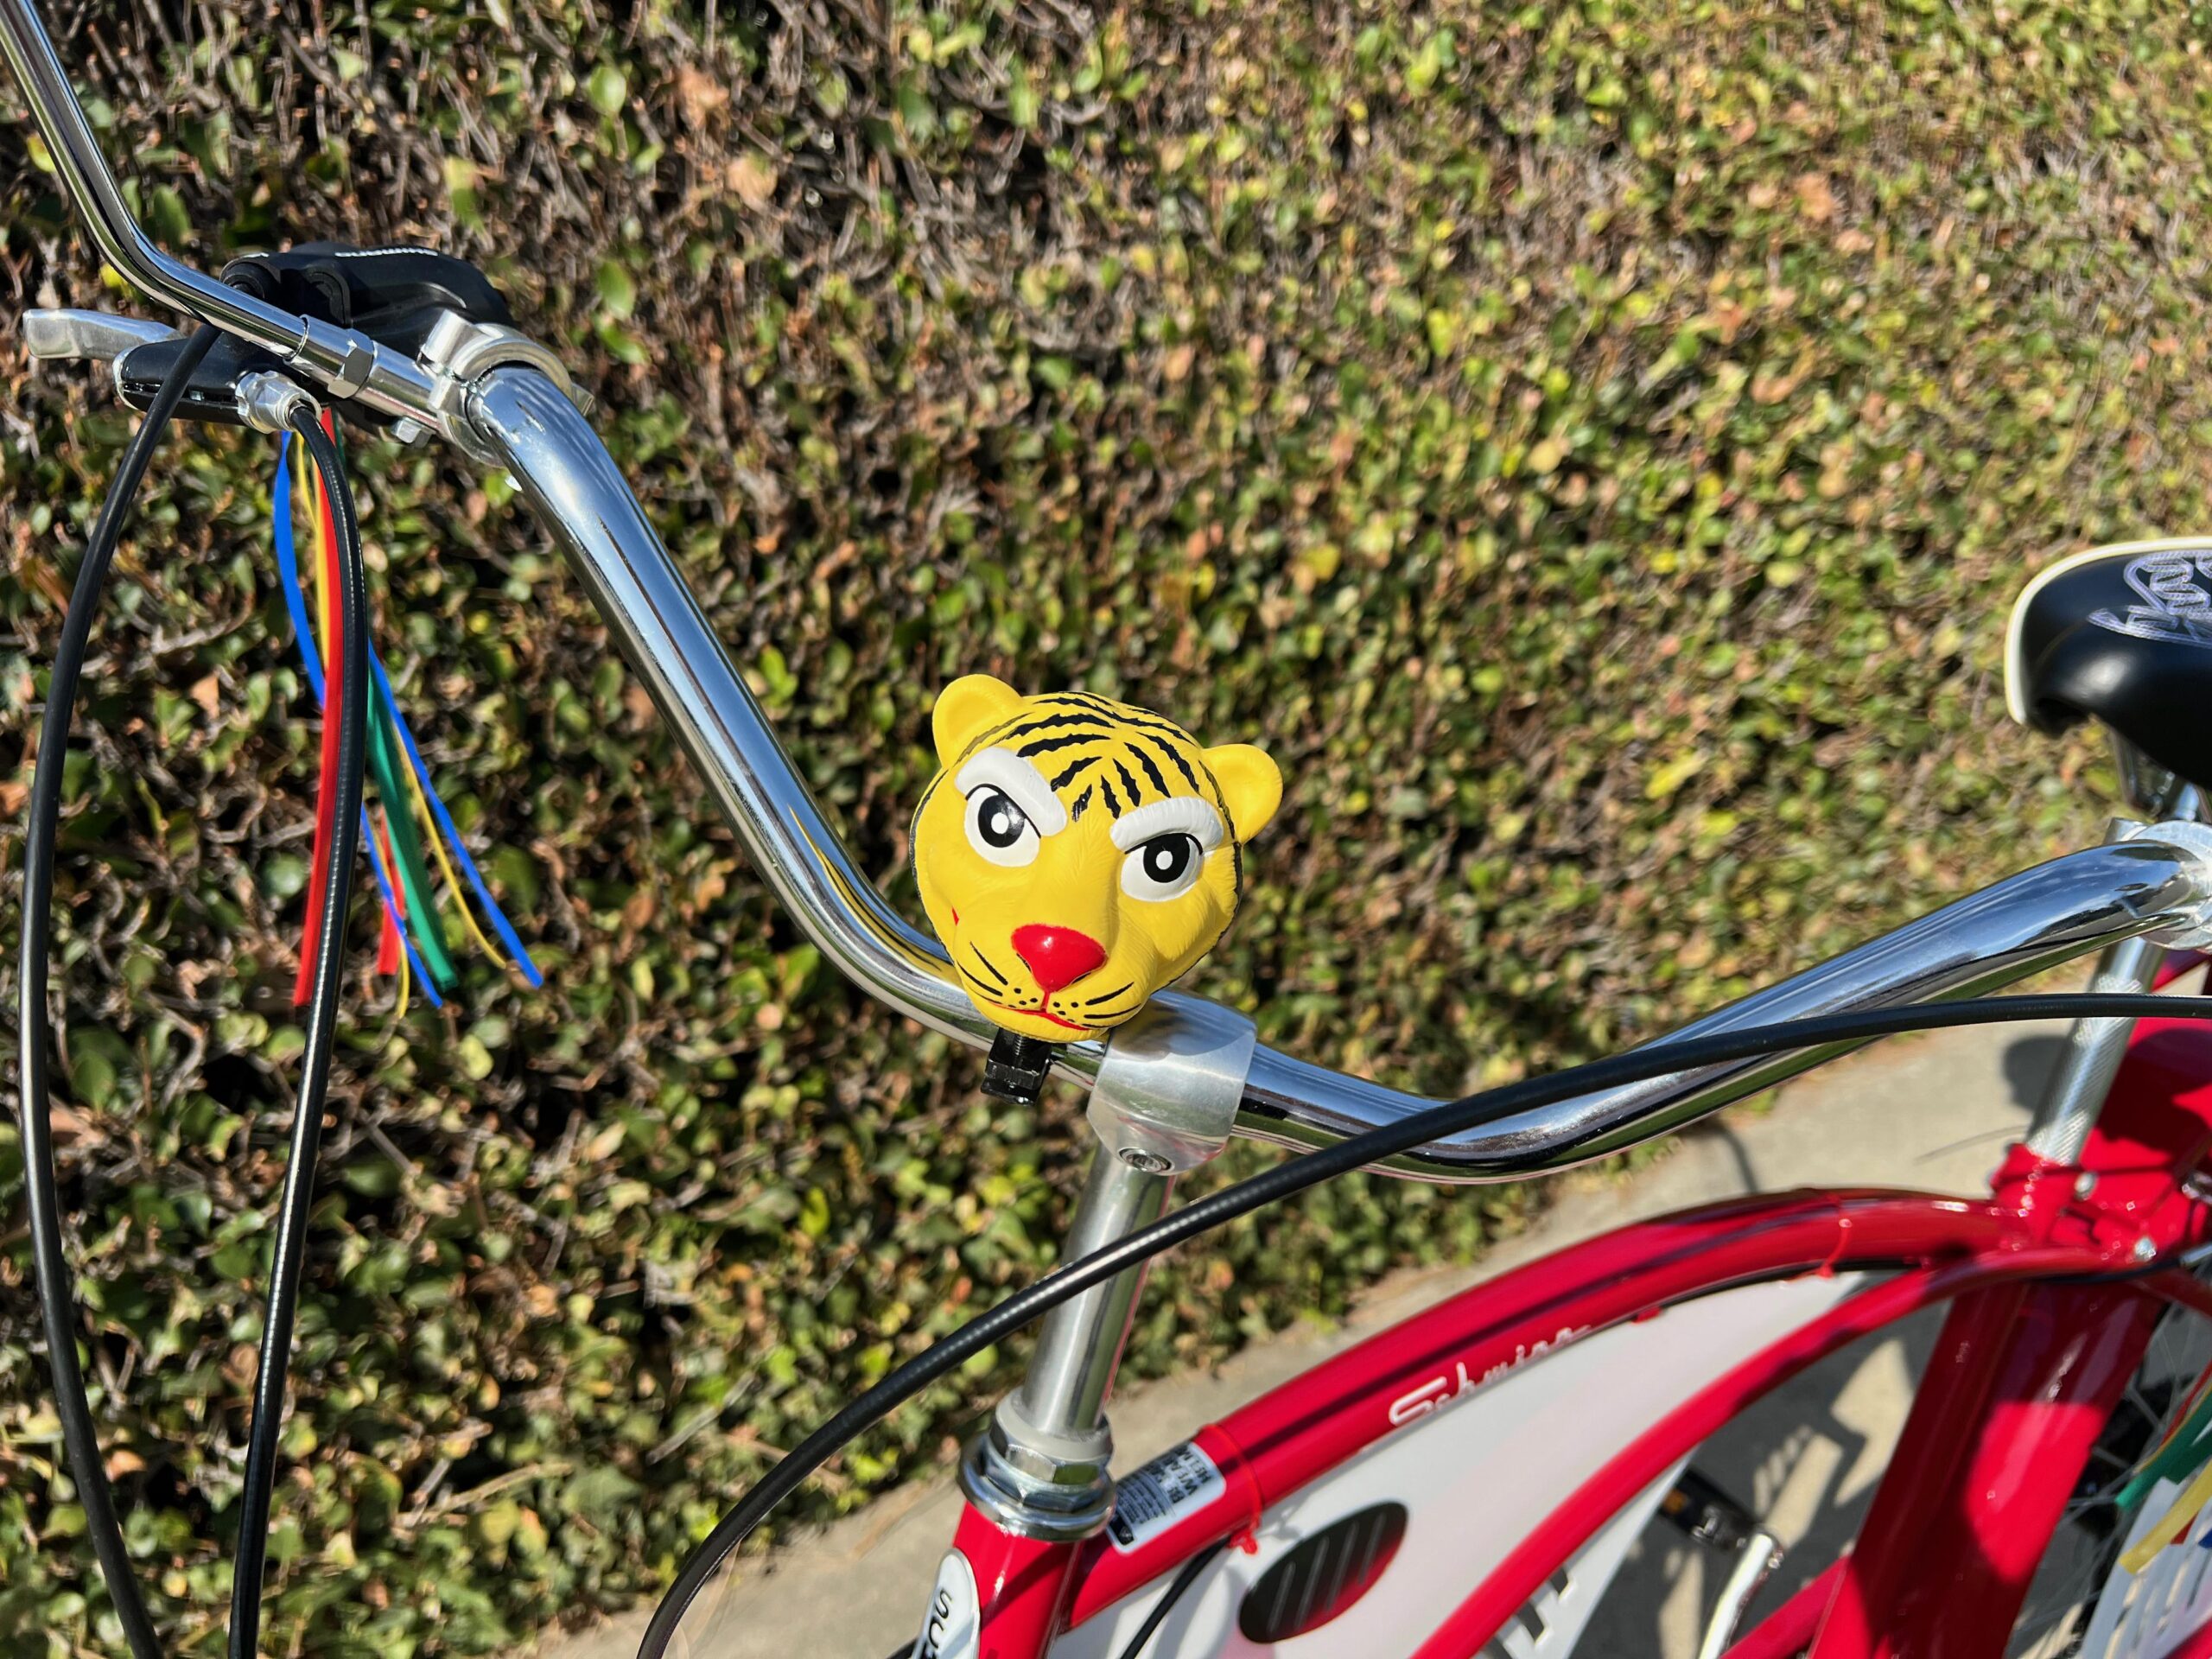
Tiger Head:
- I now have the Tiger Head available!
- Find it on my website: https://derosedesign.co/product/pee-wee-tiger-head/
- Or on my Etsy shop: https://travisderose.etsy.com/listing/4479961087
- For a more budget option, you can get a Squeeze horn tiger from Amazon: https://amzn.to/4i4huqM
Additional Accessories:
- Retro-style headlamp: https://amzn.to/4i4hsPG
- Bike streamers: https://amzn.to/43umNLJ
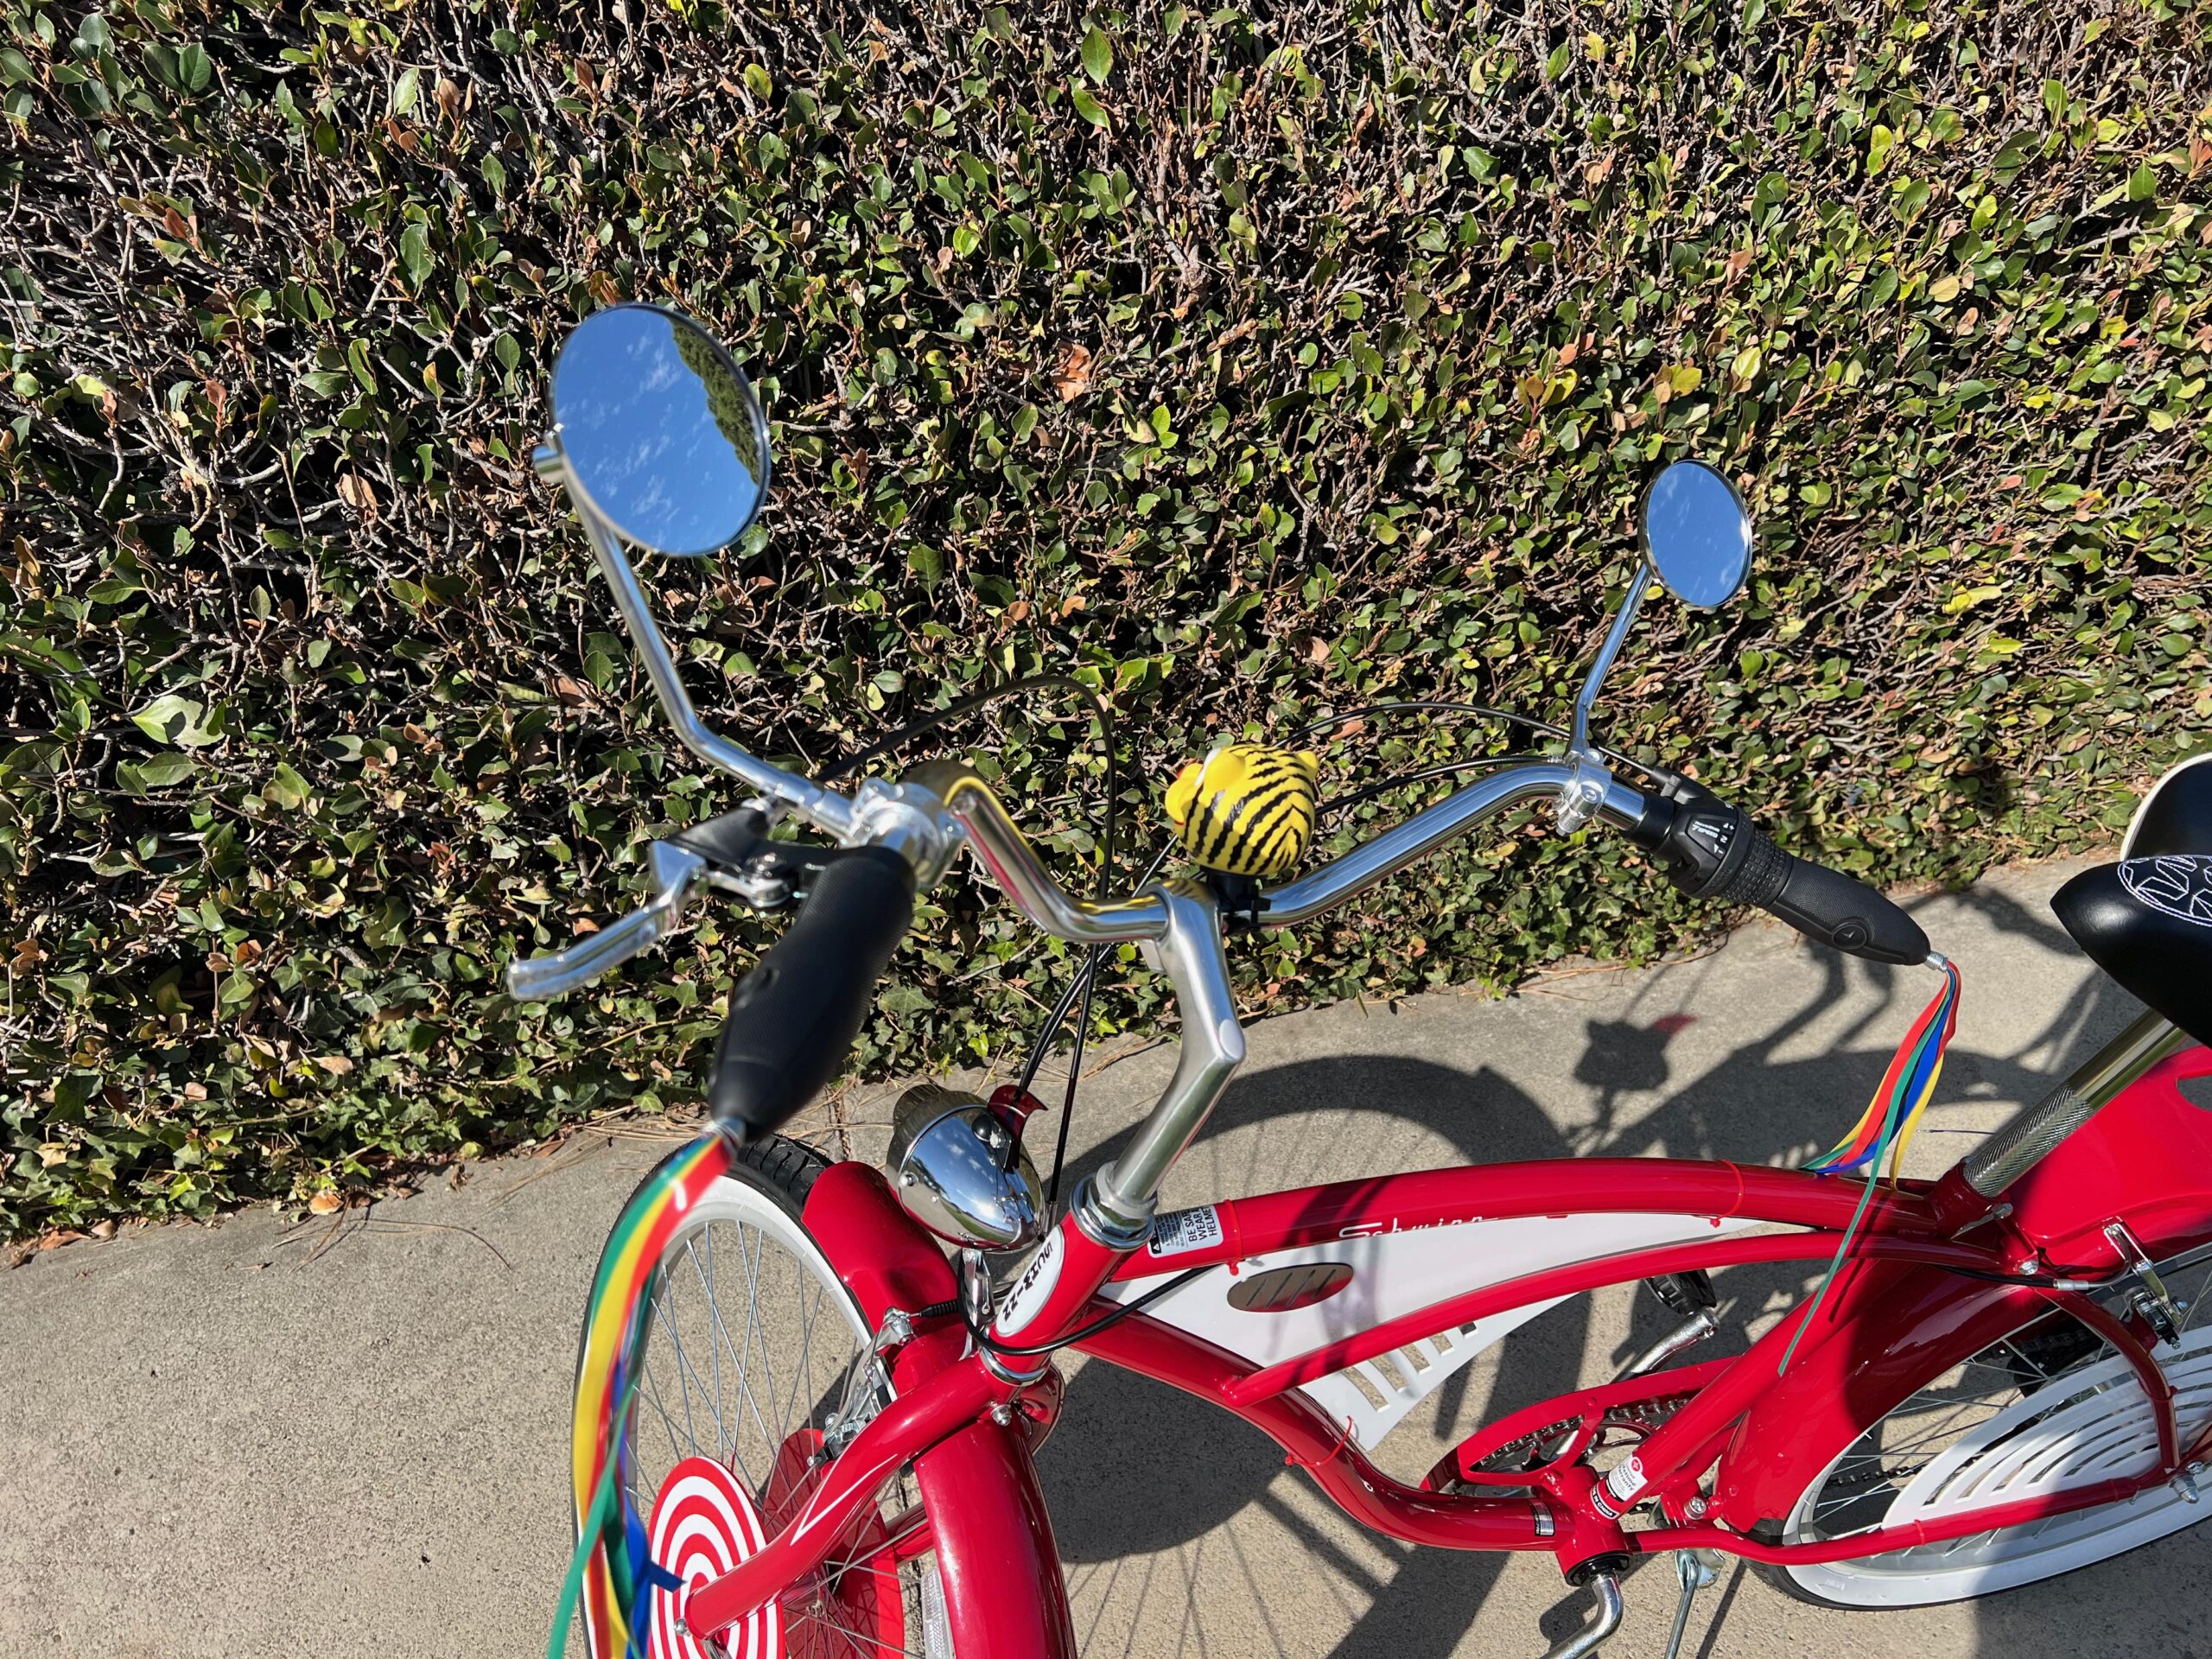
- Rearview mirrors: https://amzn.to/41xnPnw
- Red zip ties: https://amzn.to/4hiJO7v
Get Your Pee-wee Bike Parts...
PEE-WEE HERMAN BIKE KIT
$349.00
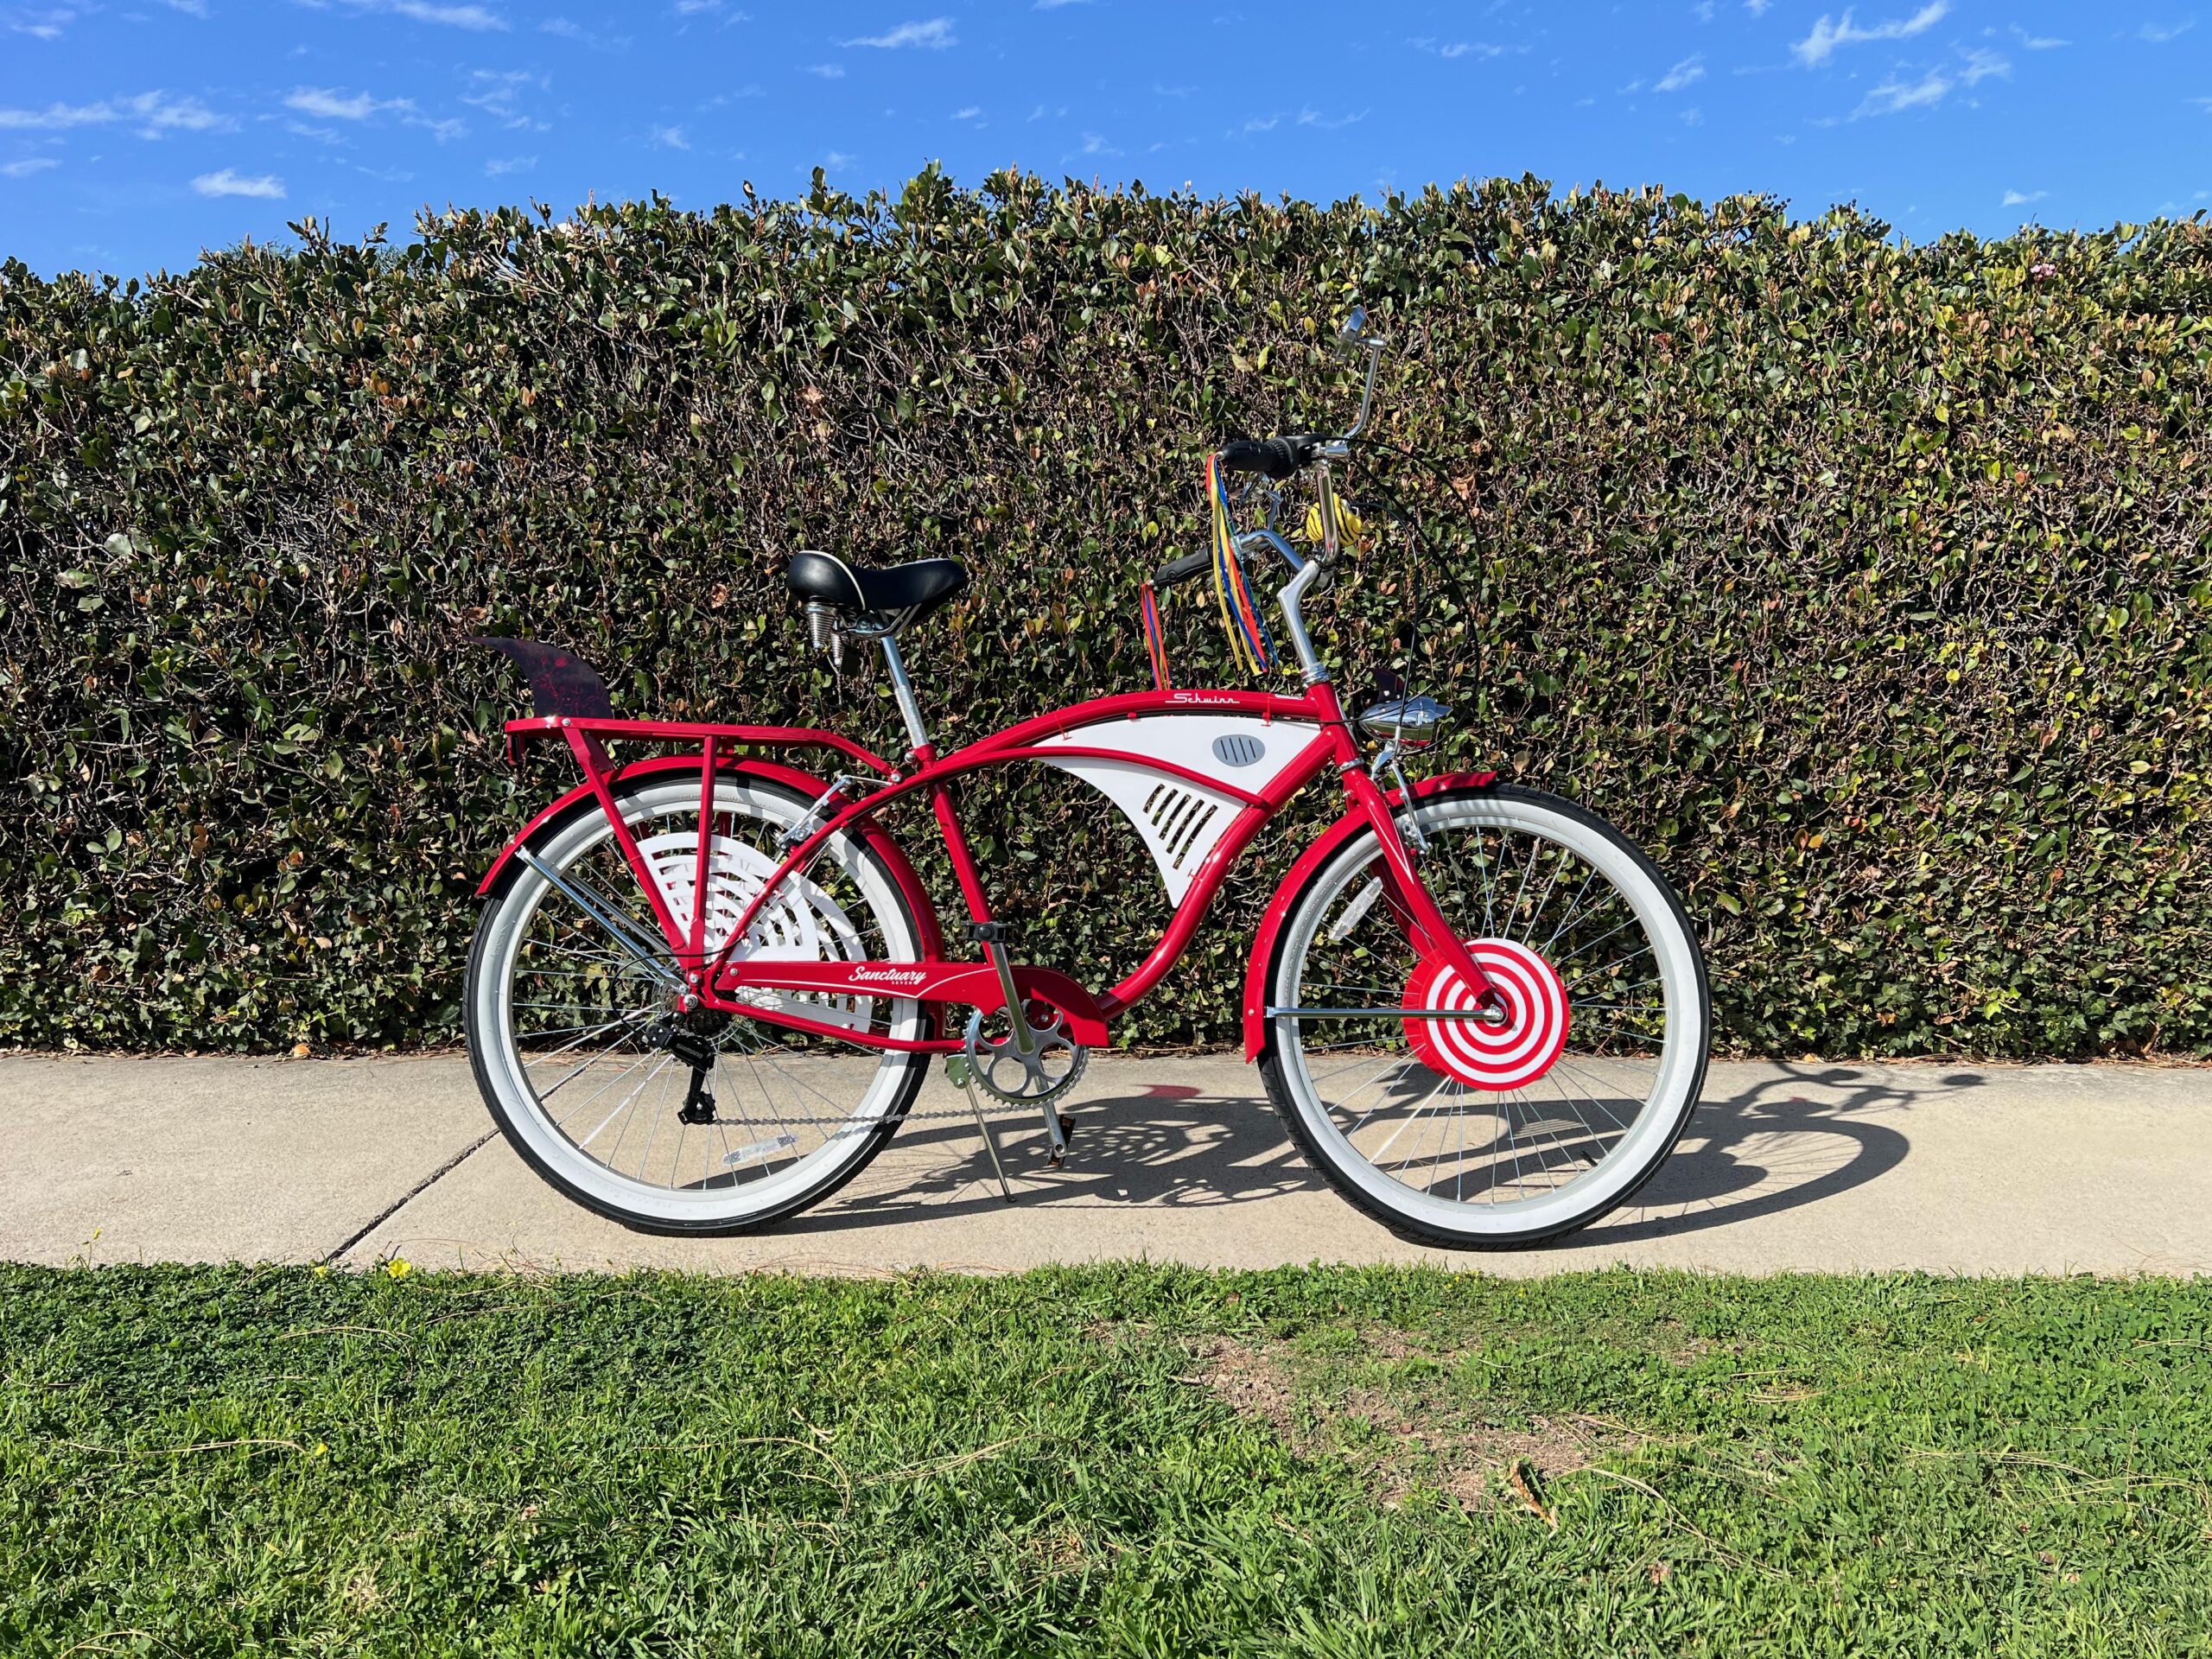
This DIY kit includes essential custom pieces to help you transform your bike into a replica of Pee-wee Herman’s legendary red bicycle.
PEE-WEE HERMAN REPLICA BIKE (Fully Built)
$1,495.00
Designed to capture the iconic look and charm of Pee-wee’s legendary ride, this fully functional, one-of-a-kind bicycle is perfect for collectors & fans!
PEE-WEE TIGER HEAD FOR BIKE – DIY OR FINISHED
This custom-designed piece is 3D printed and hand-finished, built to mount securely right in the center of your handlebars just like Pee-wee’s!
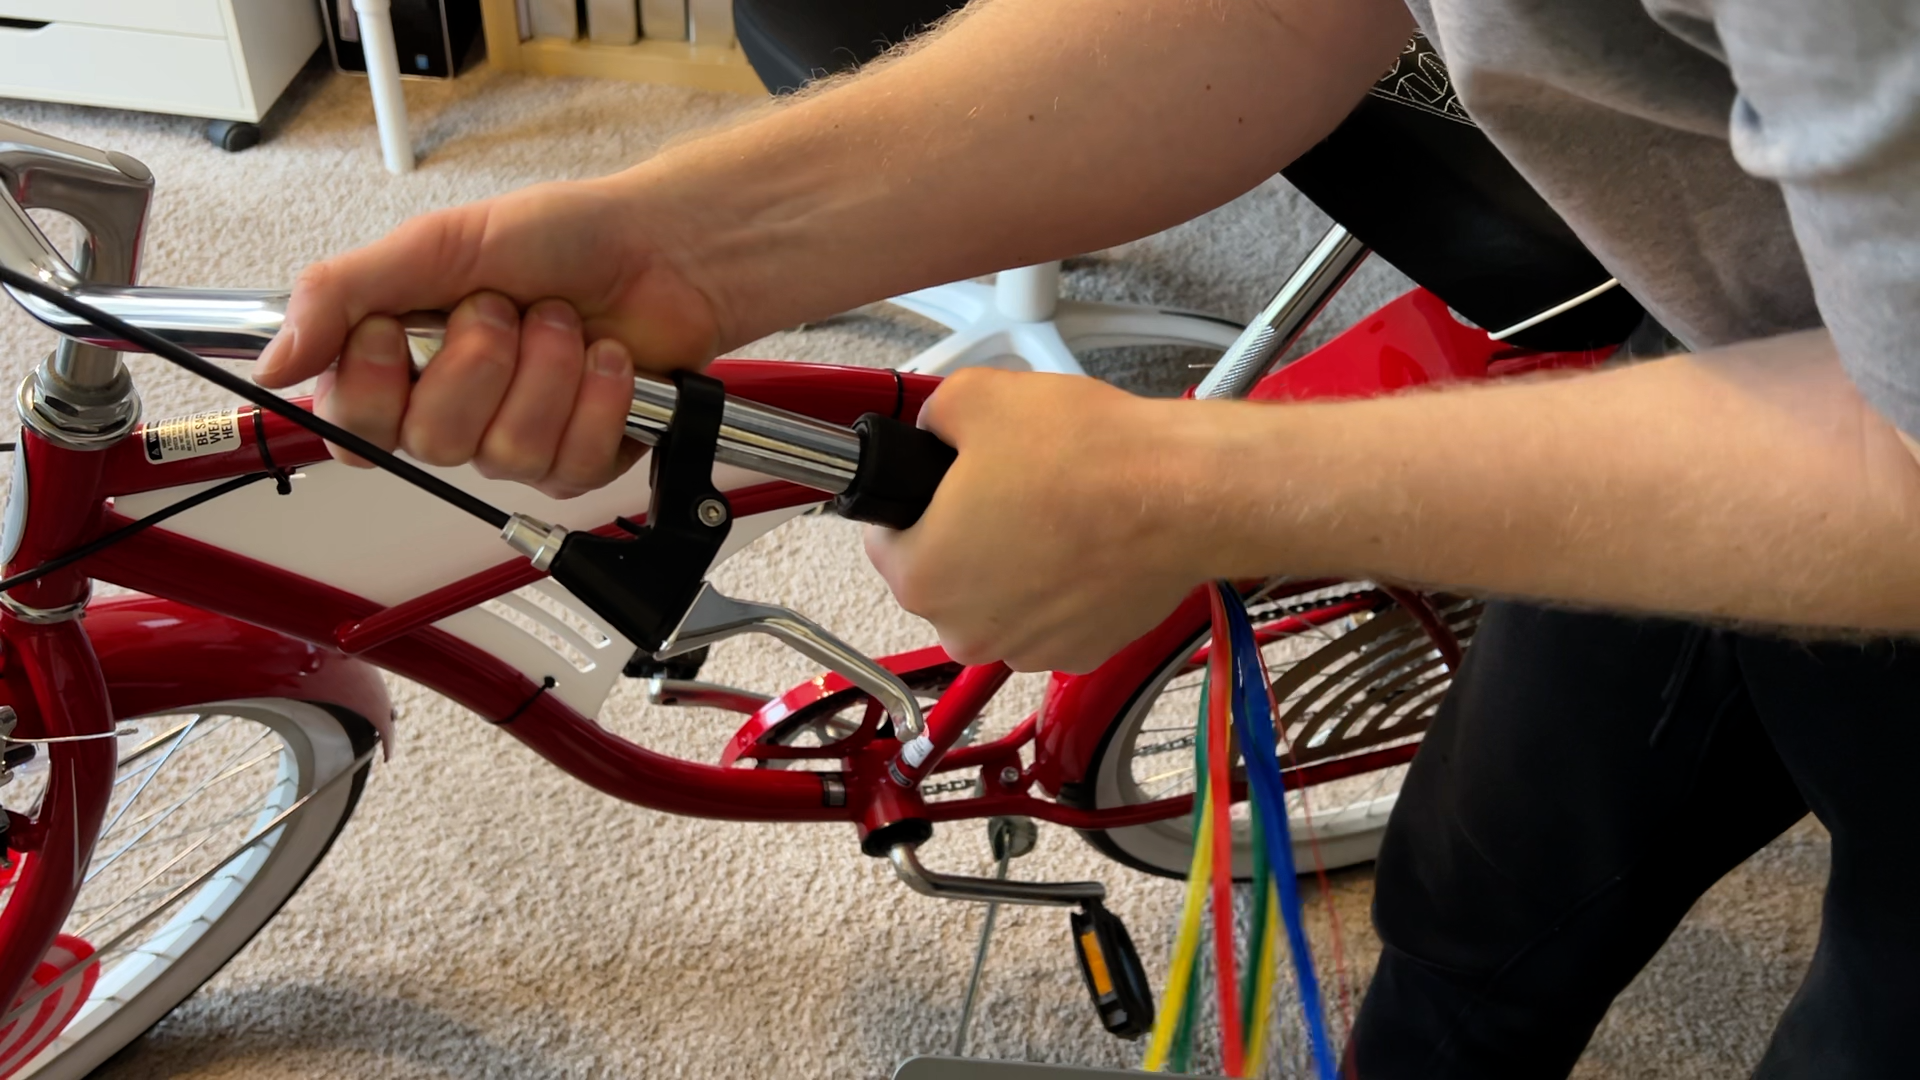
Step 1: Assemble the Base Bike
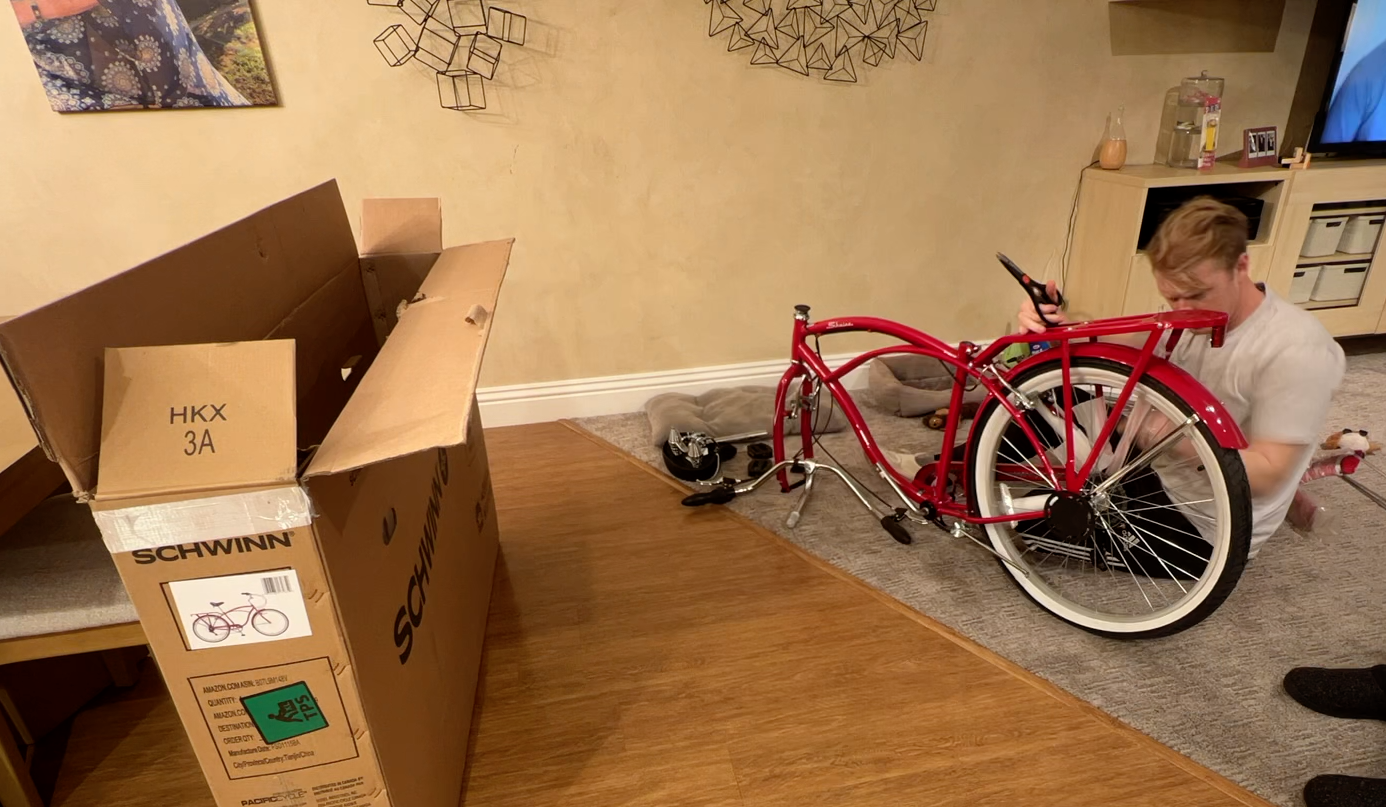
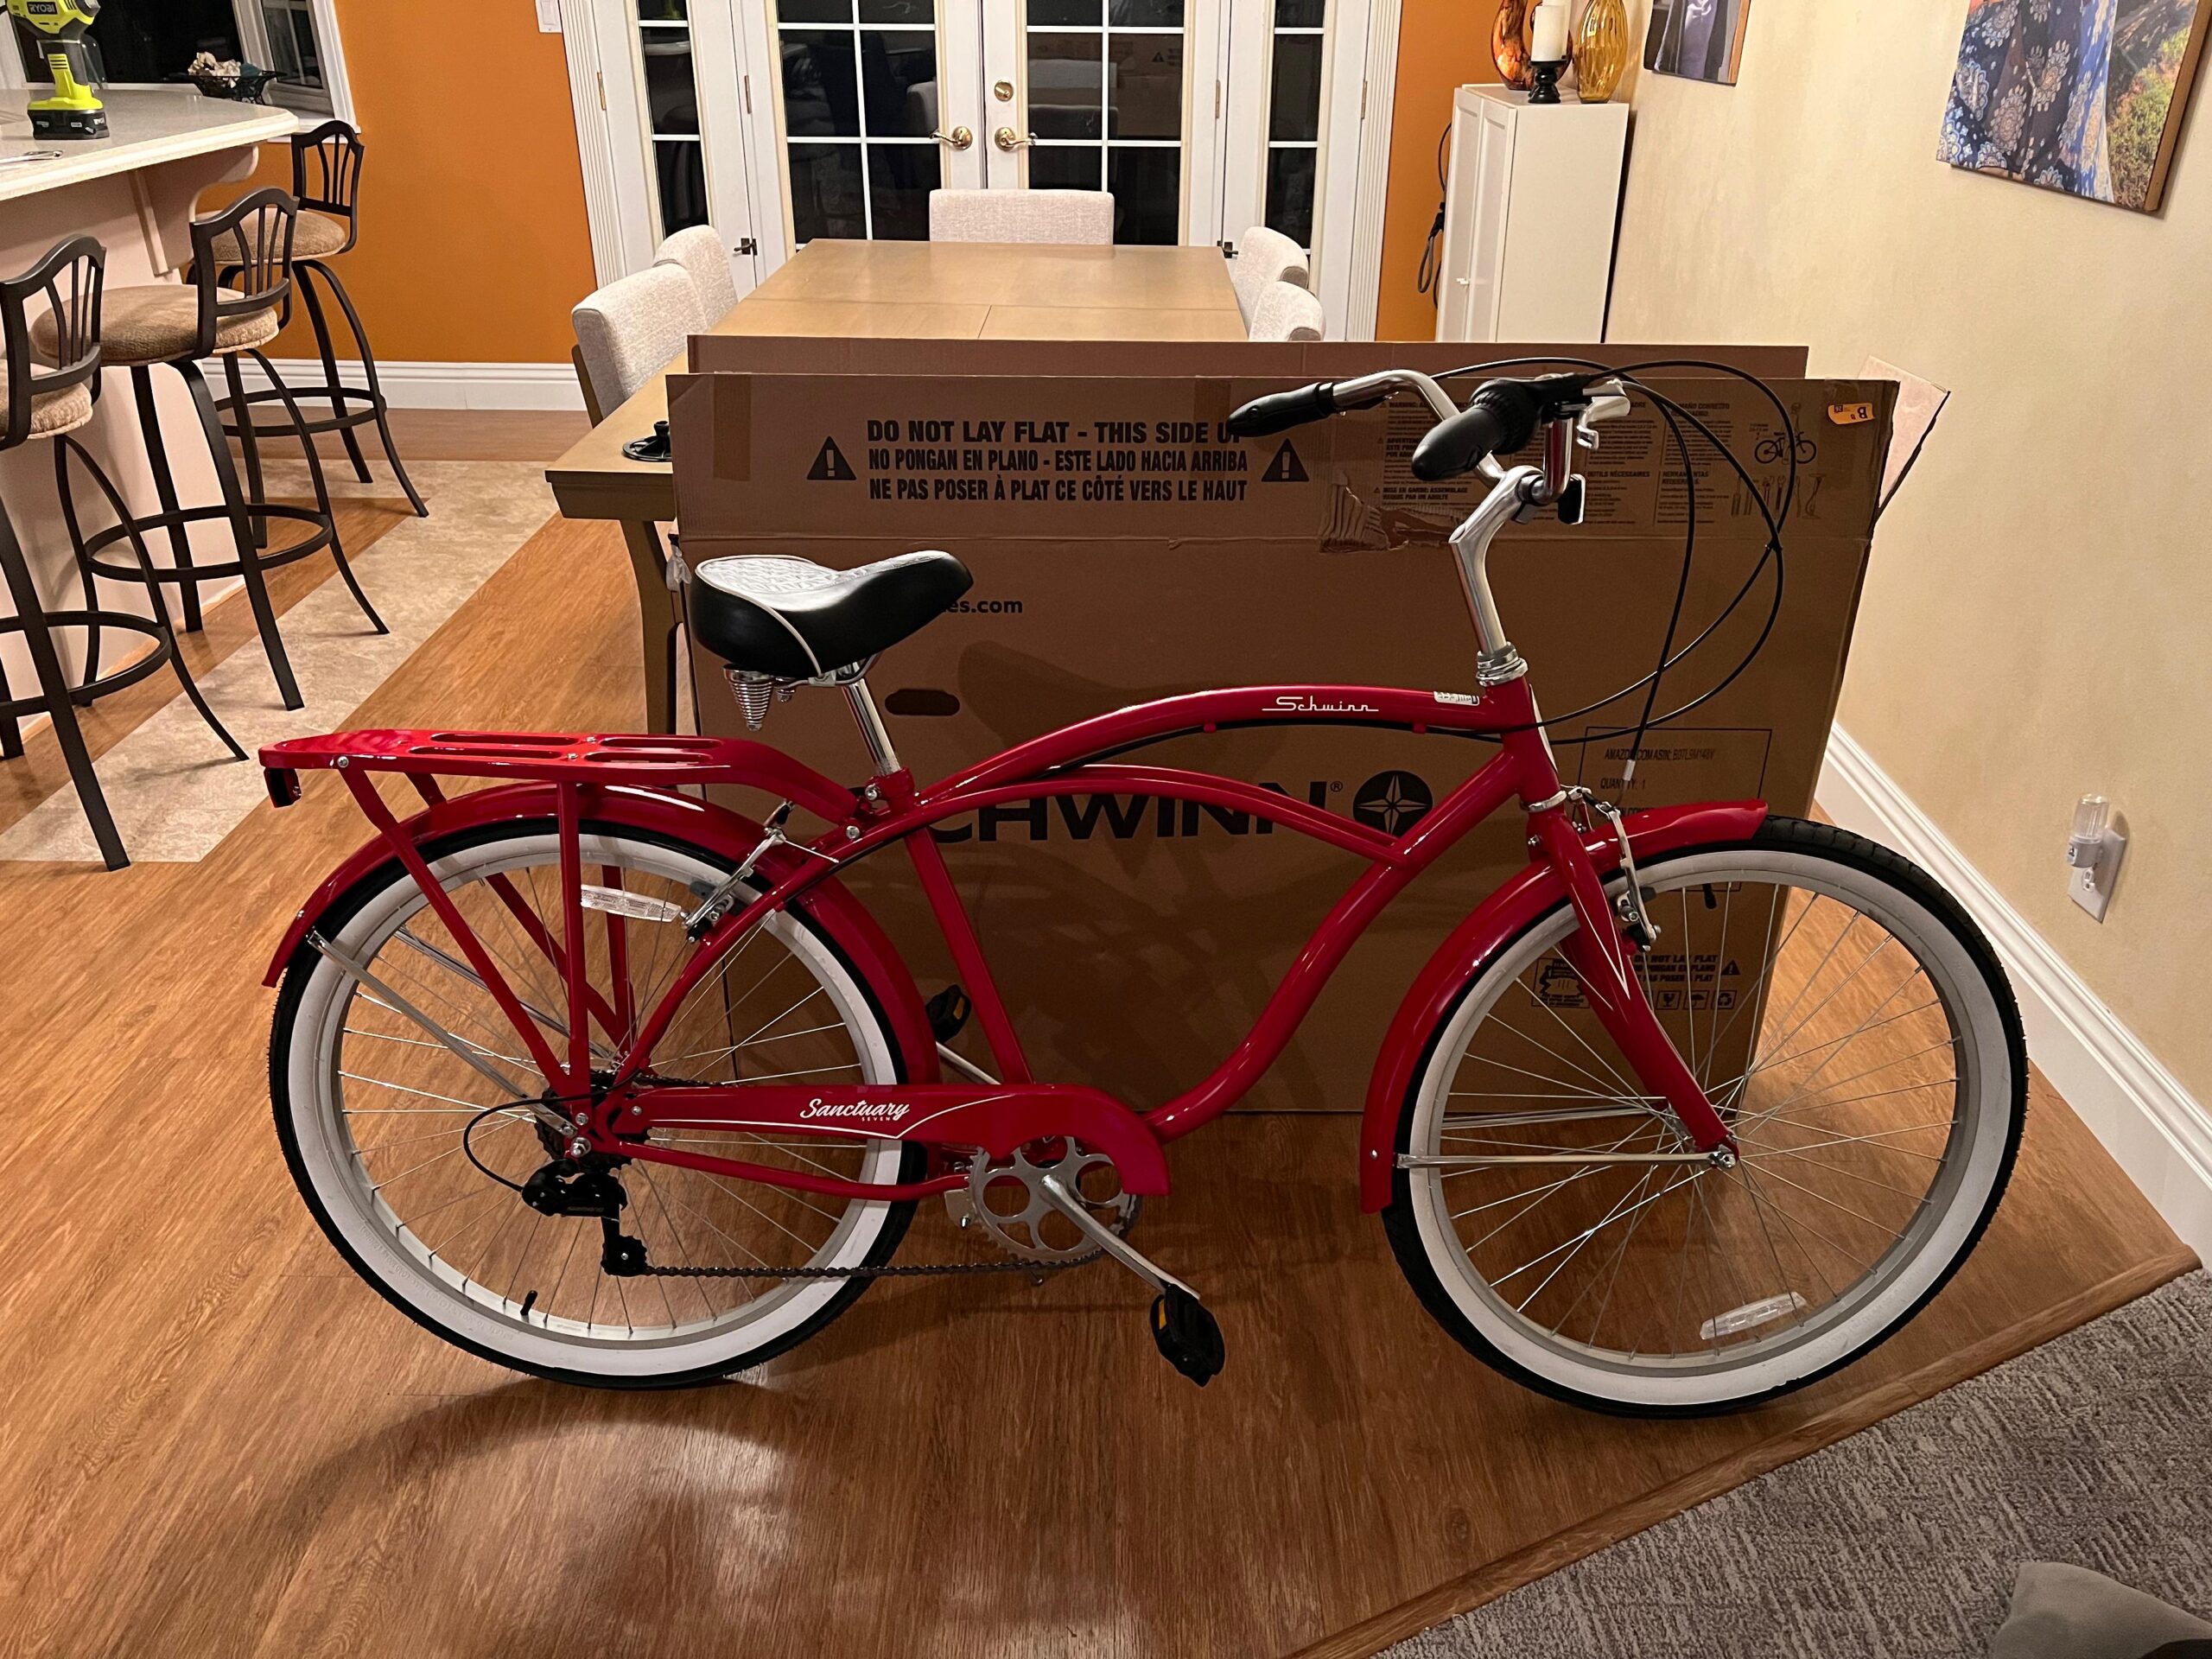
Once your Schwinn cruiser arrives, assemble it according to the instructions. Make sure everything is adjusted properly—seat height, handlebar alignment, and brake function—before moving on.
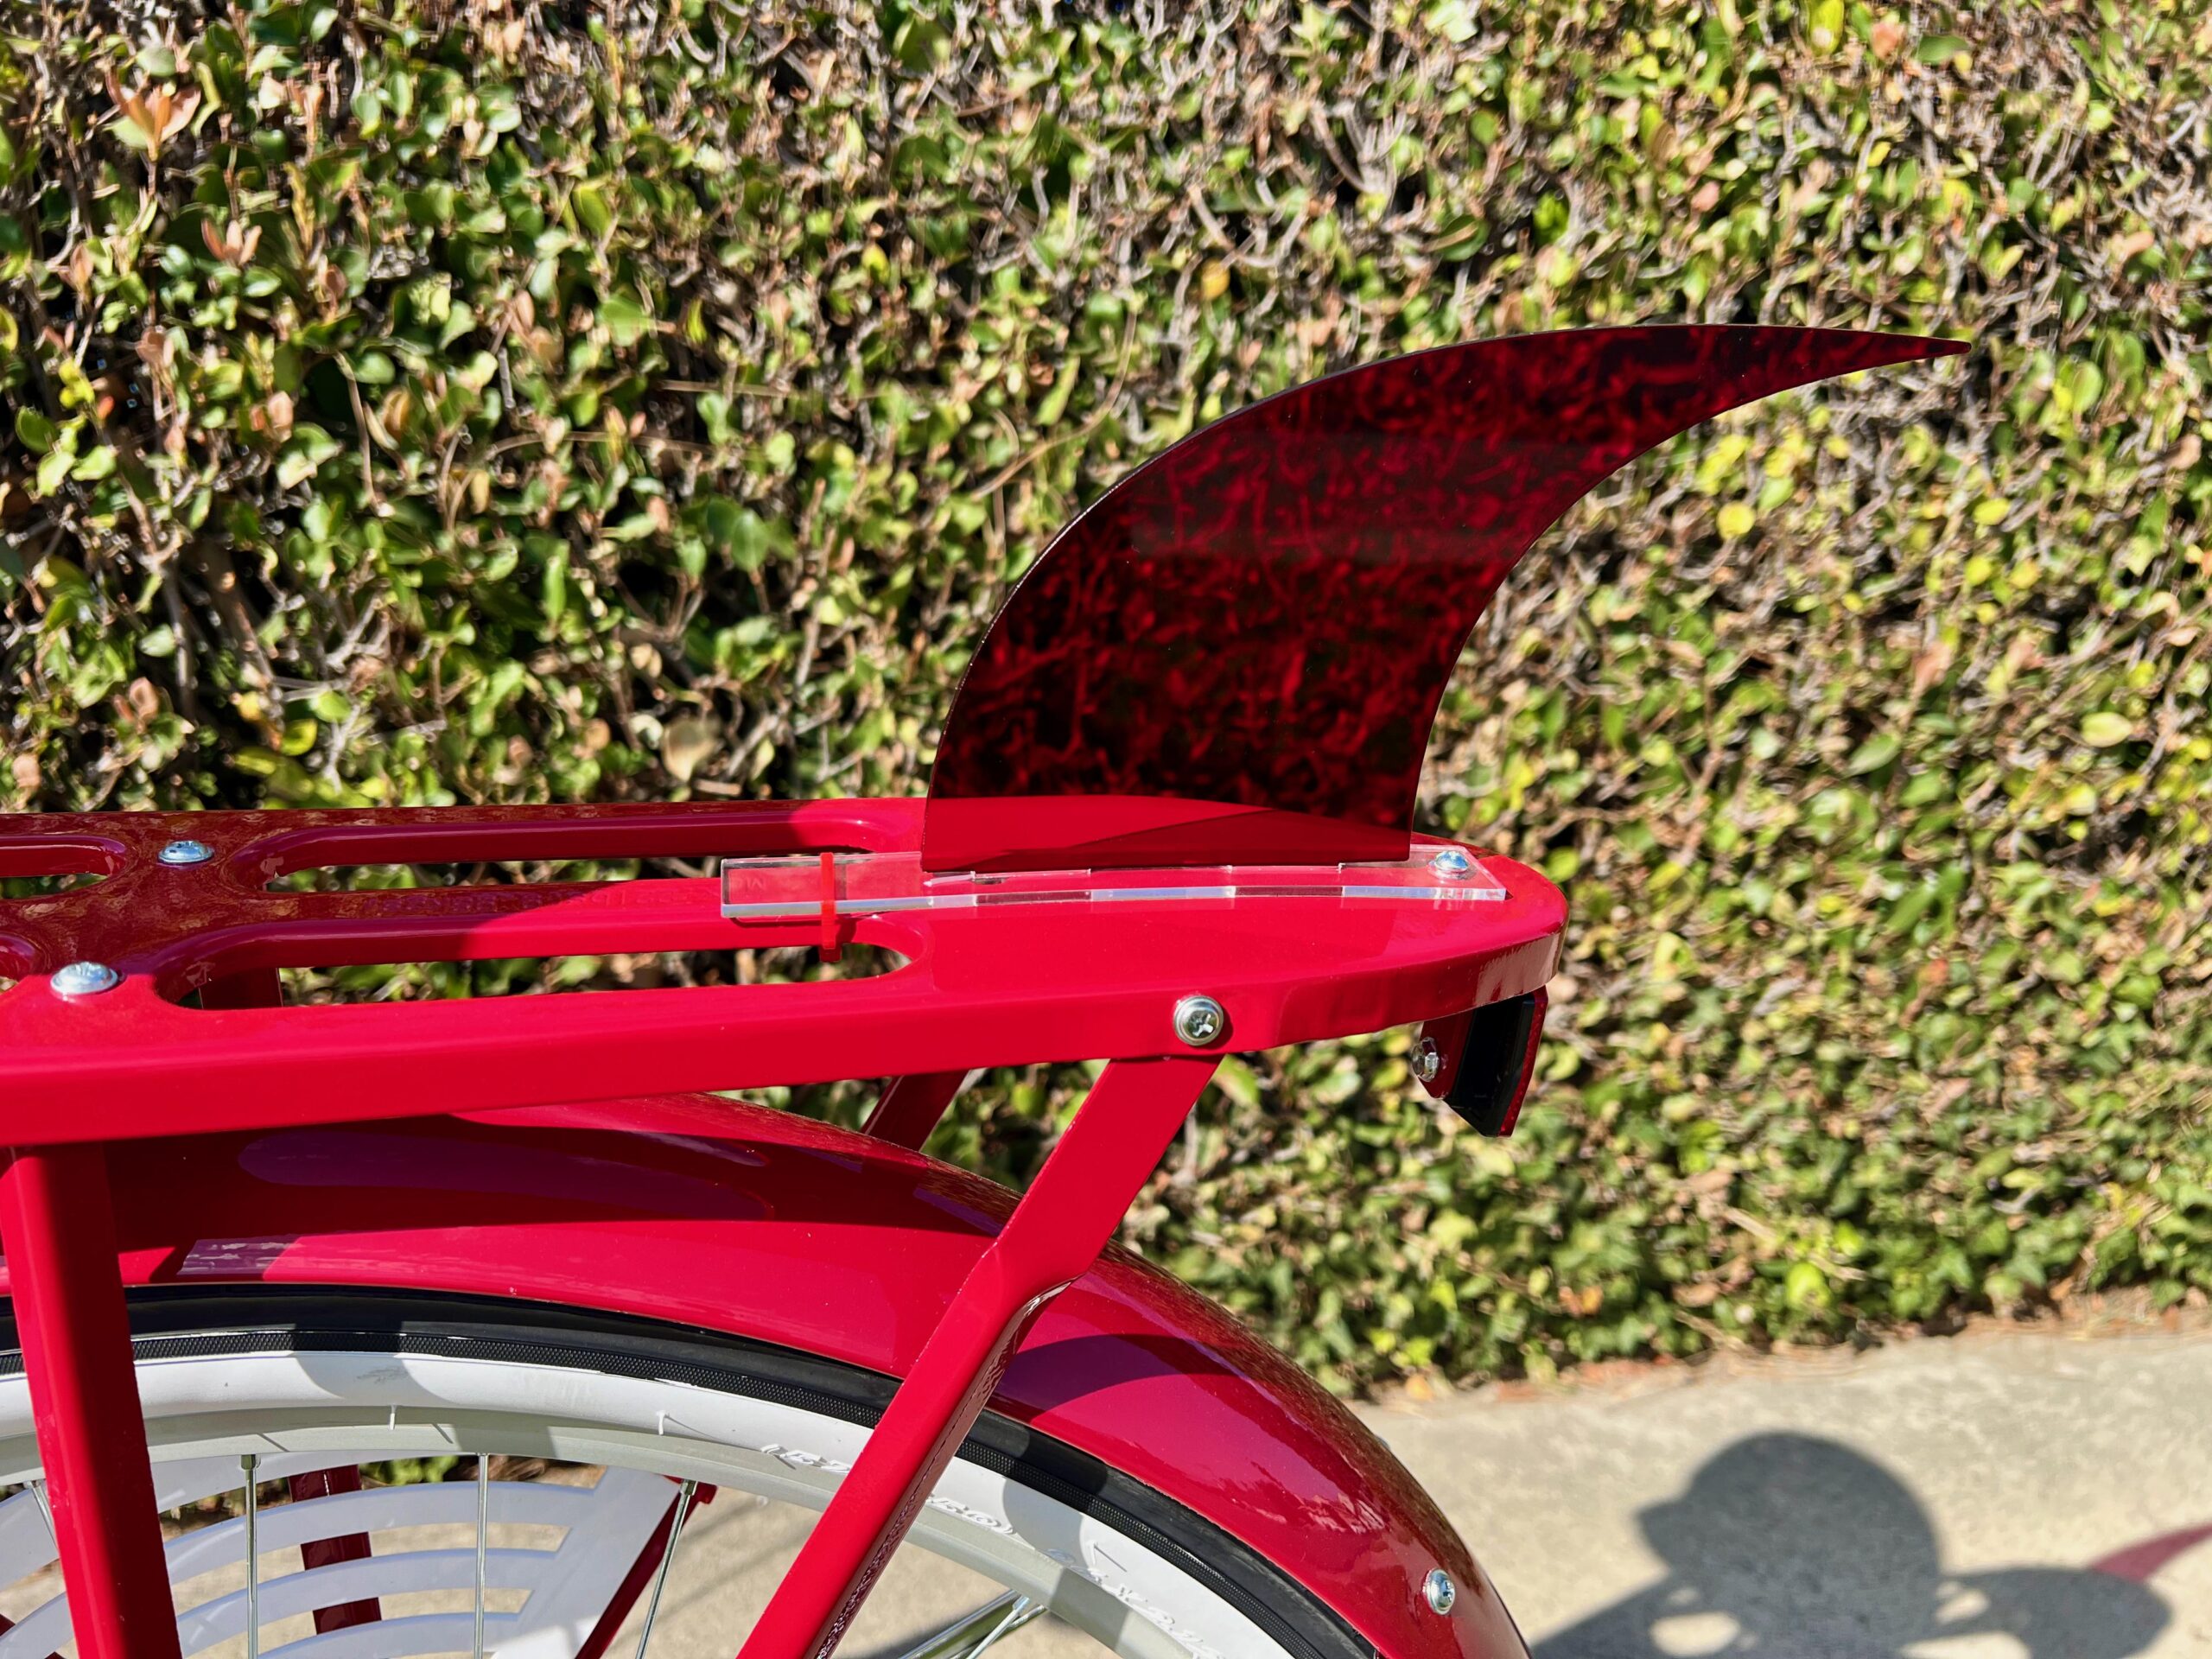
Step 2: Install the Rear Fin

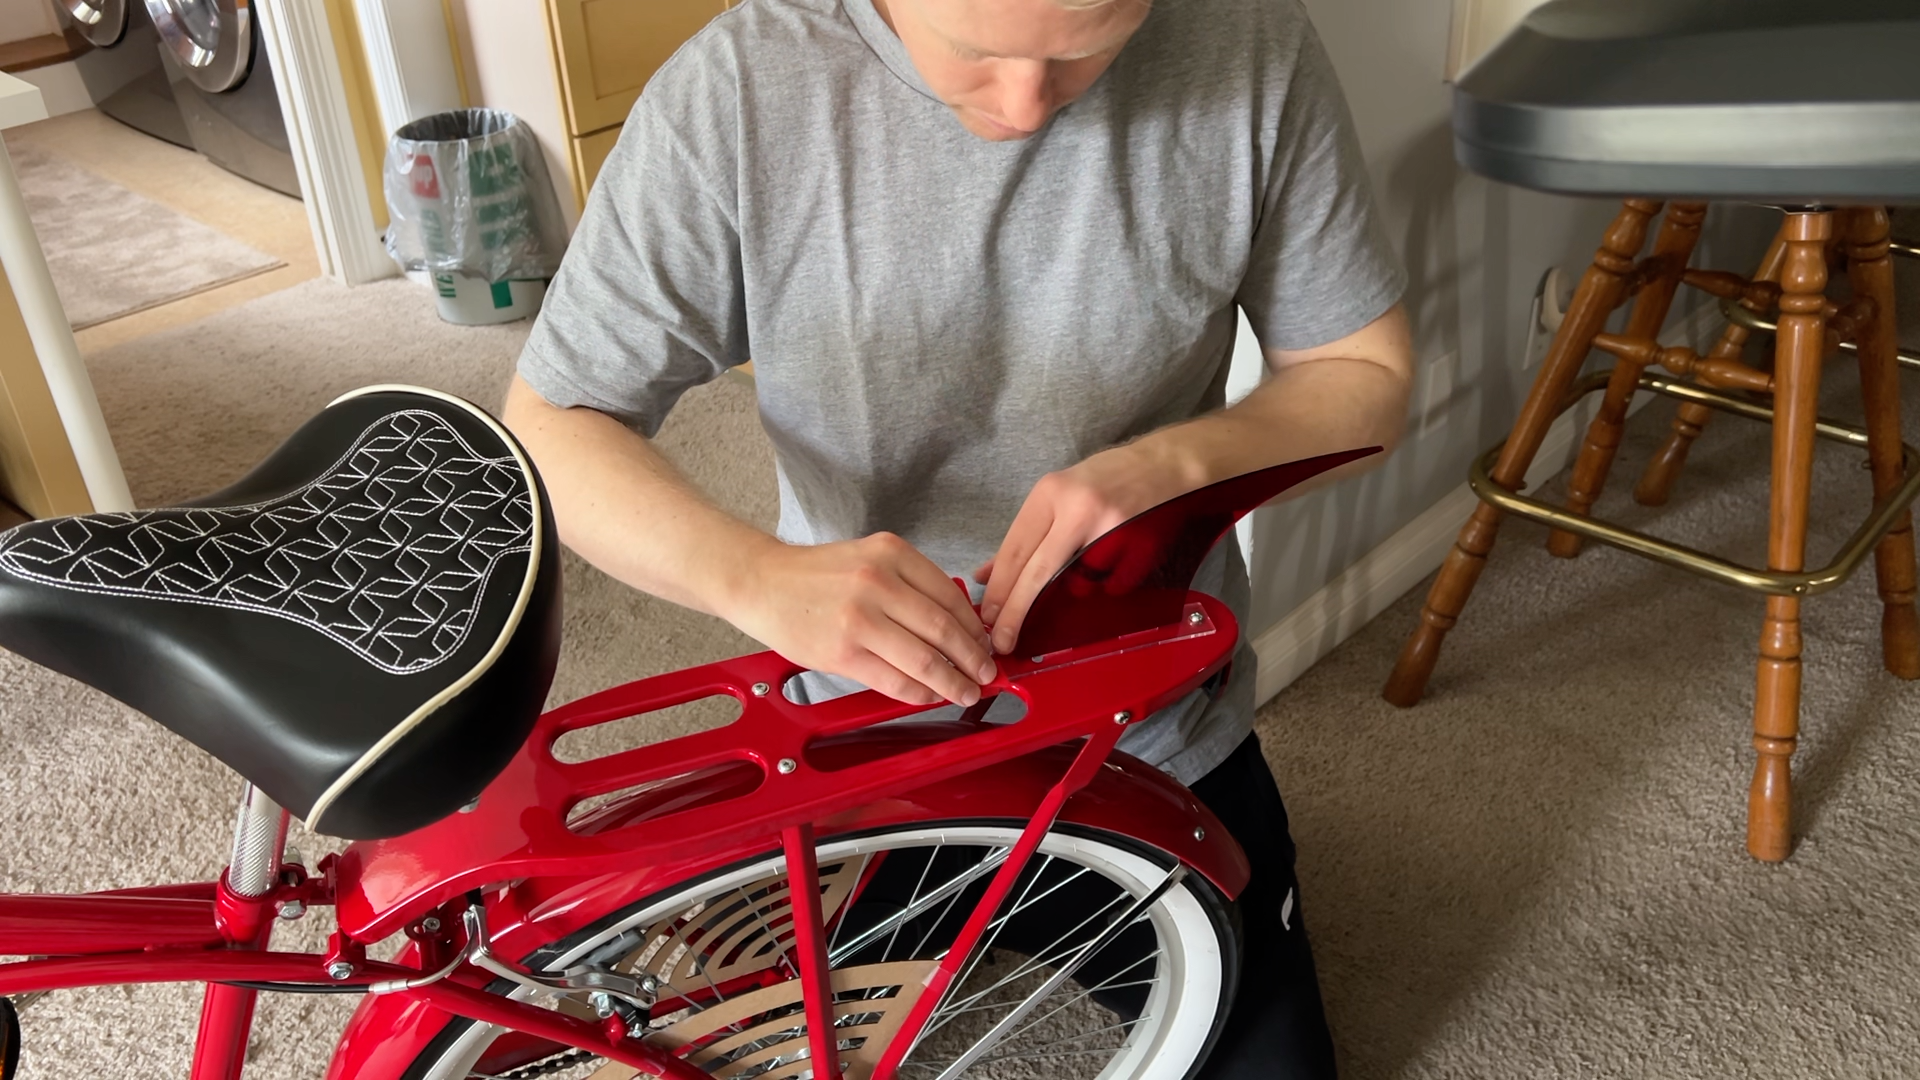
UPDATE: I’ve updated this fin design so that it magnetically attaches because it tends to be easily hit when swinging your foot over the bike. This new design just knocks off and you can just slap it back on. Please watch the video for this update if you’d like to implement it.
The fin slots into a clear base piece and attaches to the frame using an existing hole.
You can glue this in if you’d like, but I chose not to. Since the fin is easy to bump, it just pops out when you hit it without glue and can be easily put back in. If it were glued, there’s a risk of cracking the acrylic.
Secure it with a nut, screw, and a red zip tie to keep it in place.
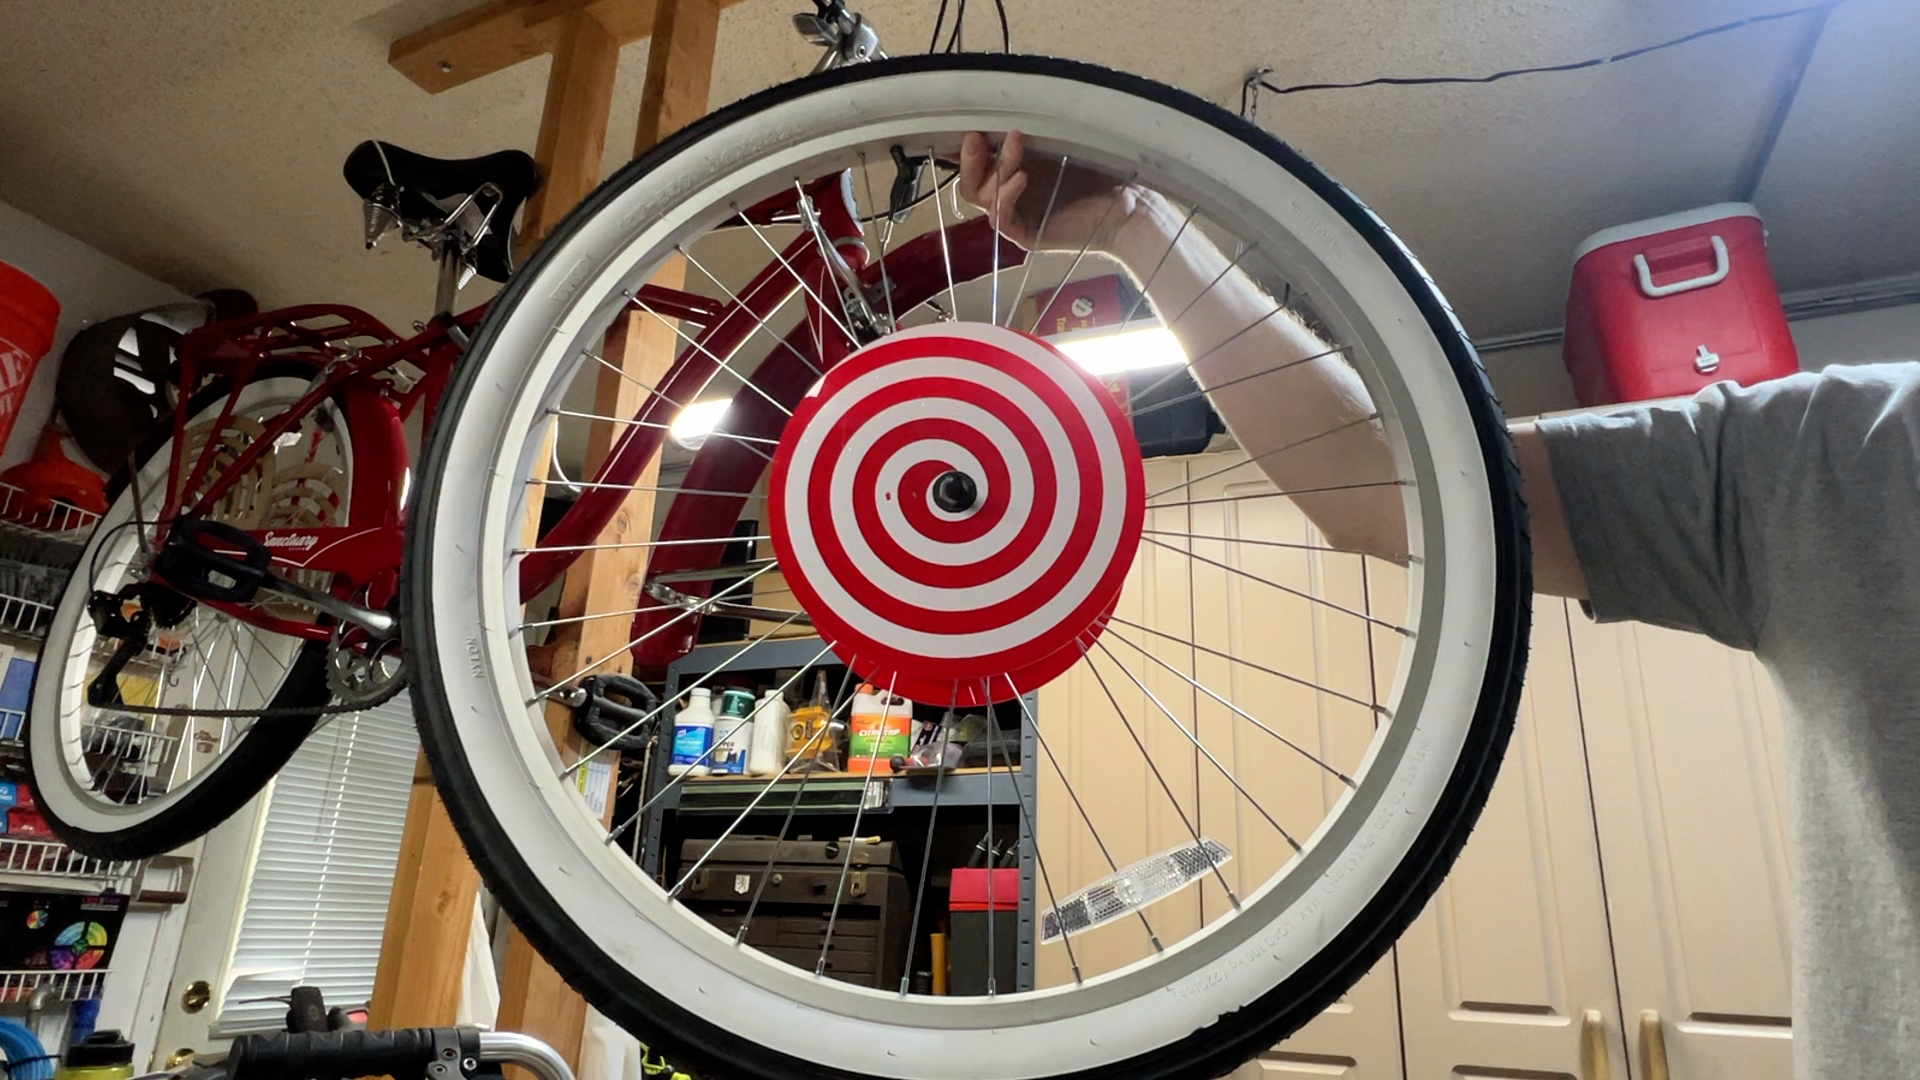
Step 3: Attach the Front Wheel Spirals
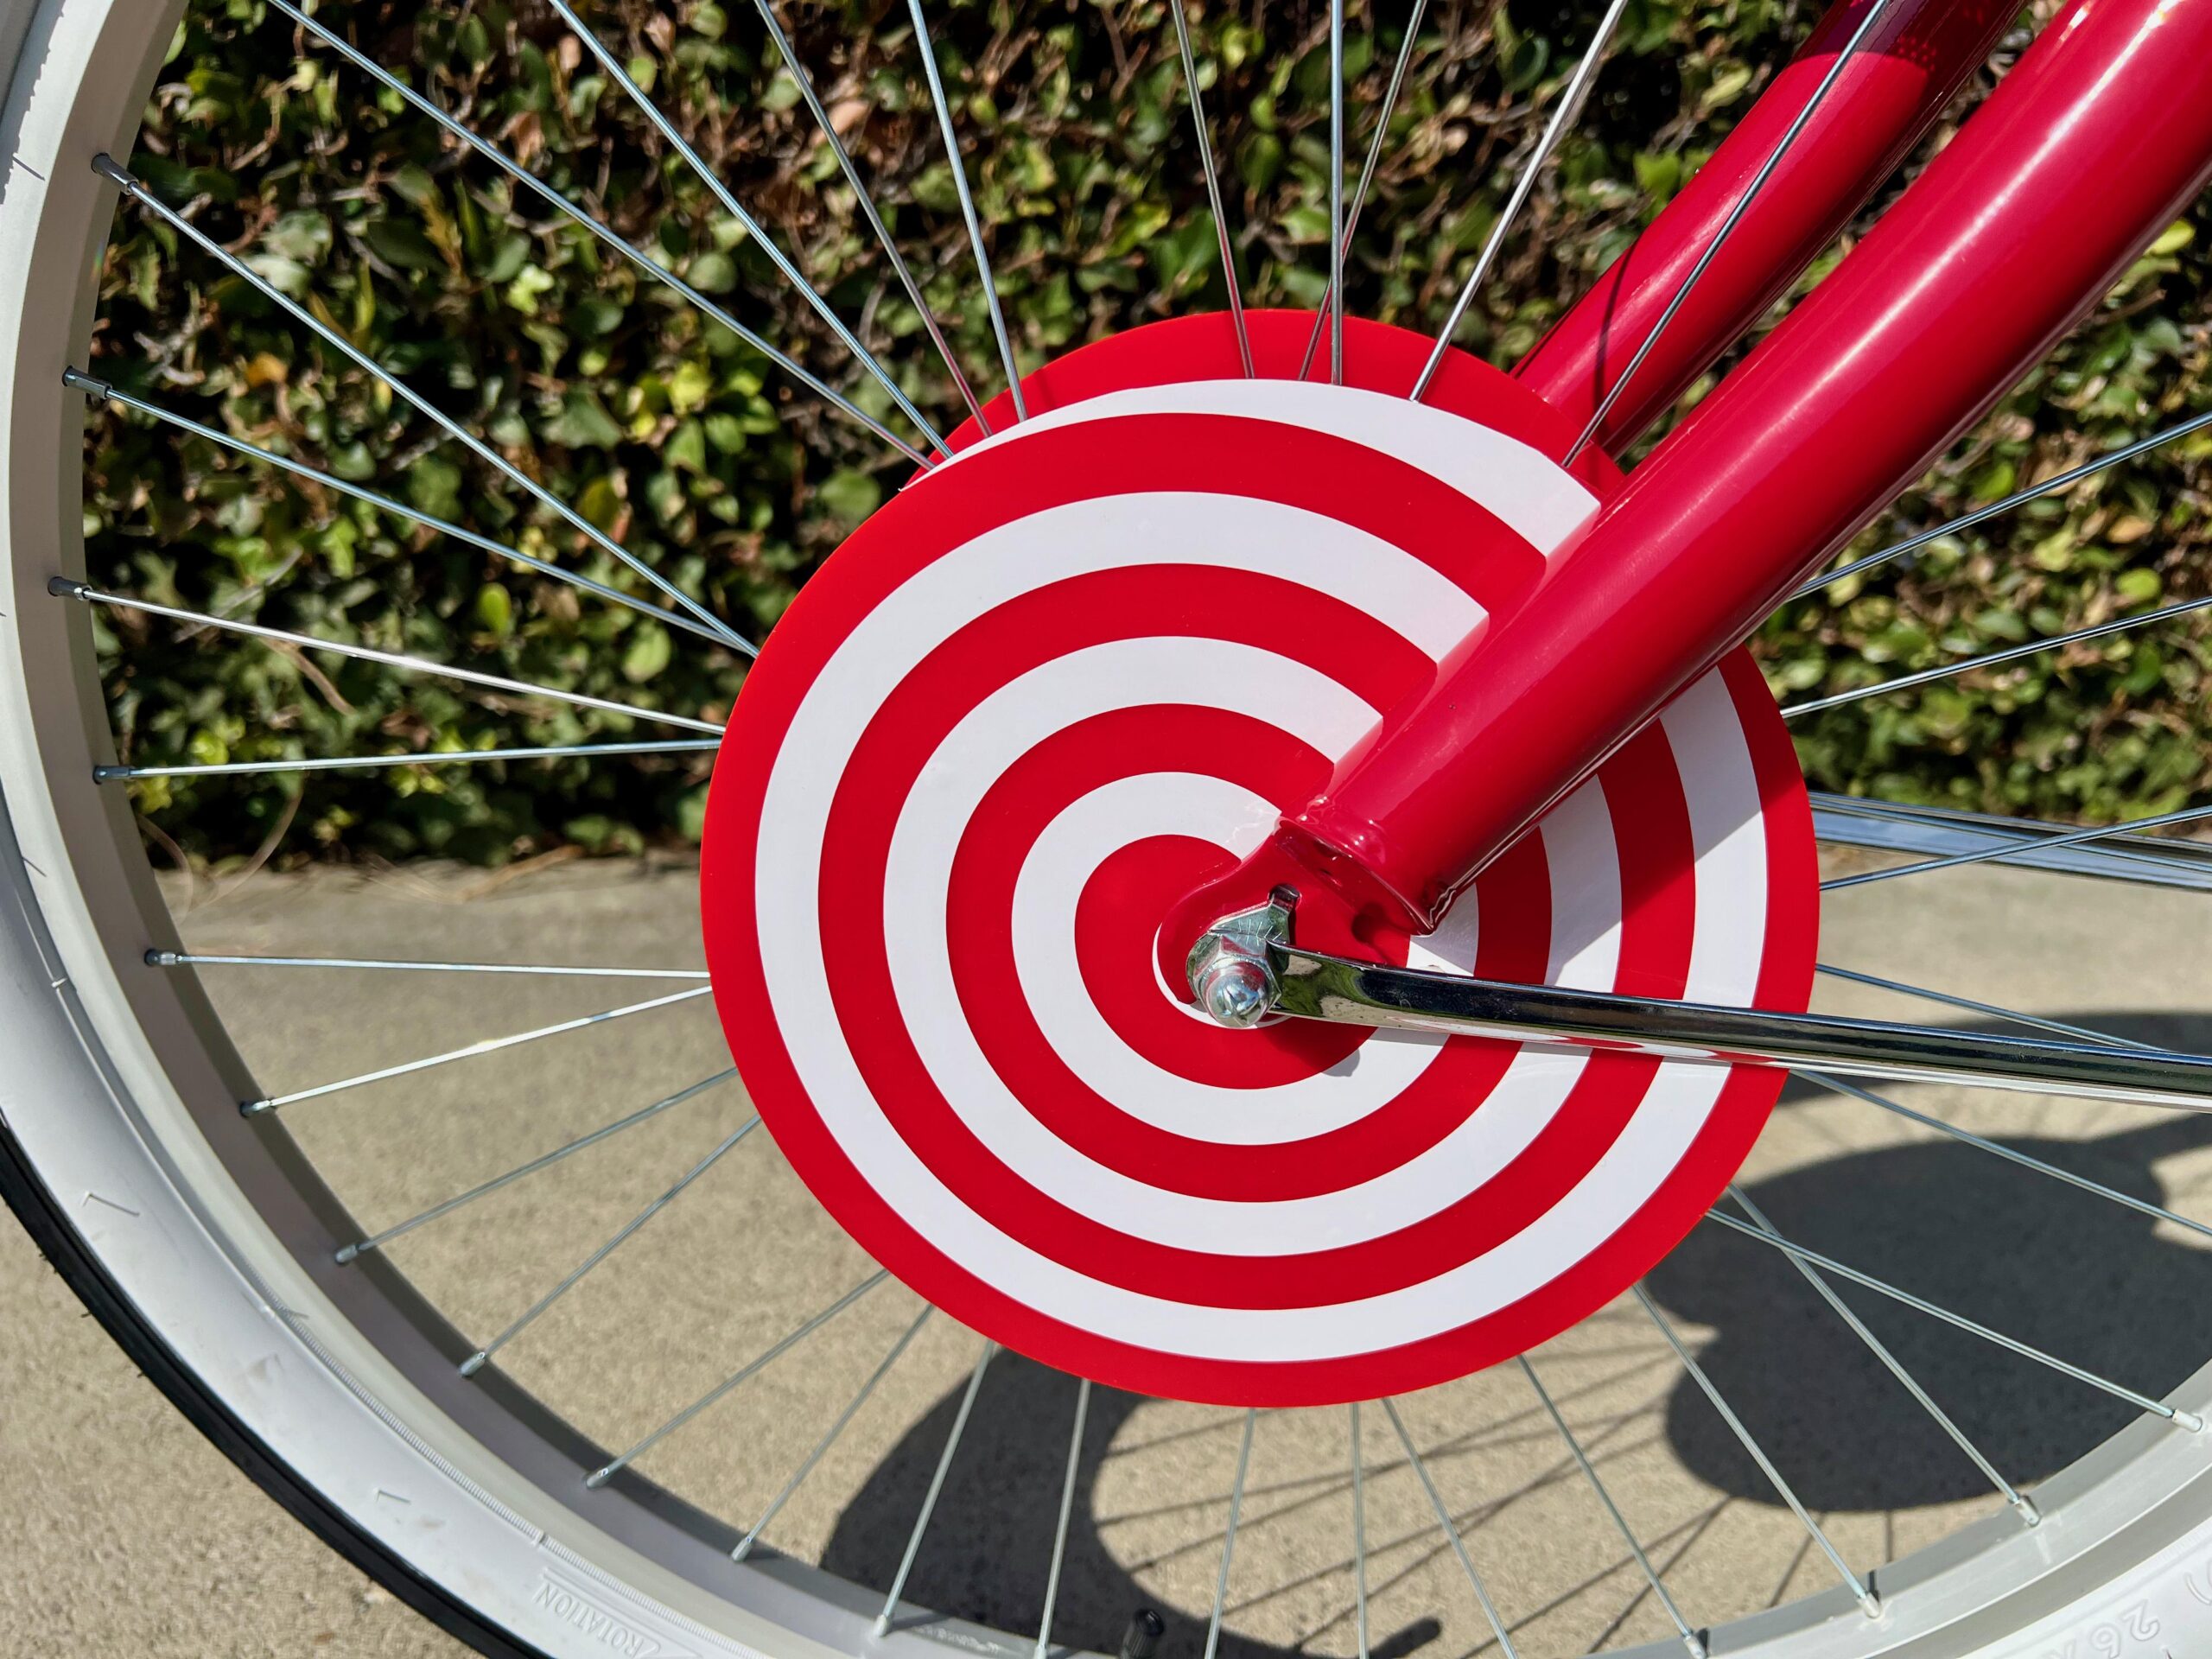
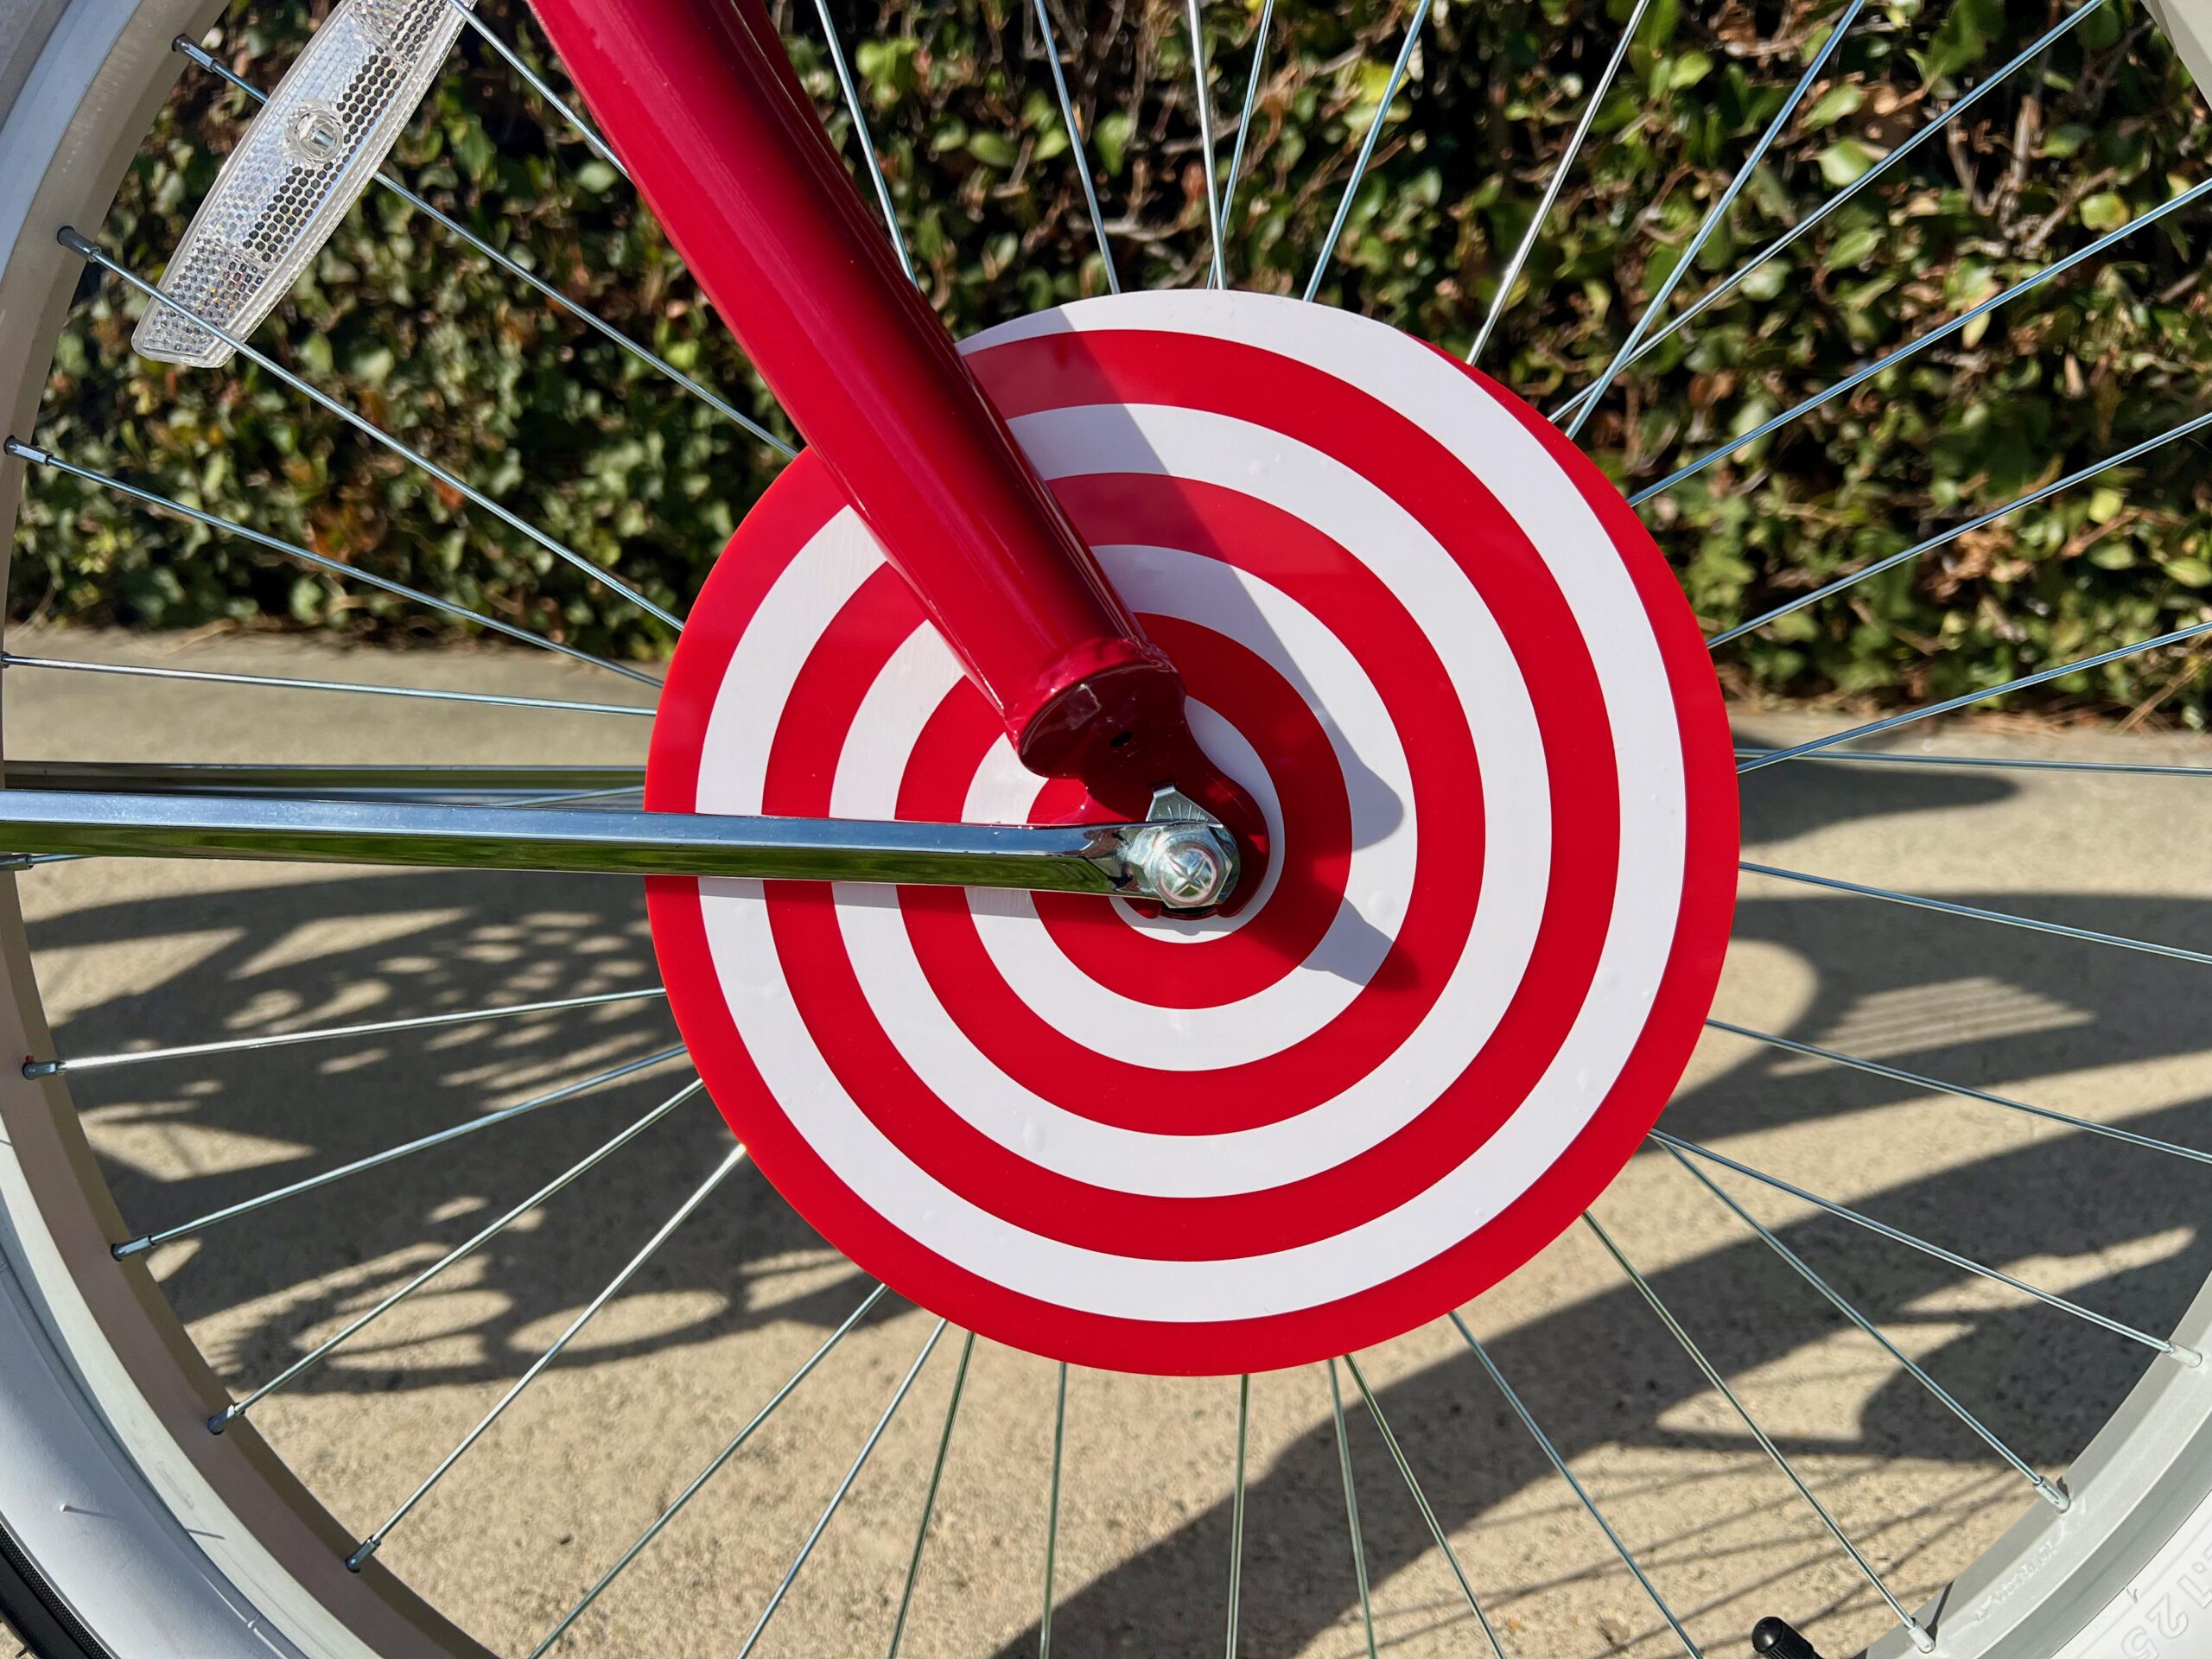
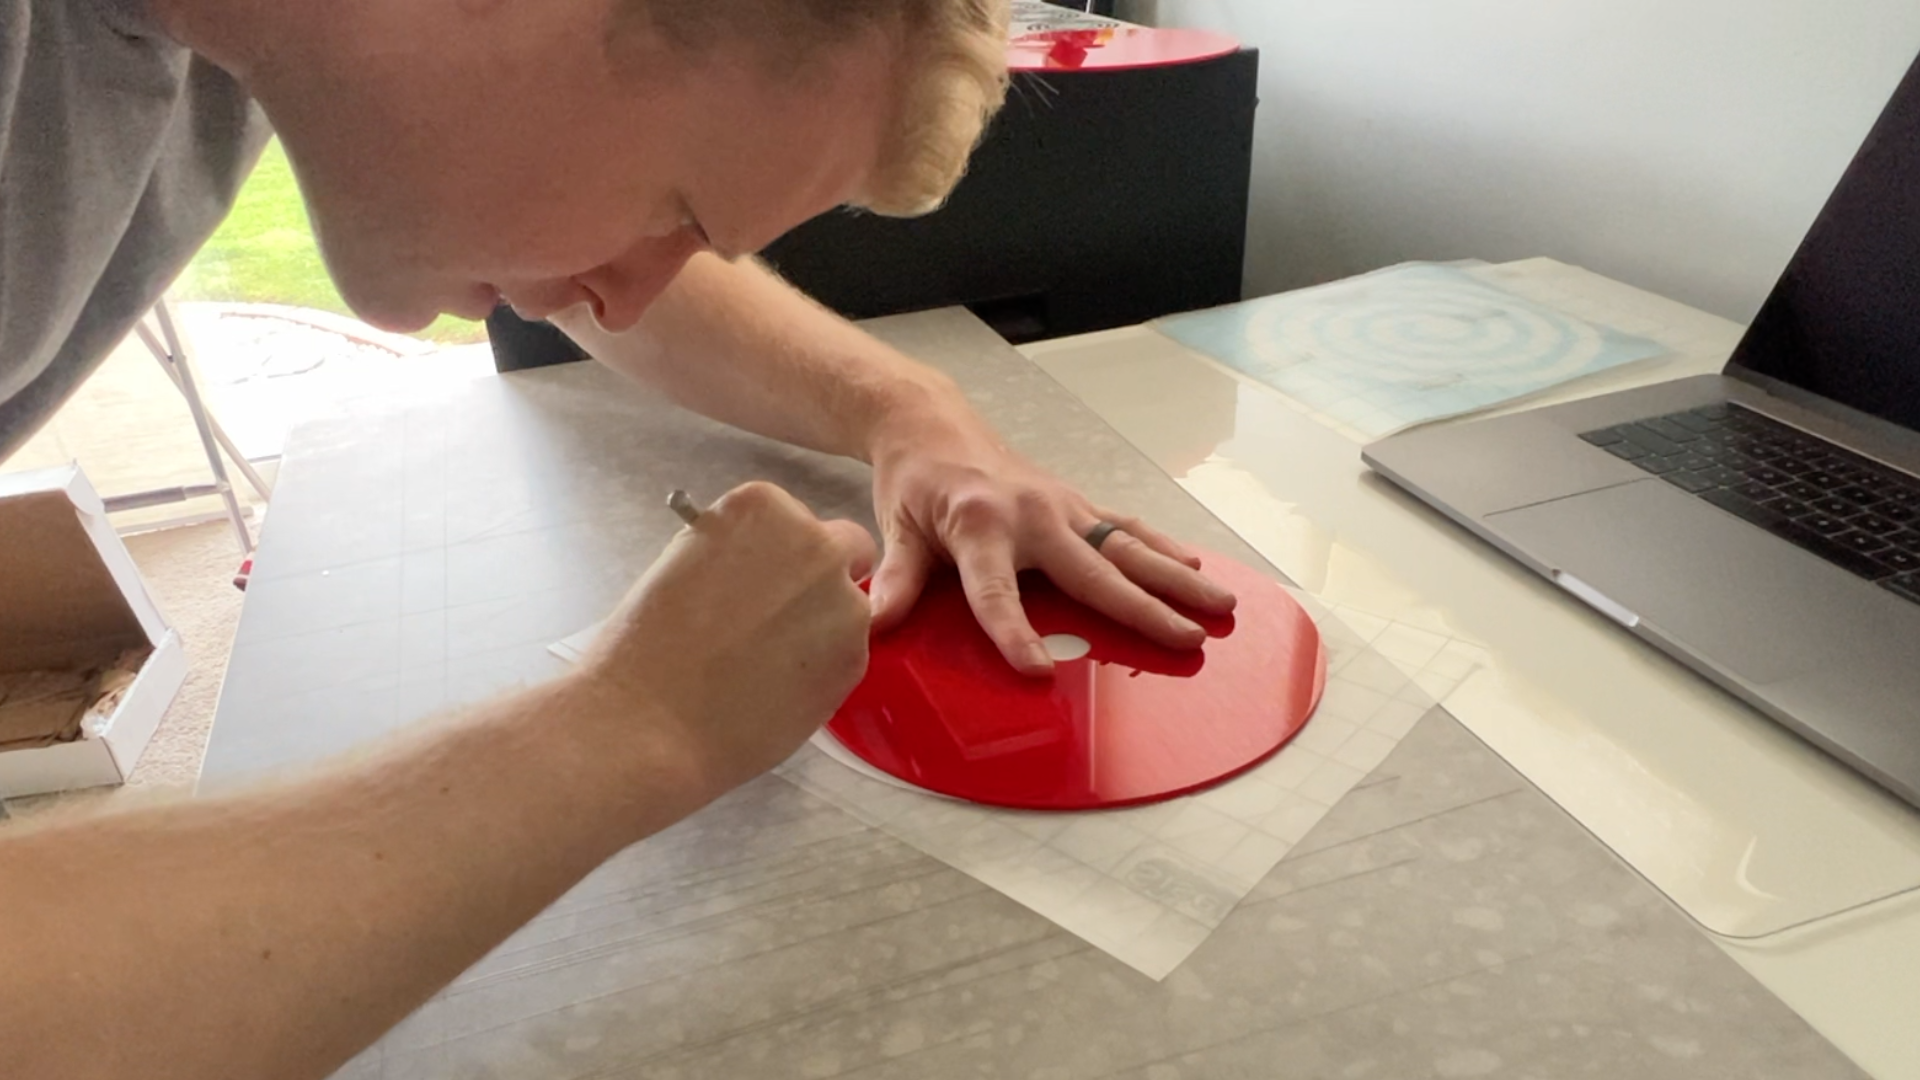
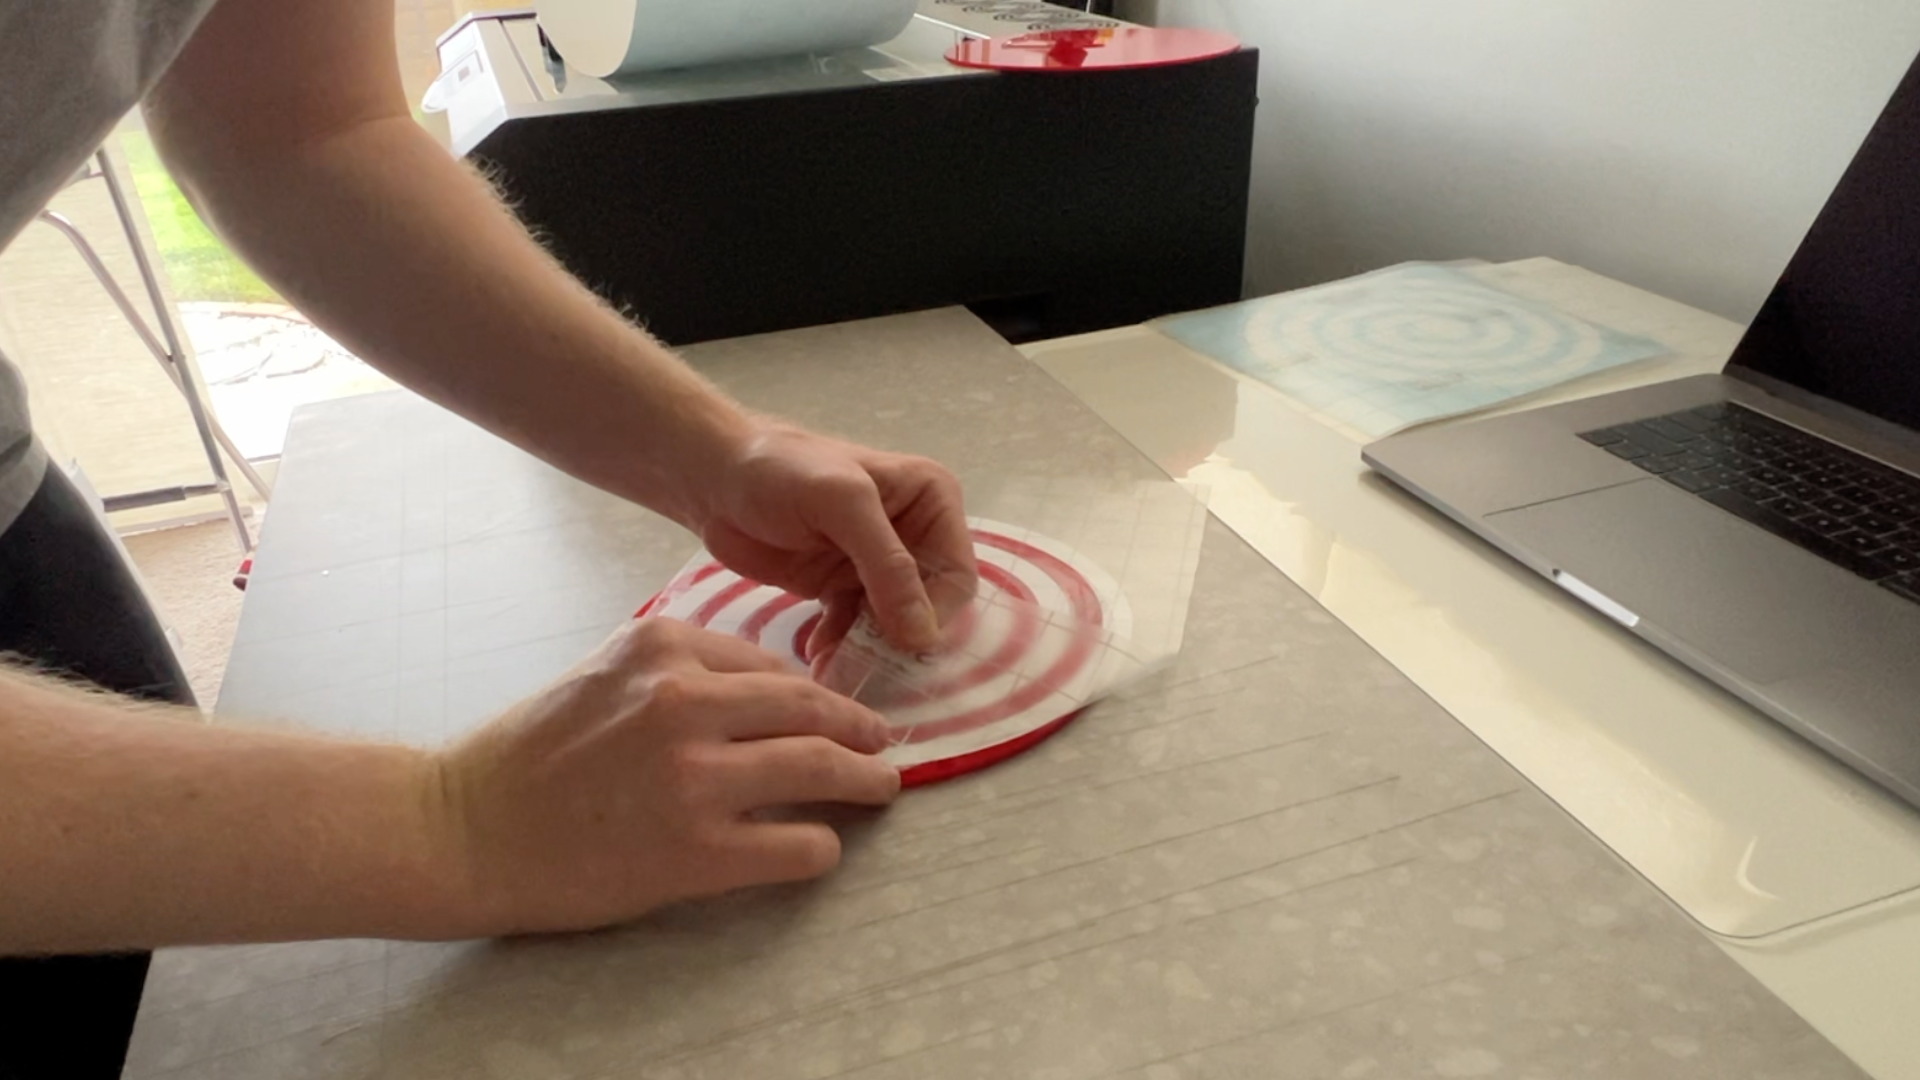
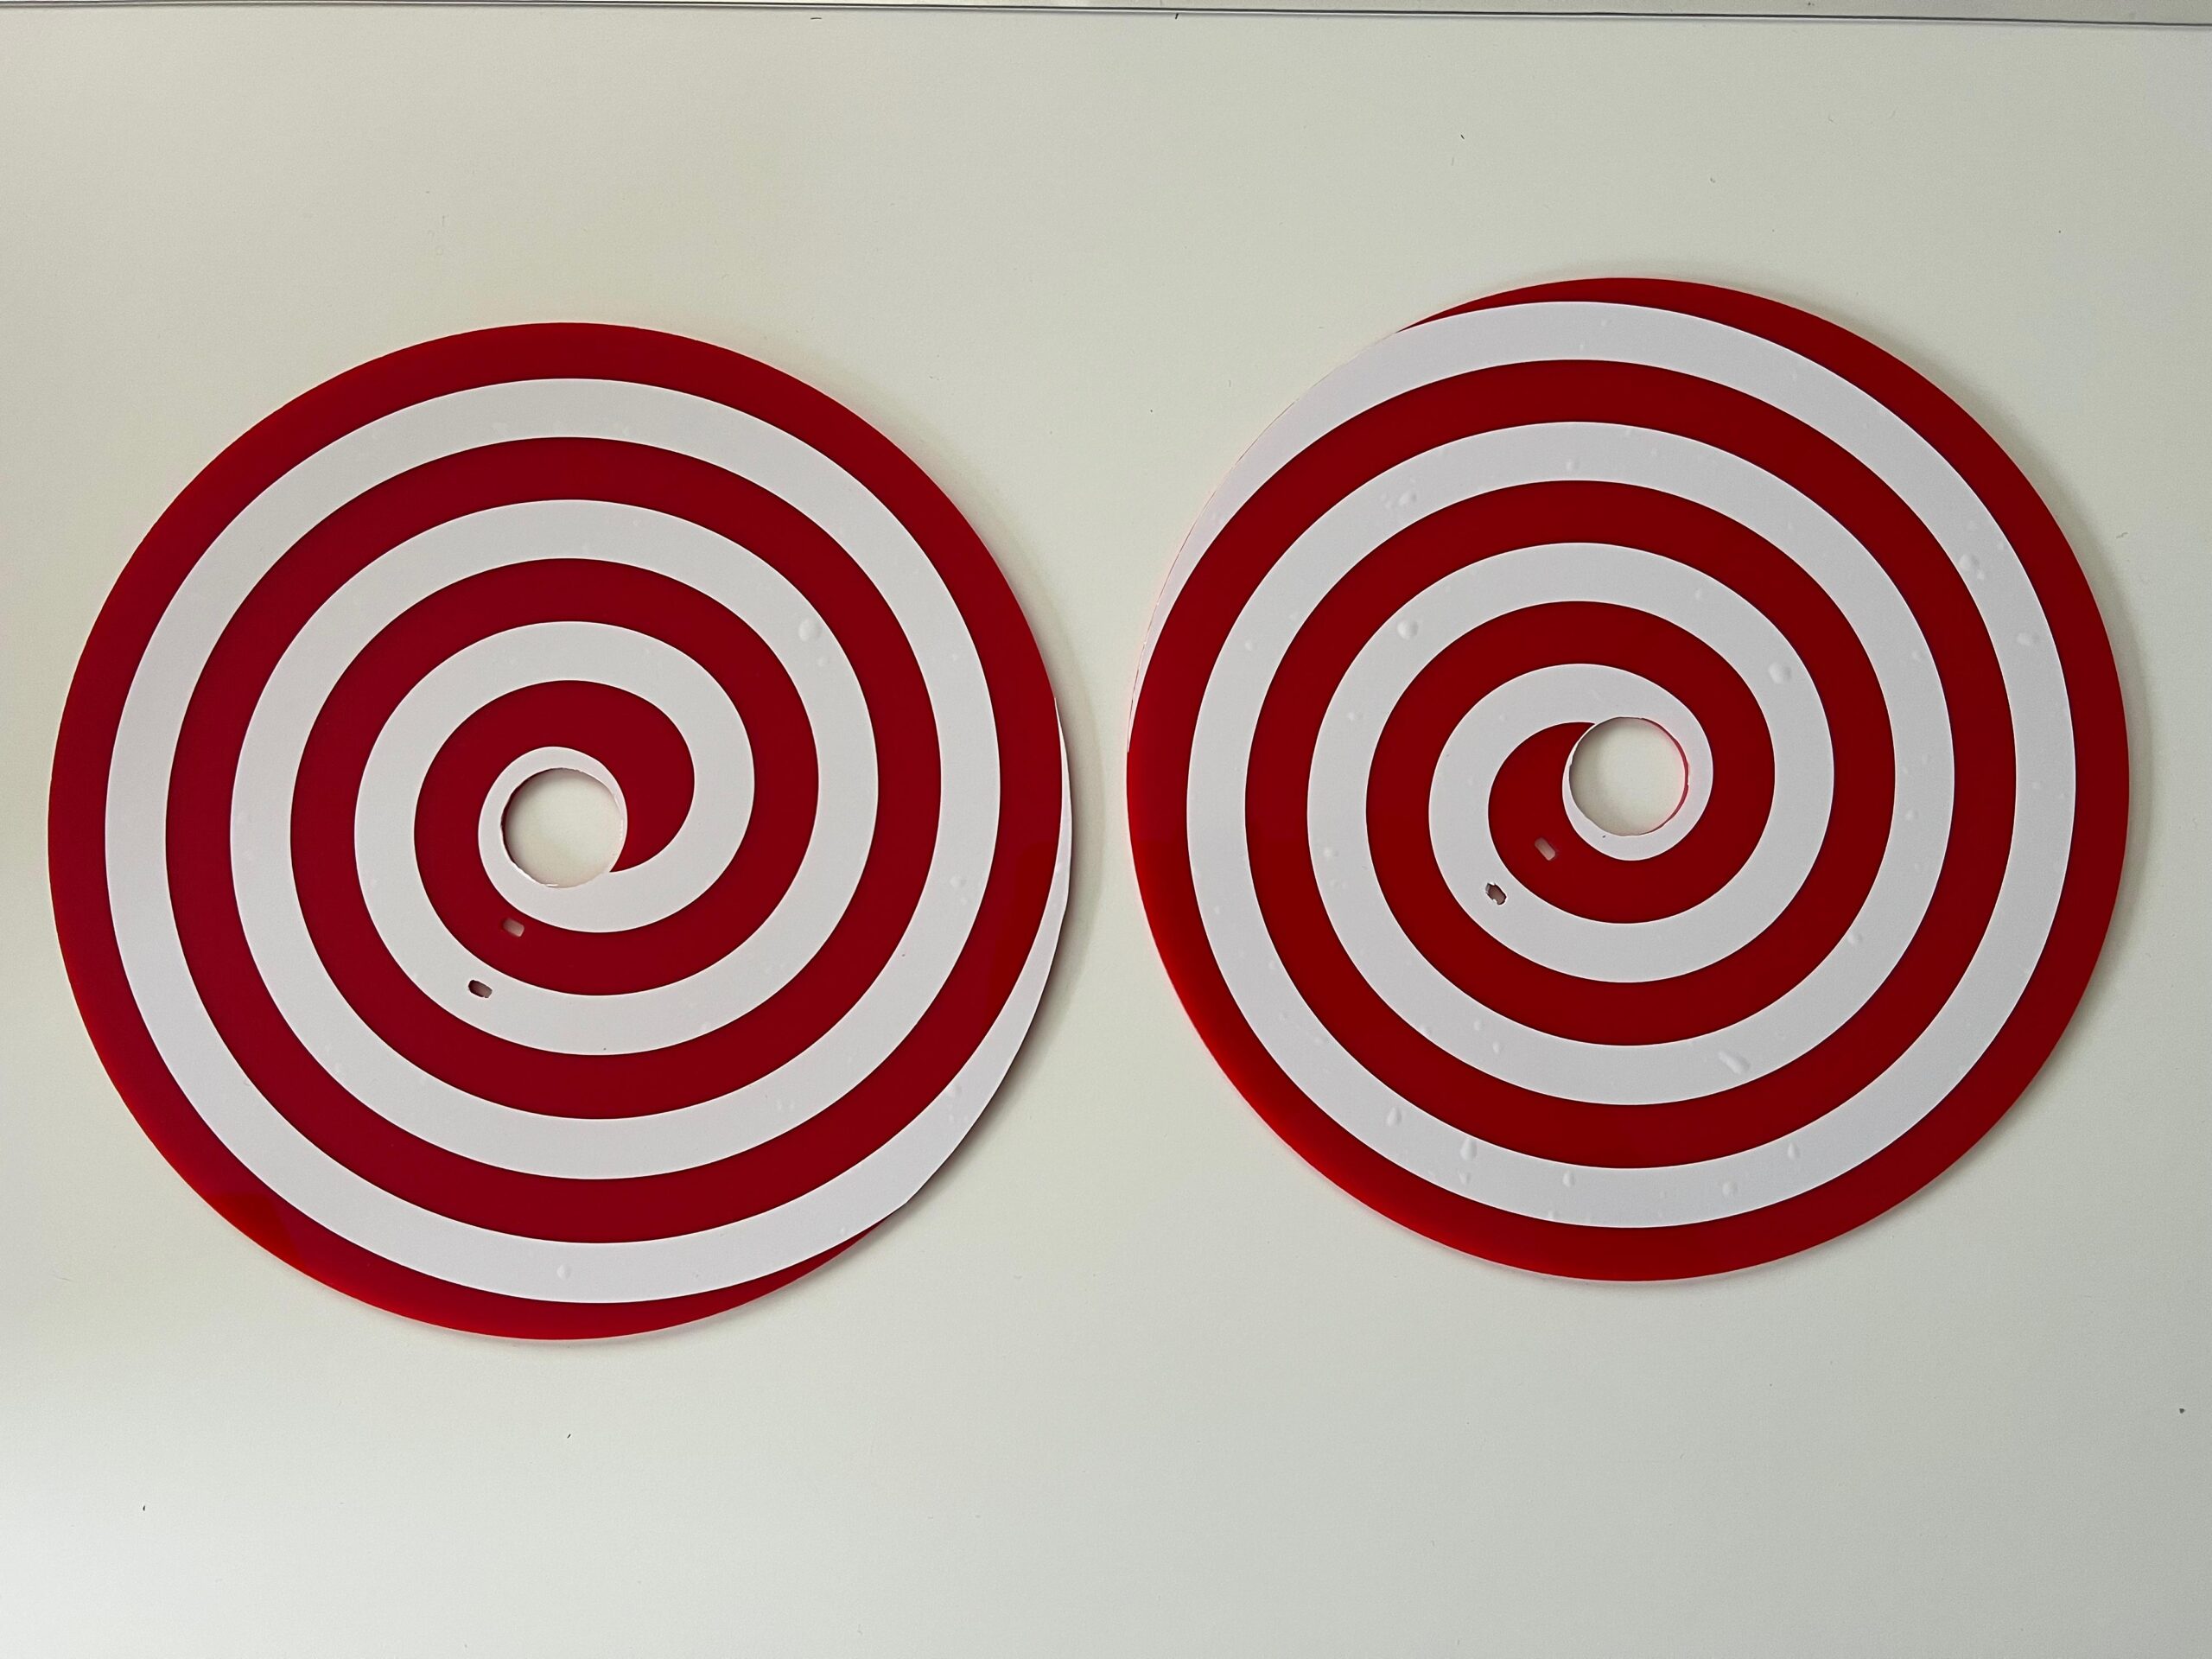
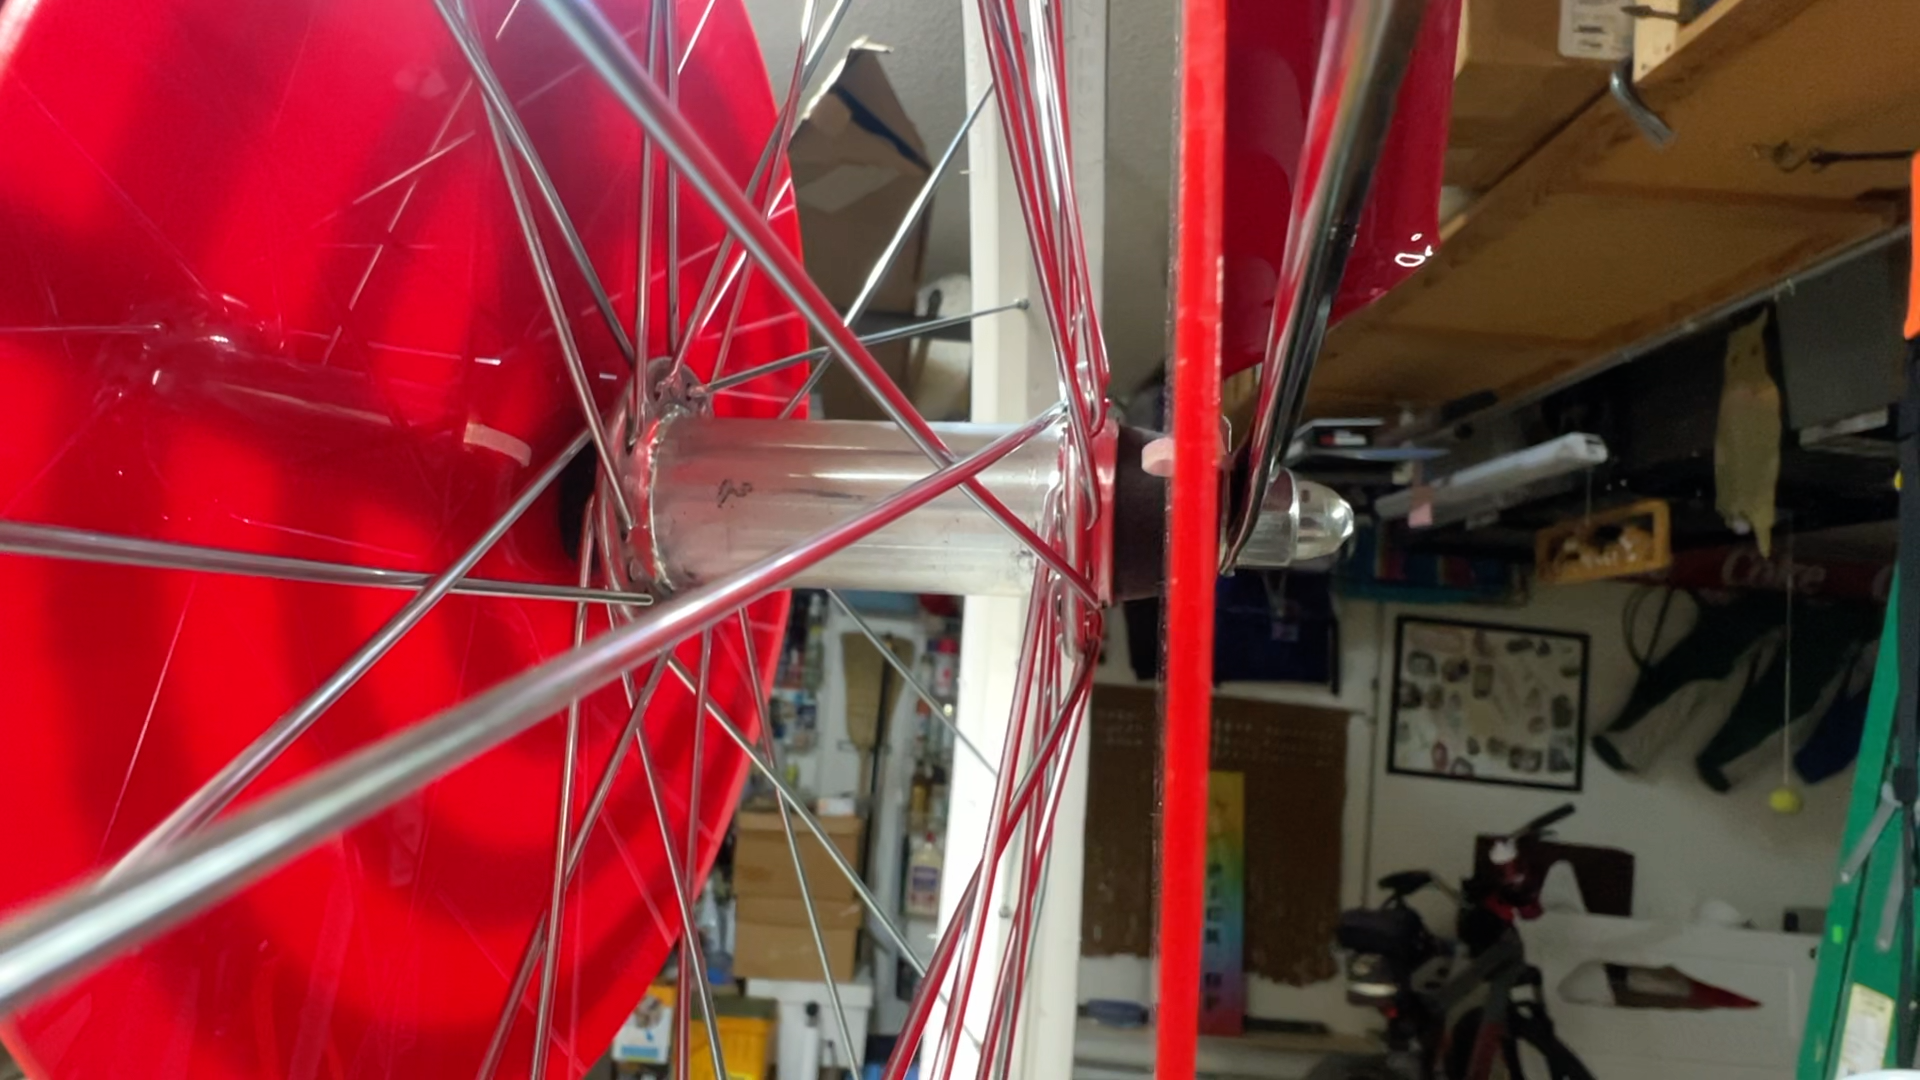
Apply the white vinyl decal to the red acrylic circles. Then use an x-acto knife to cut away the extra sticker material.
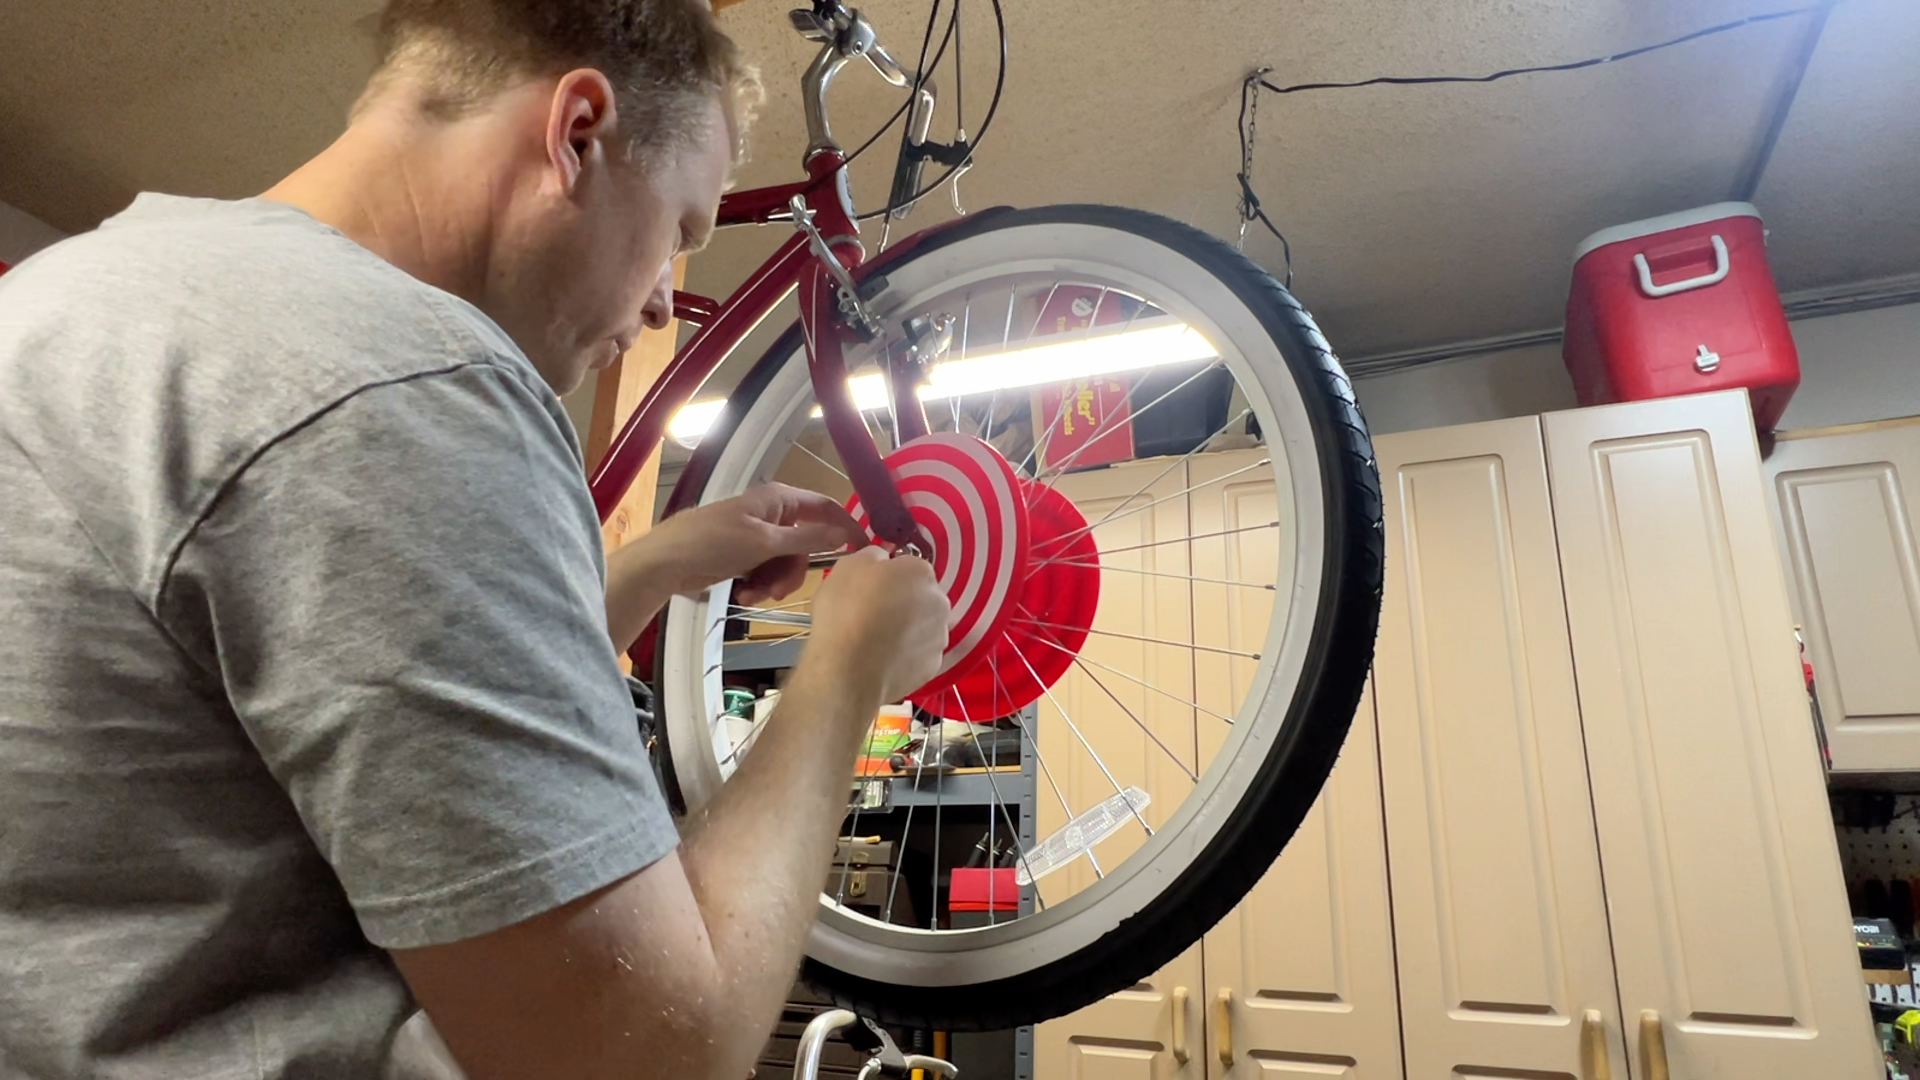
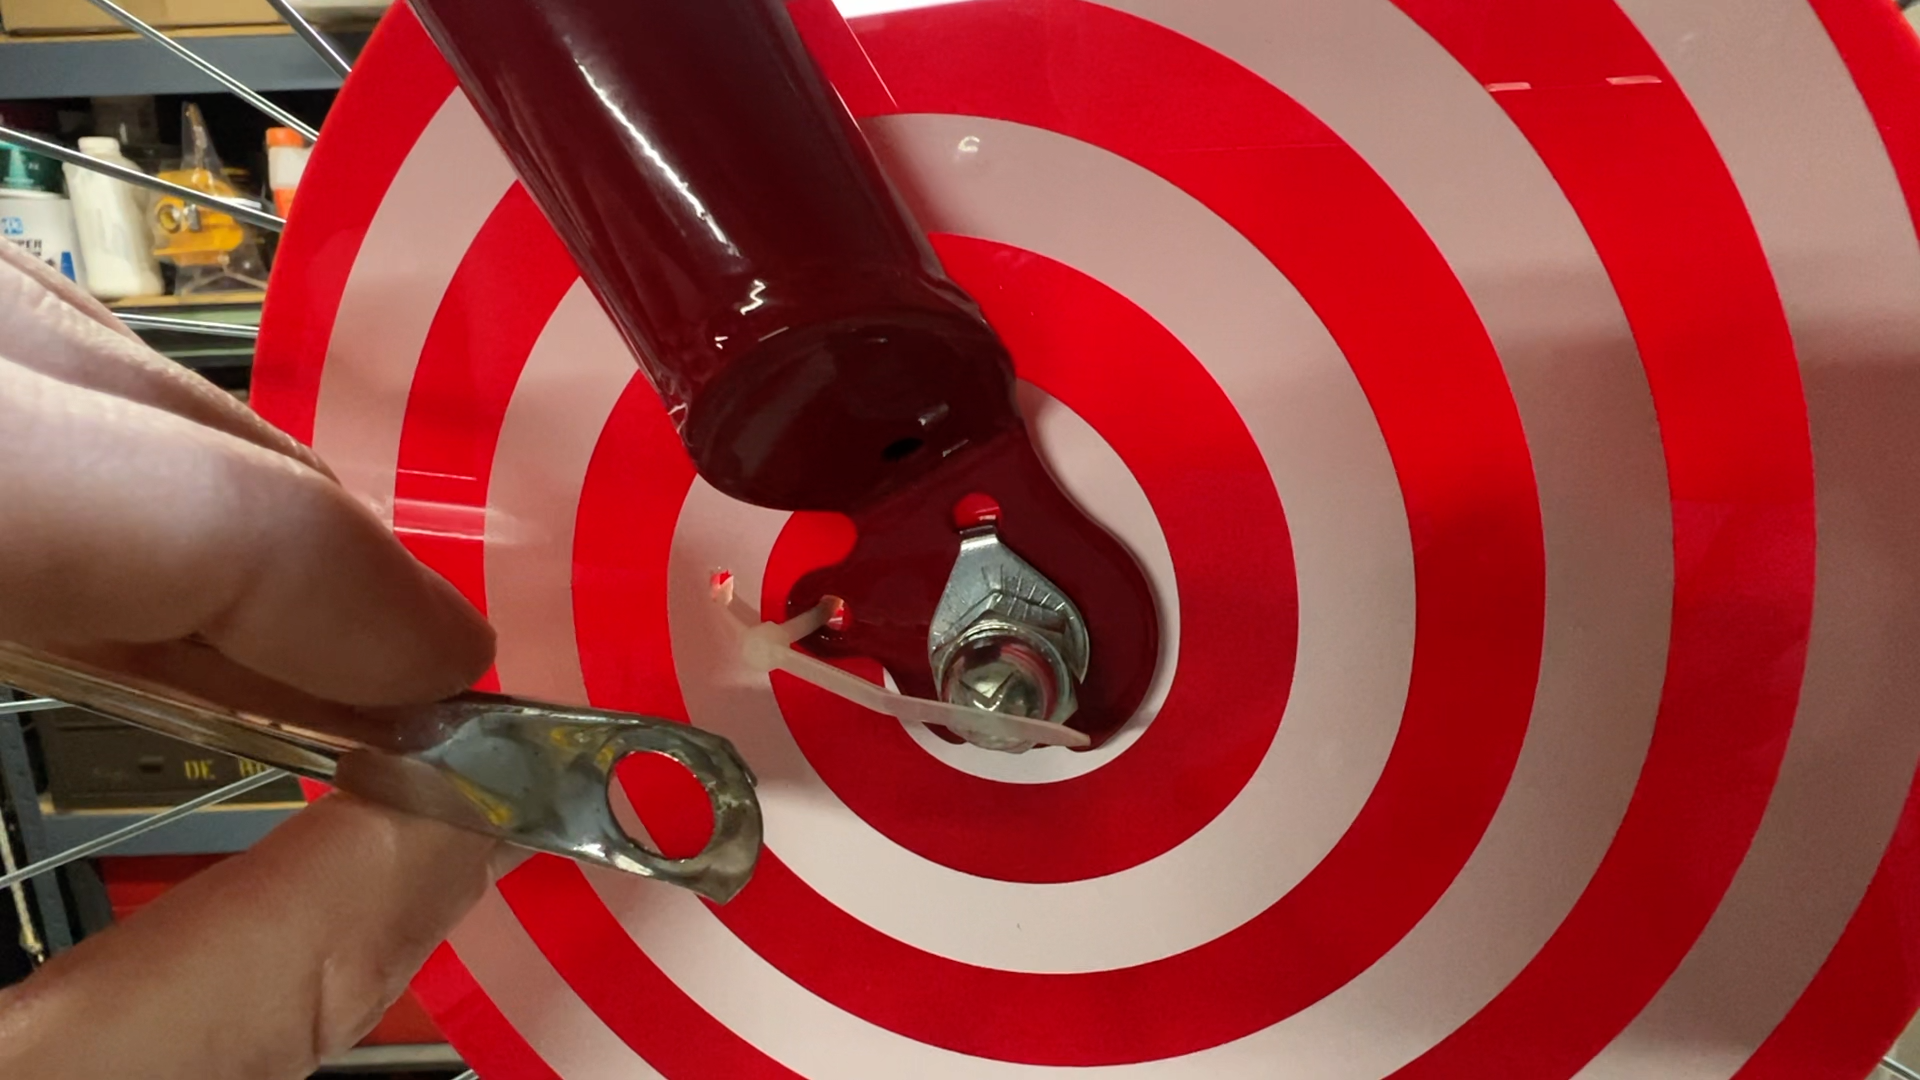
To install, remove the front wheel and slide the spiral between the fork and the wheel.
Use the small existing hole in the fork and through the attachment point hole in the acrylic circle to secure it with a zip tie.
Double-check for clearance so it doesn’t interfere with the spinning wheel.
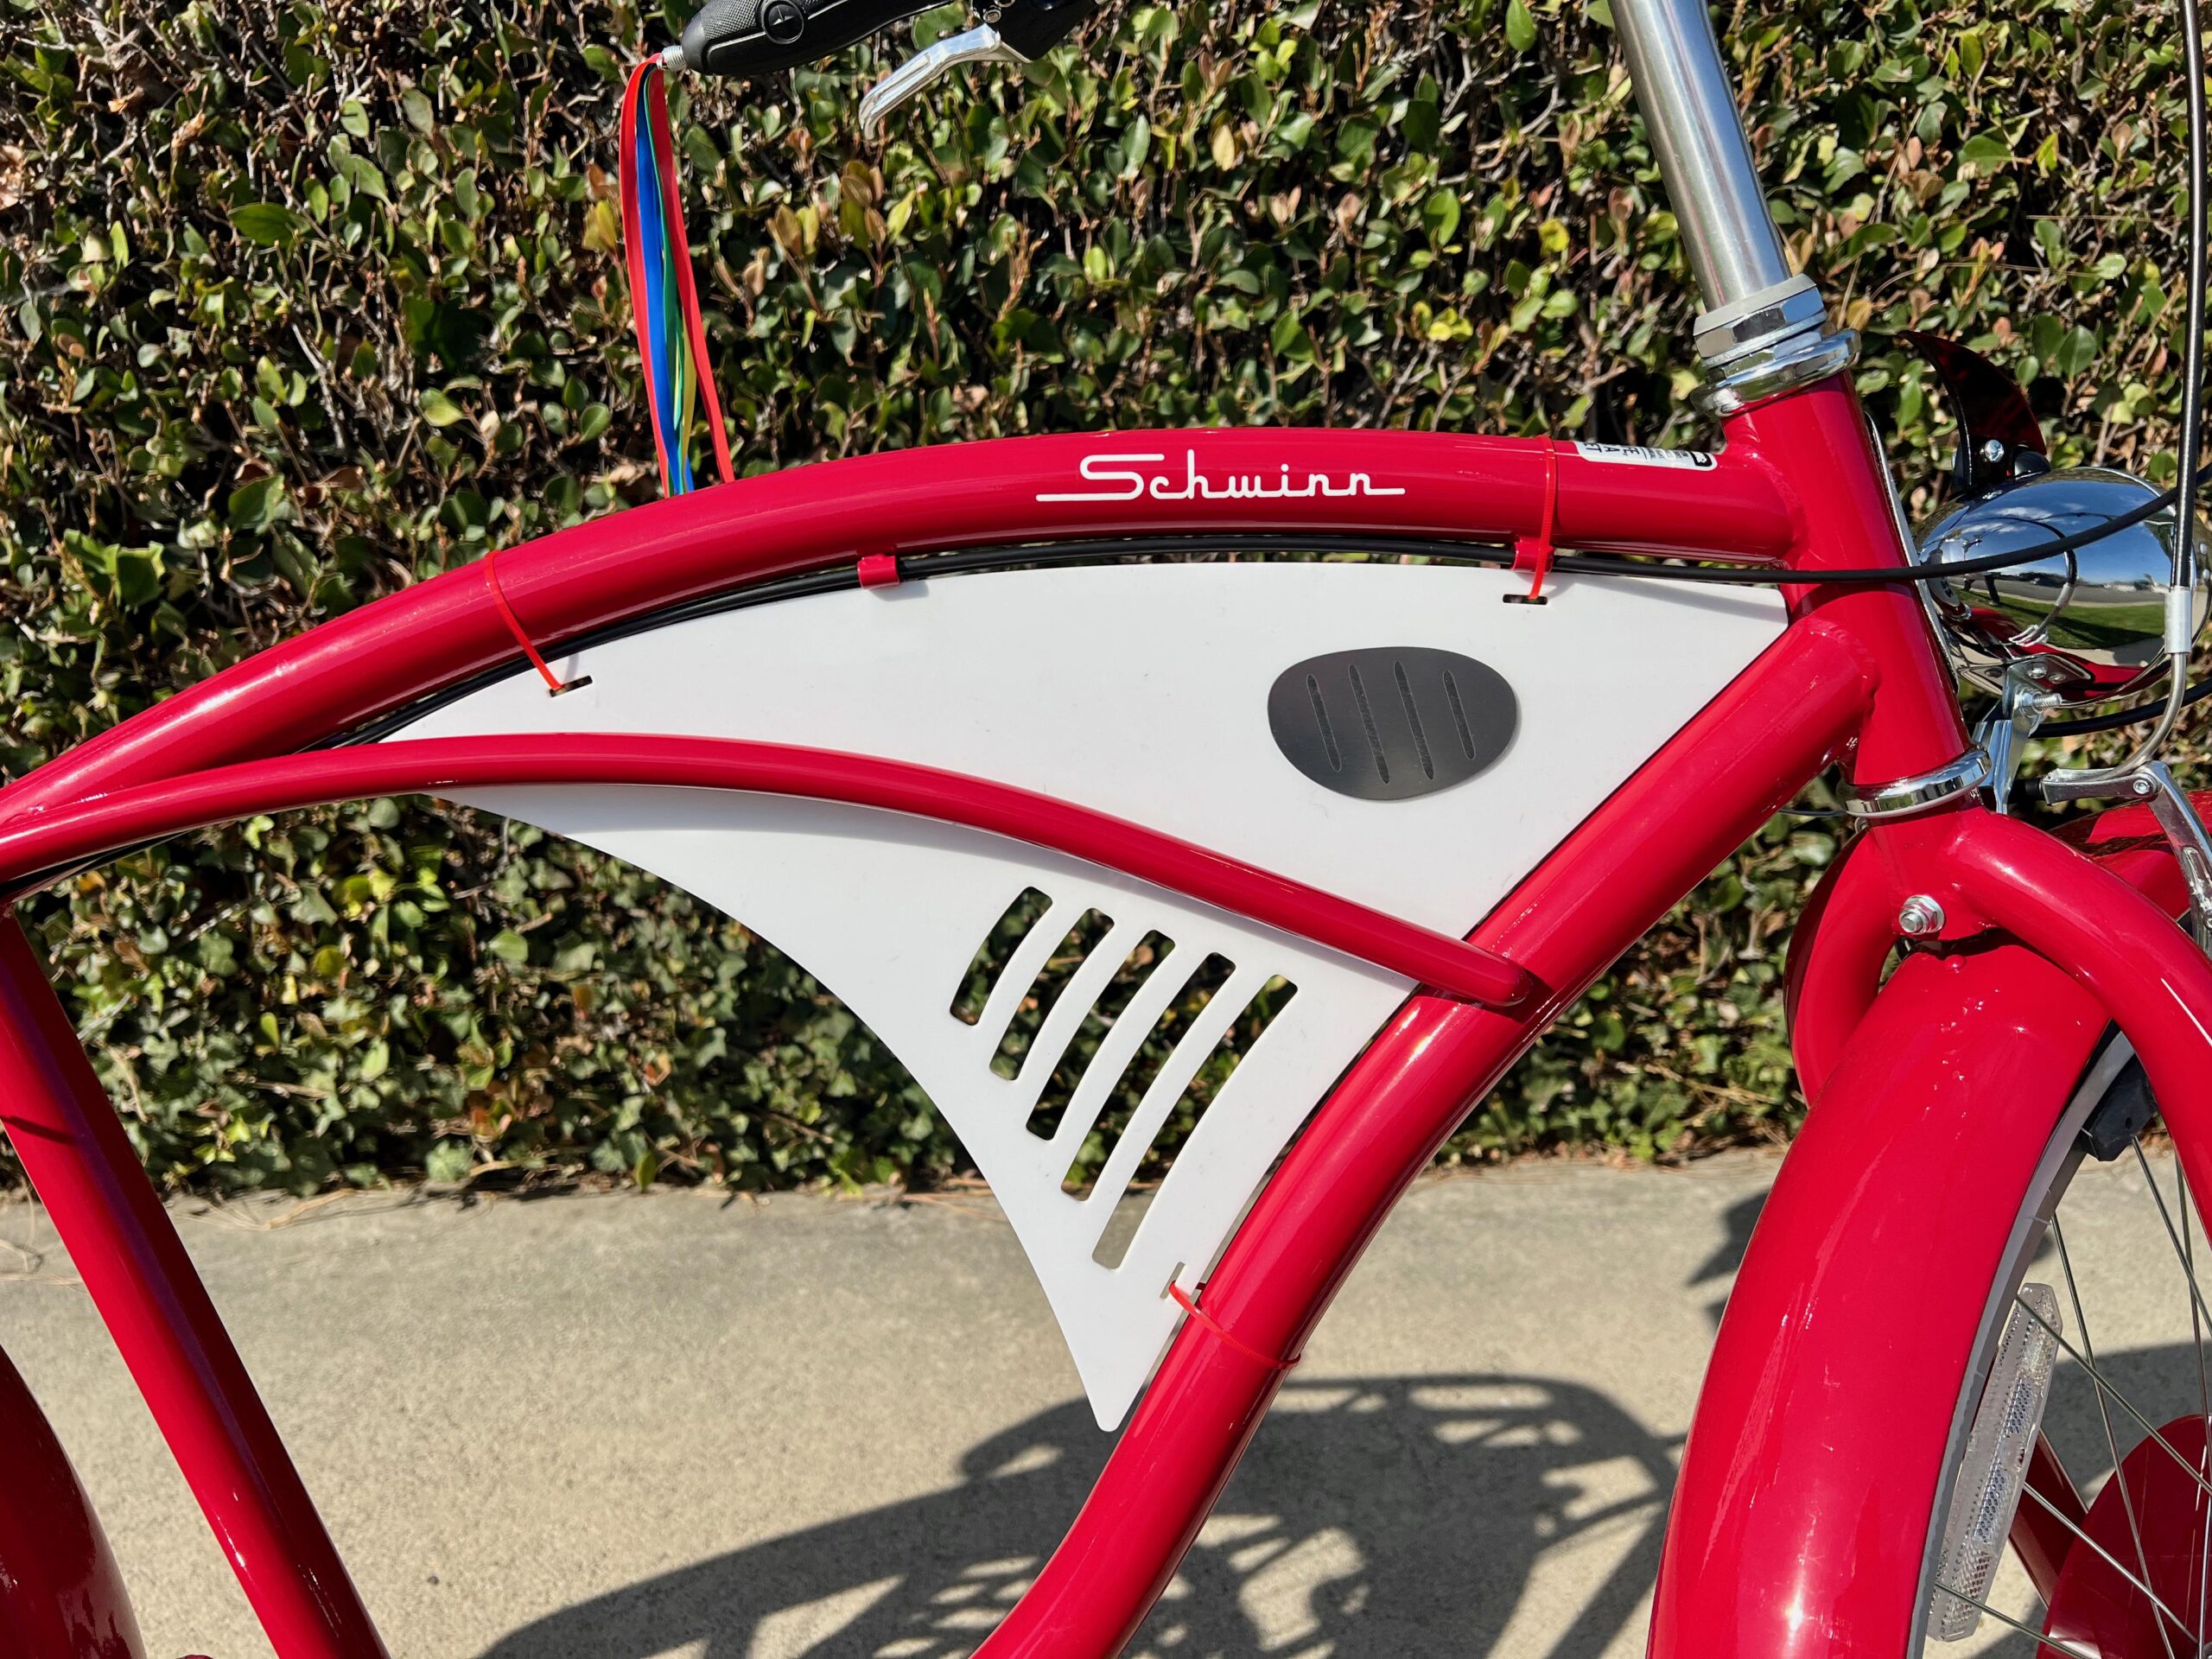
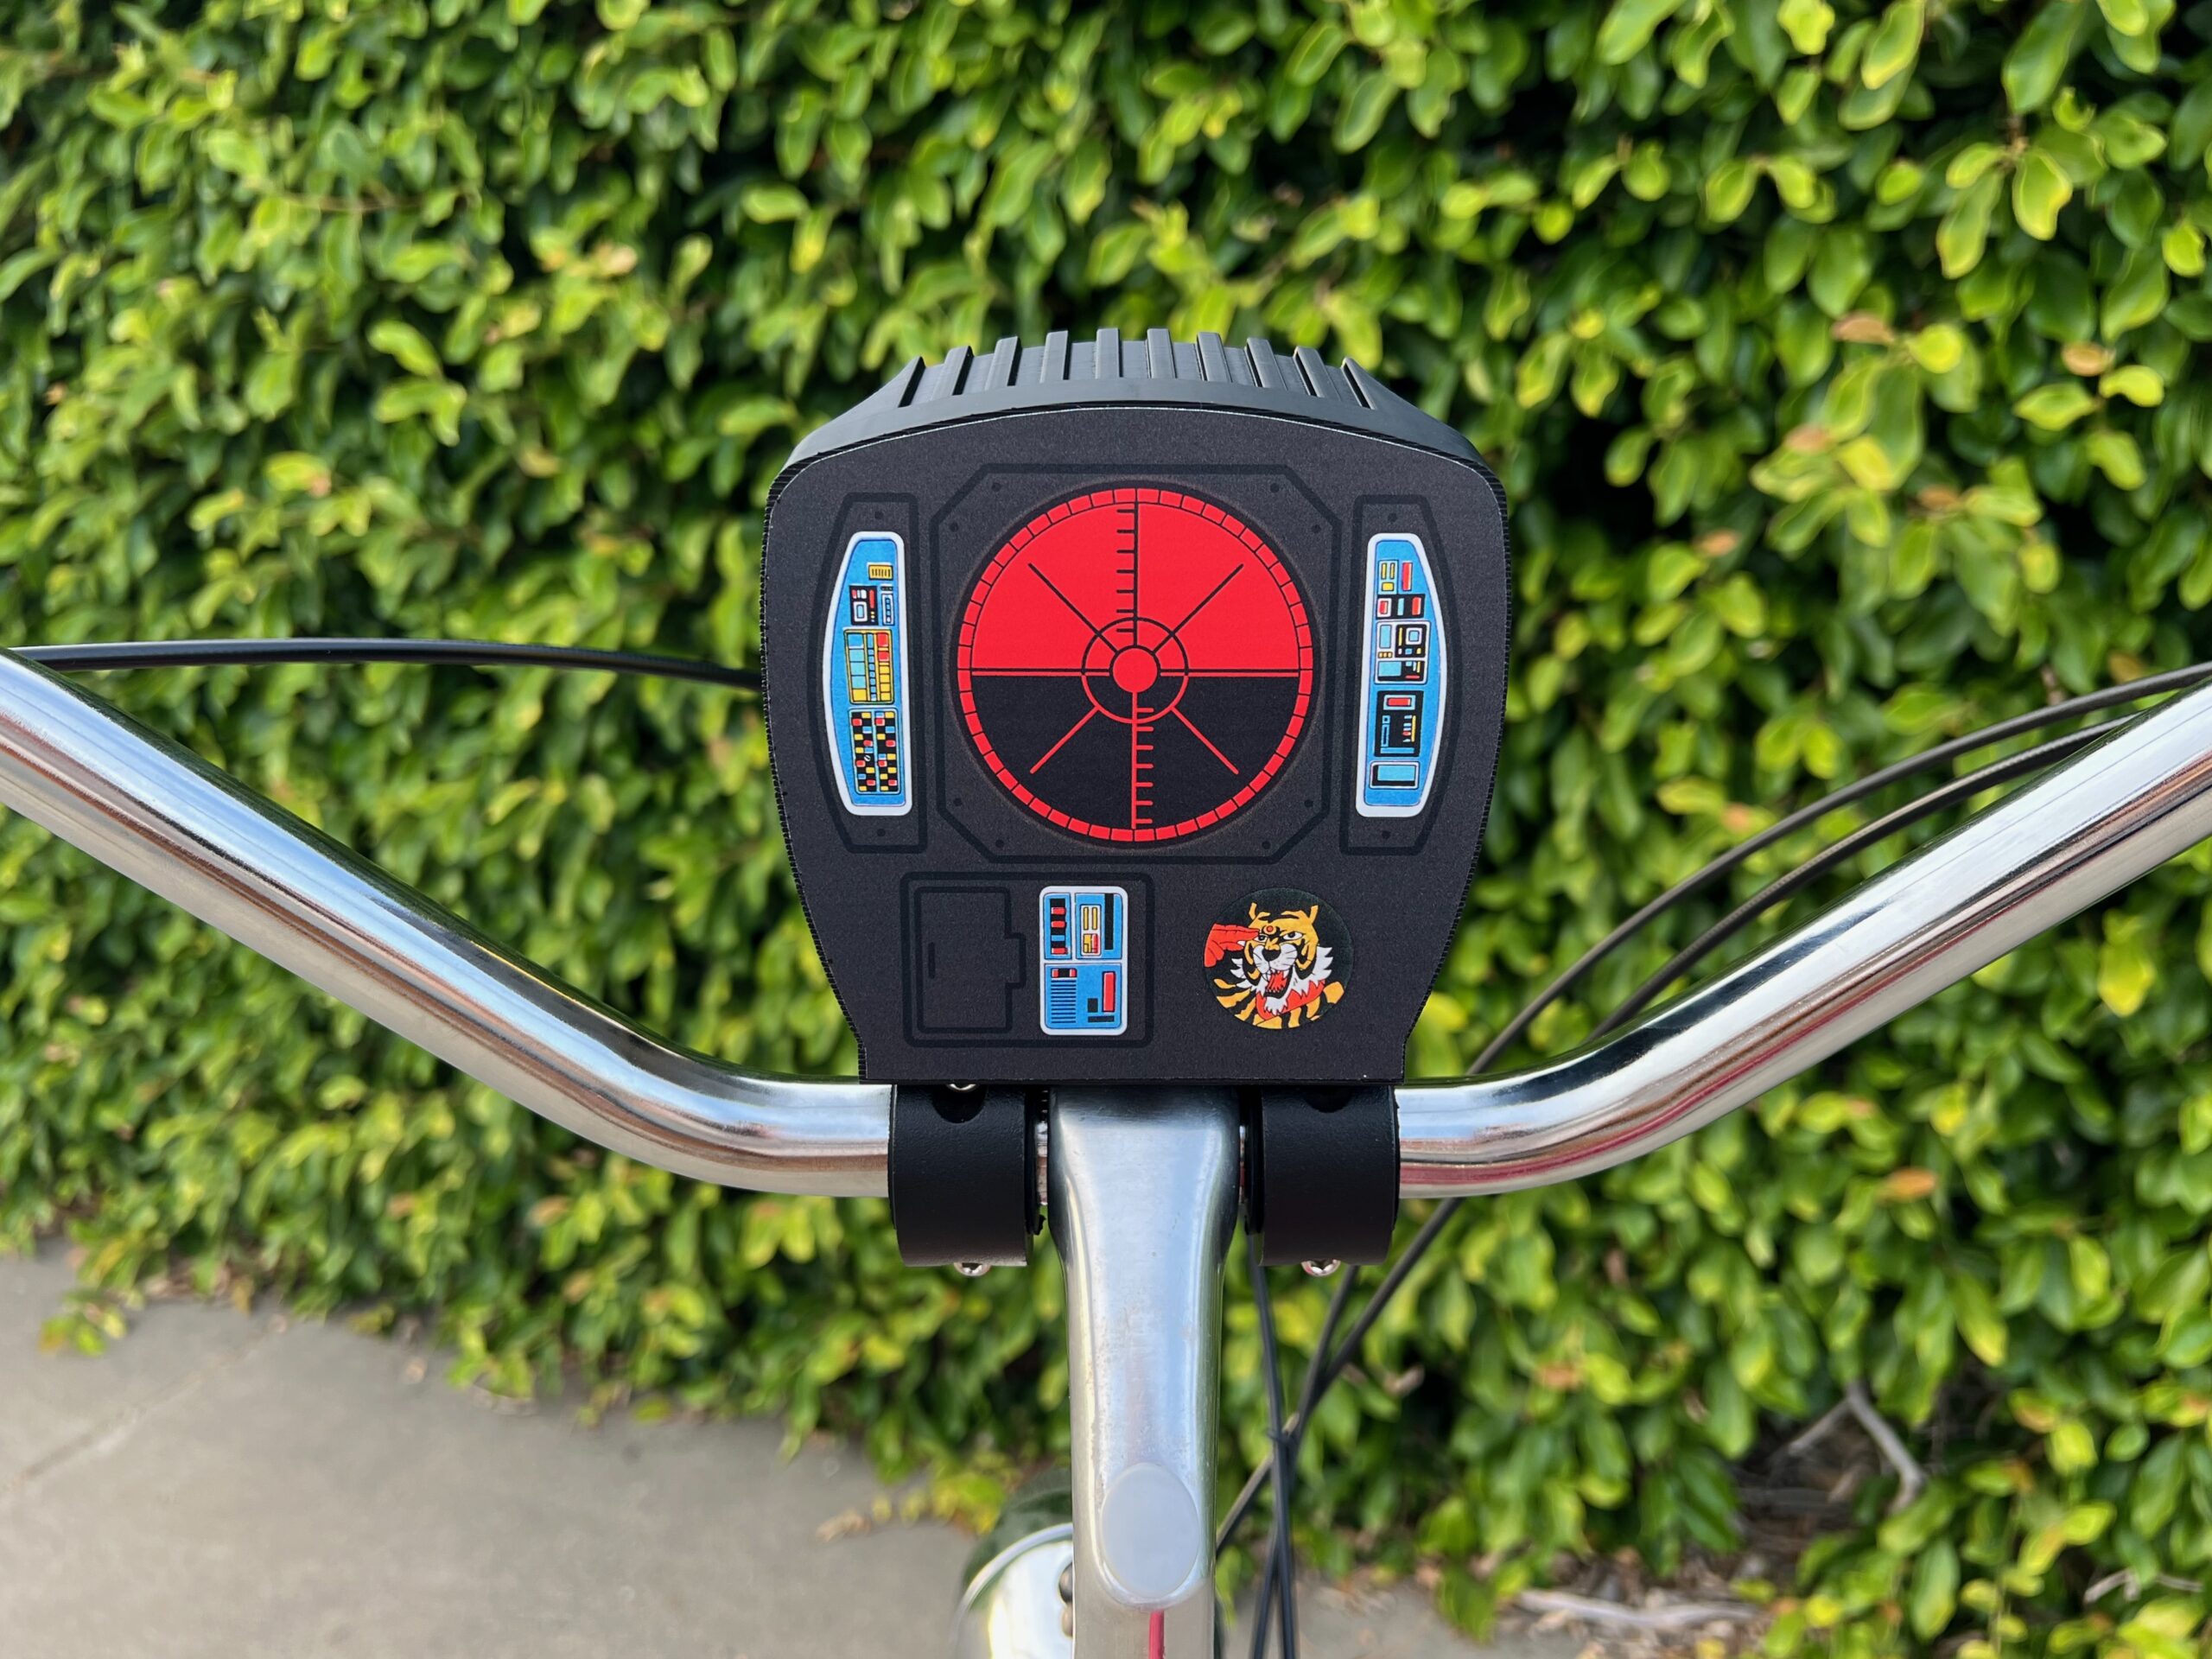
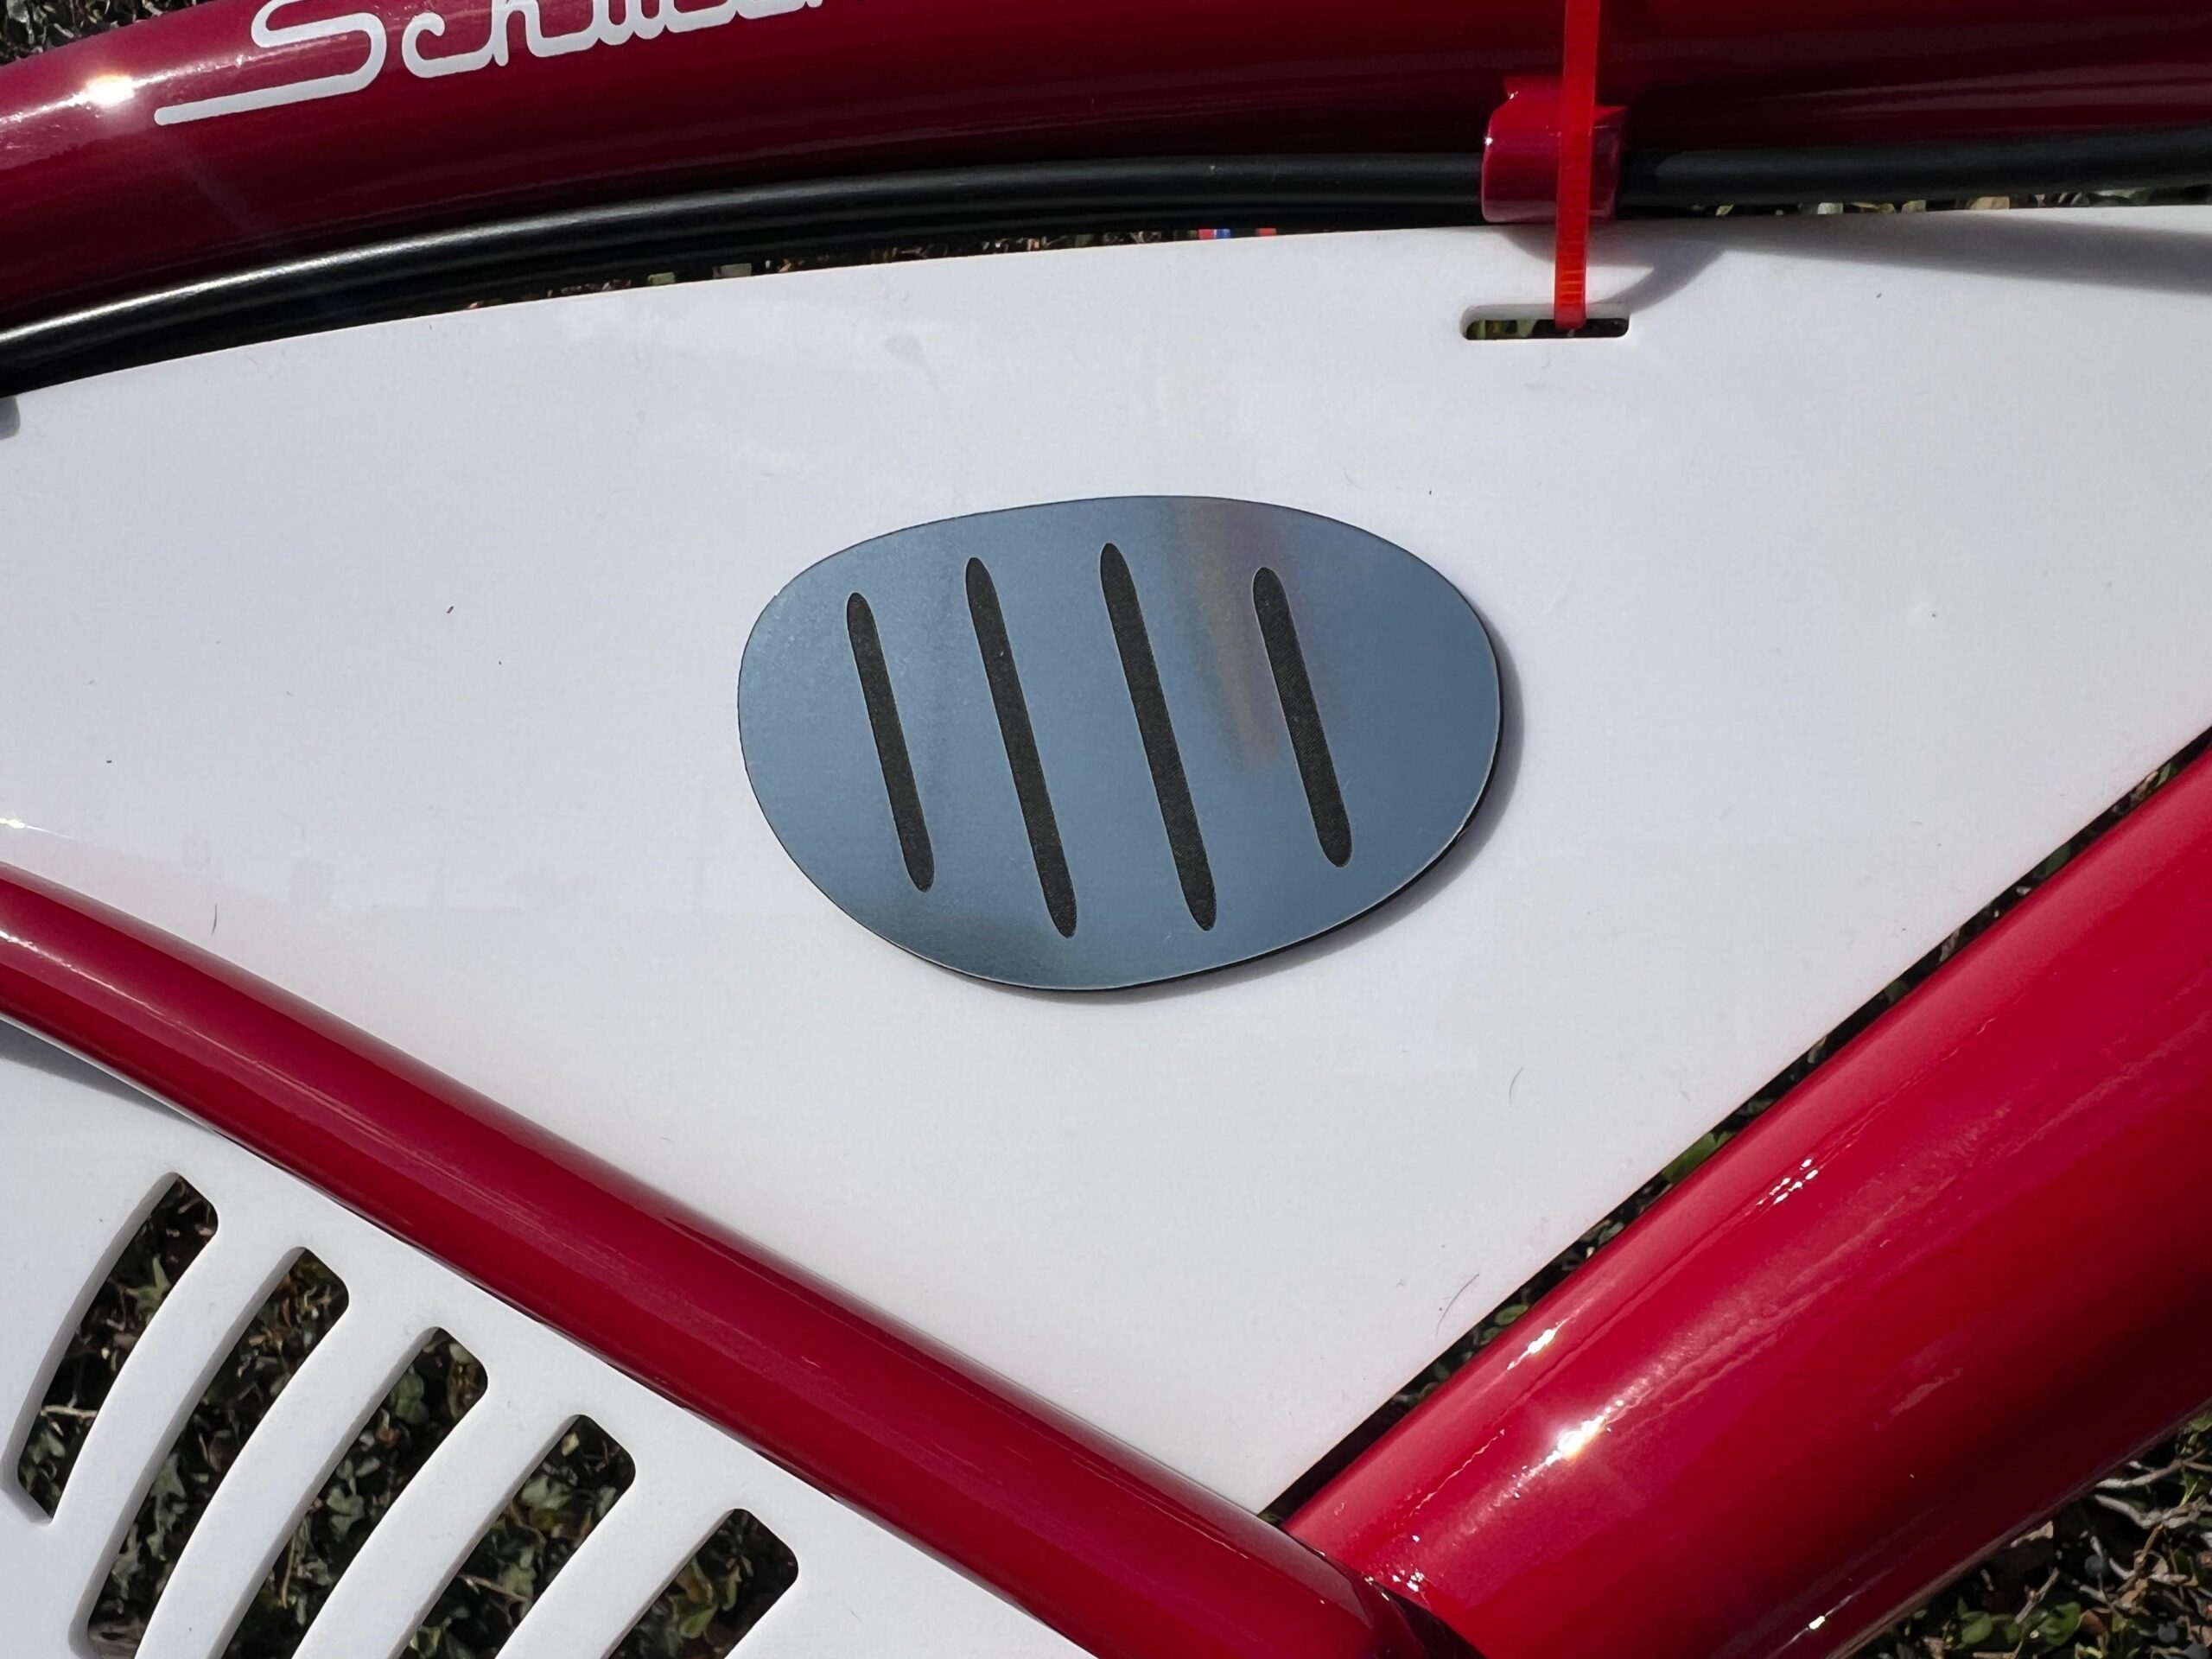
Step 4: Install the White Center Filler Piece

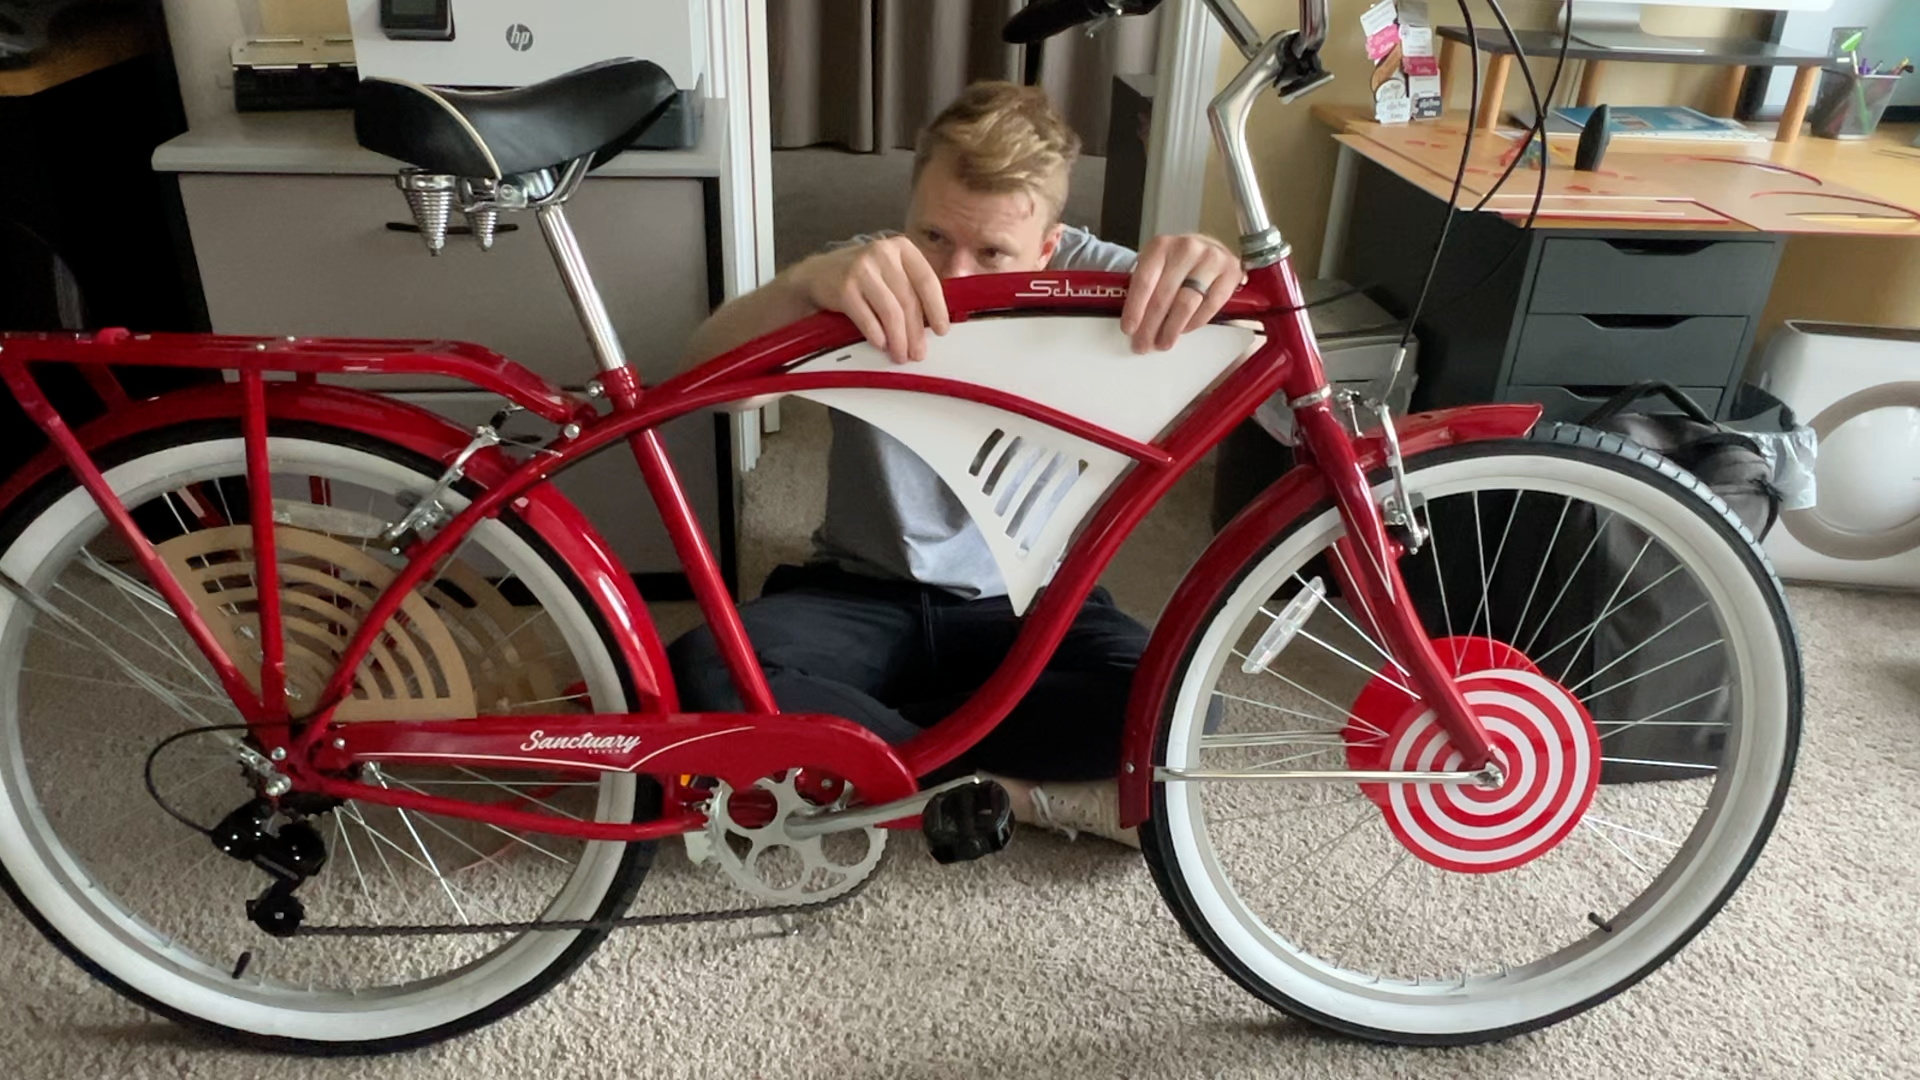
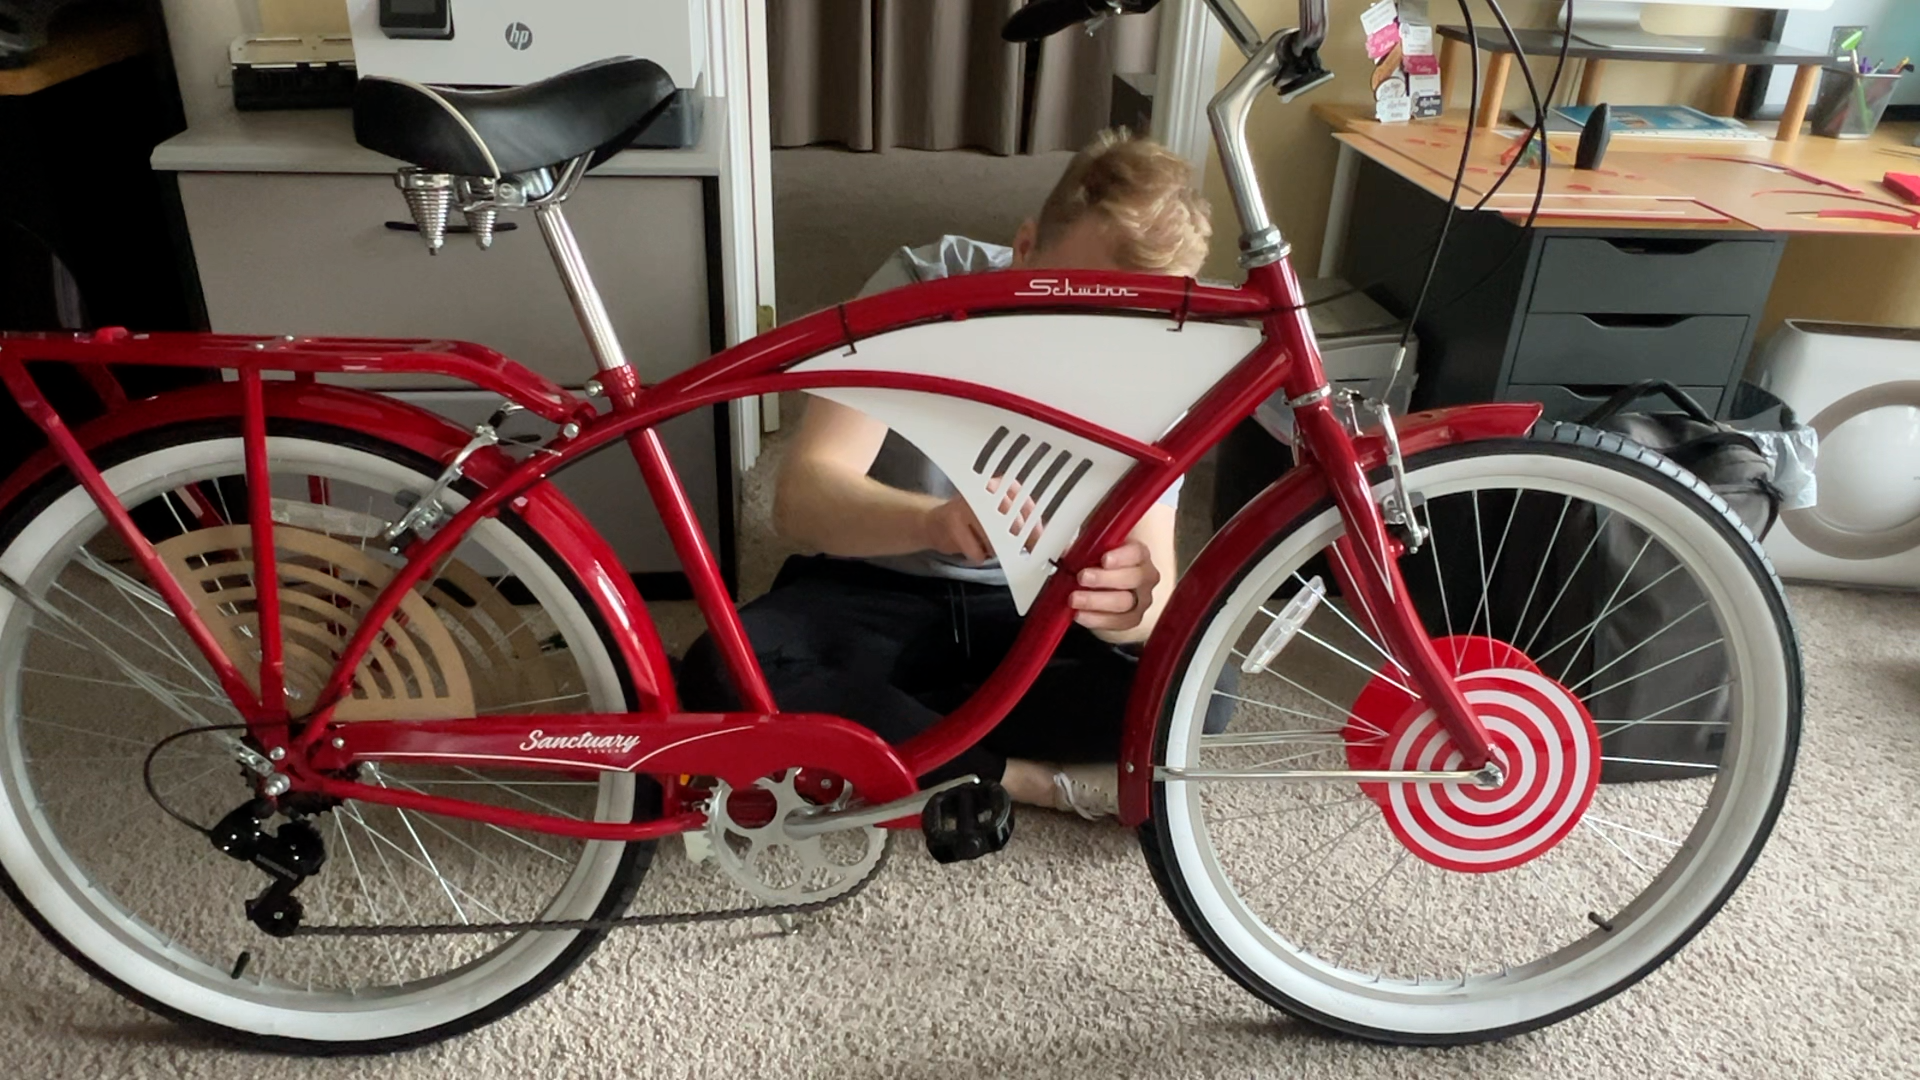
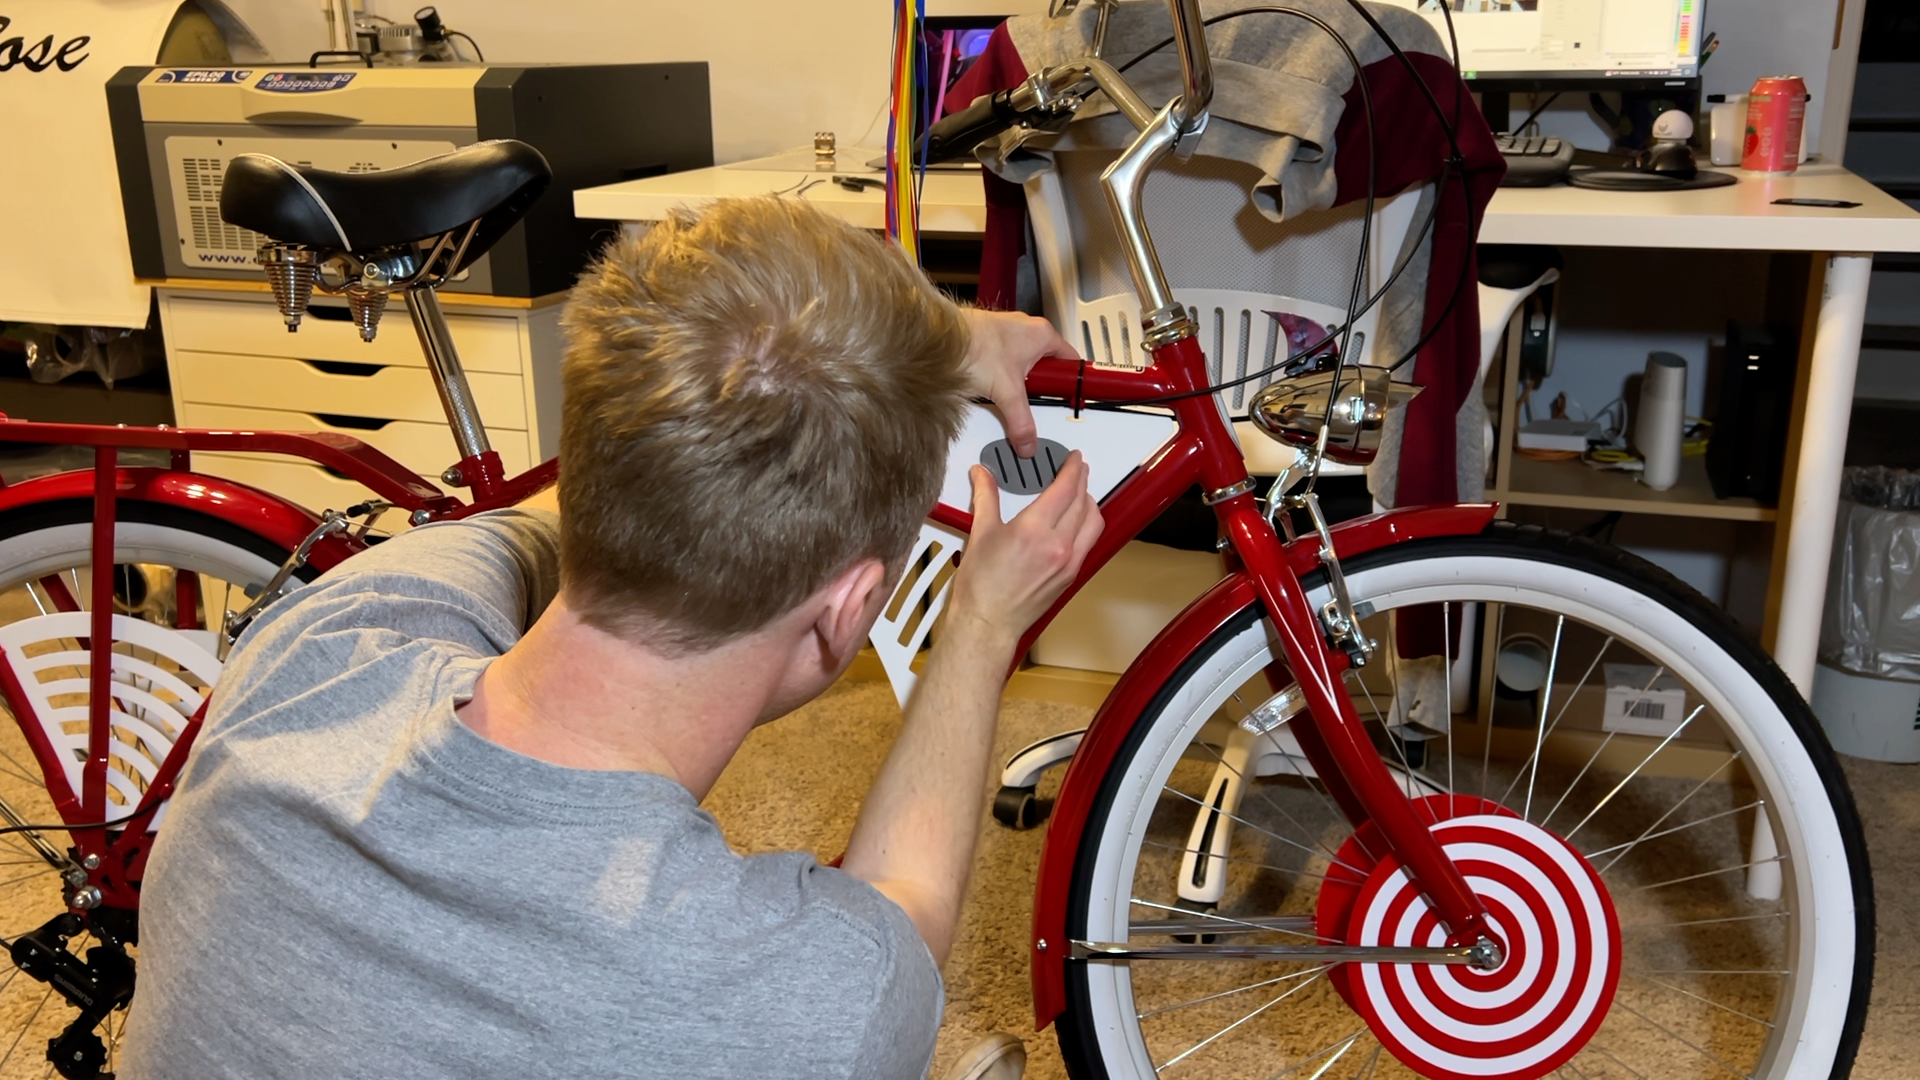
This slides between the bike’s crossbars.
Originally, I used red Velcro strips for easy removal (to fit on my bike rack), but they stood out too much.
Instead, I switched to red zip ties, which blend in better, and if I ever need to remove it, I can just snip them and replace them.
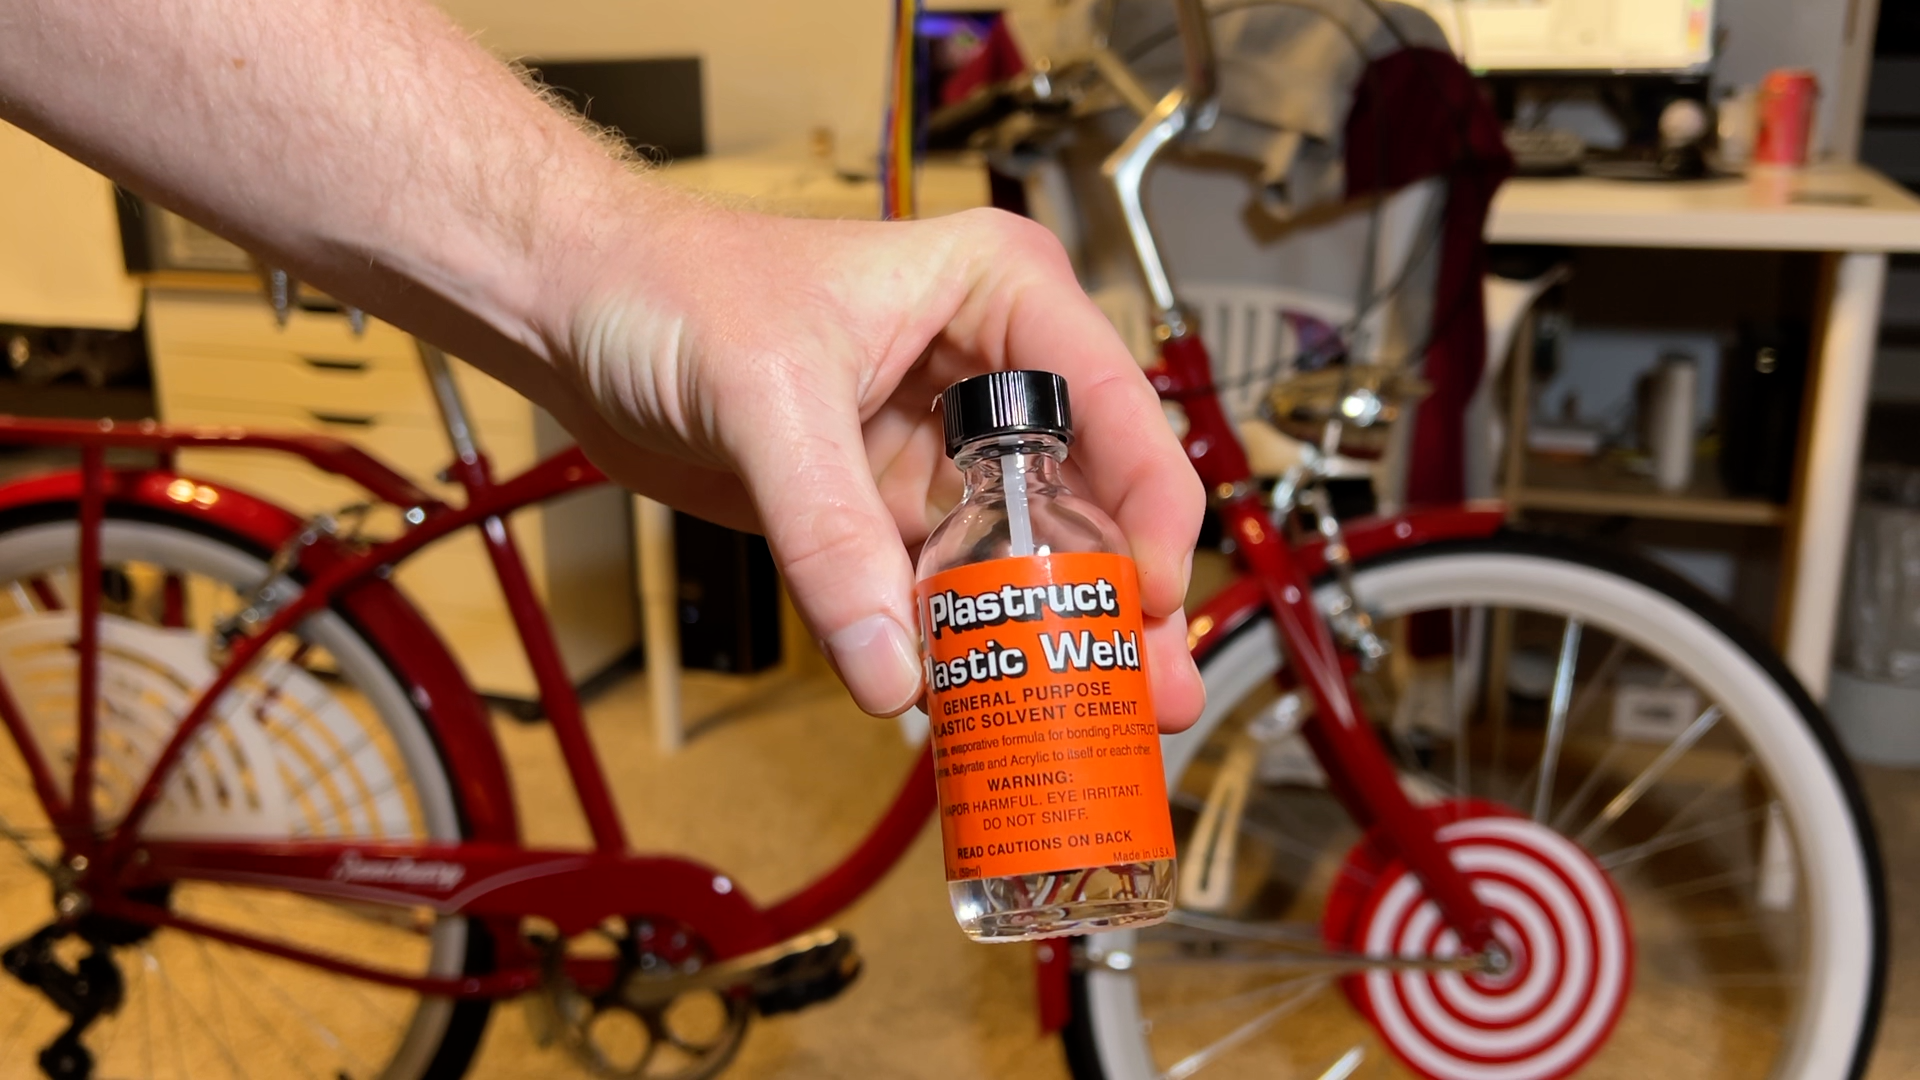
Then you’ll want to attach the Metallic Panel to give the center section that classic Pee-wee look.
I used plastic weld for a super-strong bond, but other adhesives should work too.
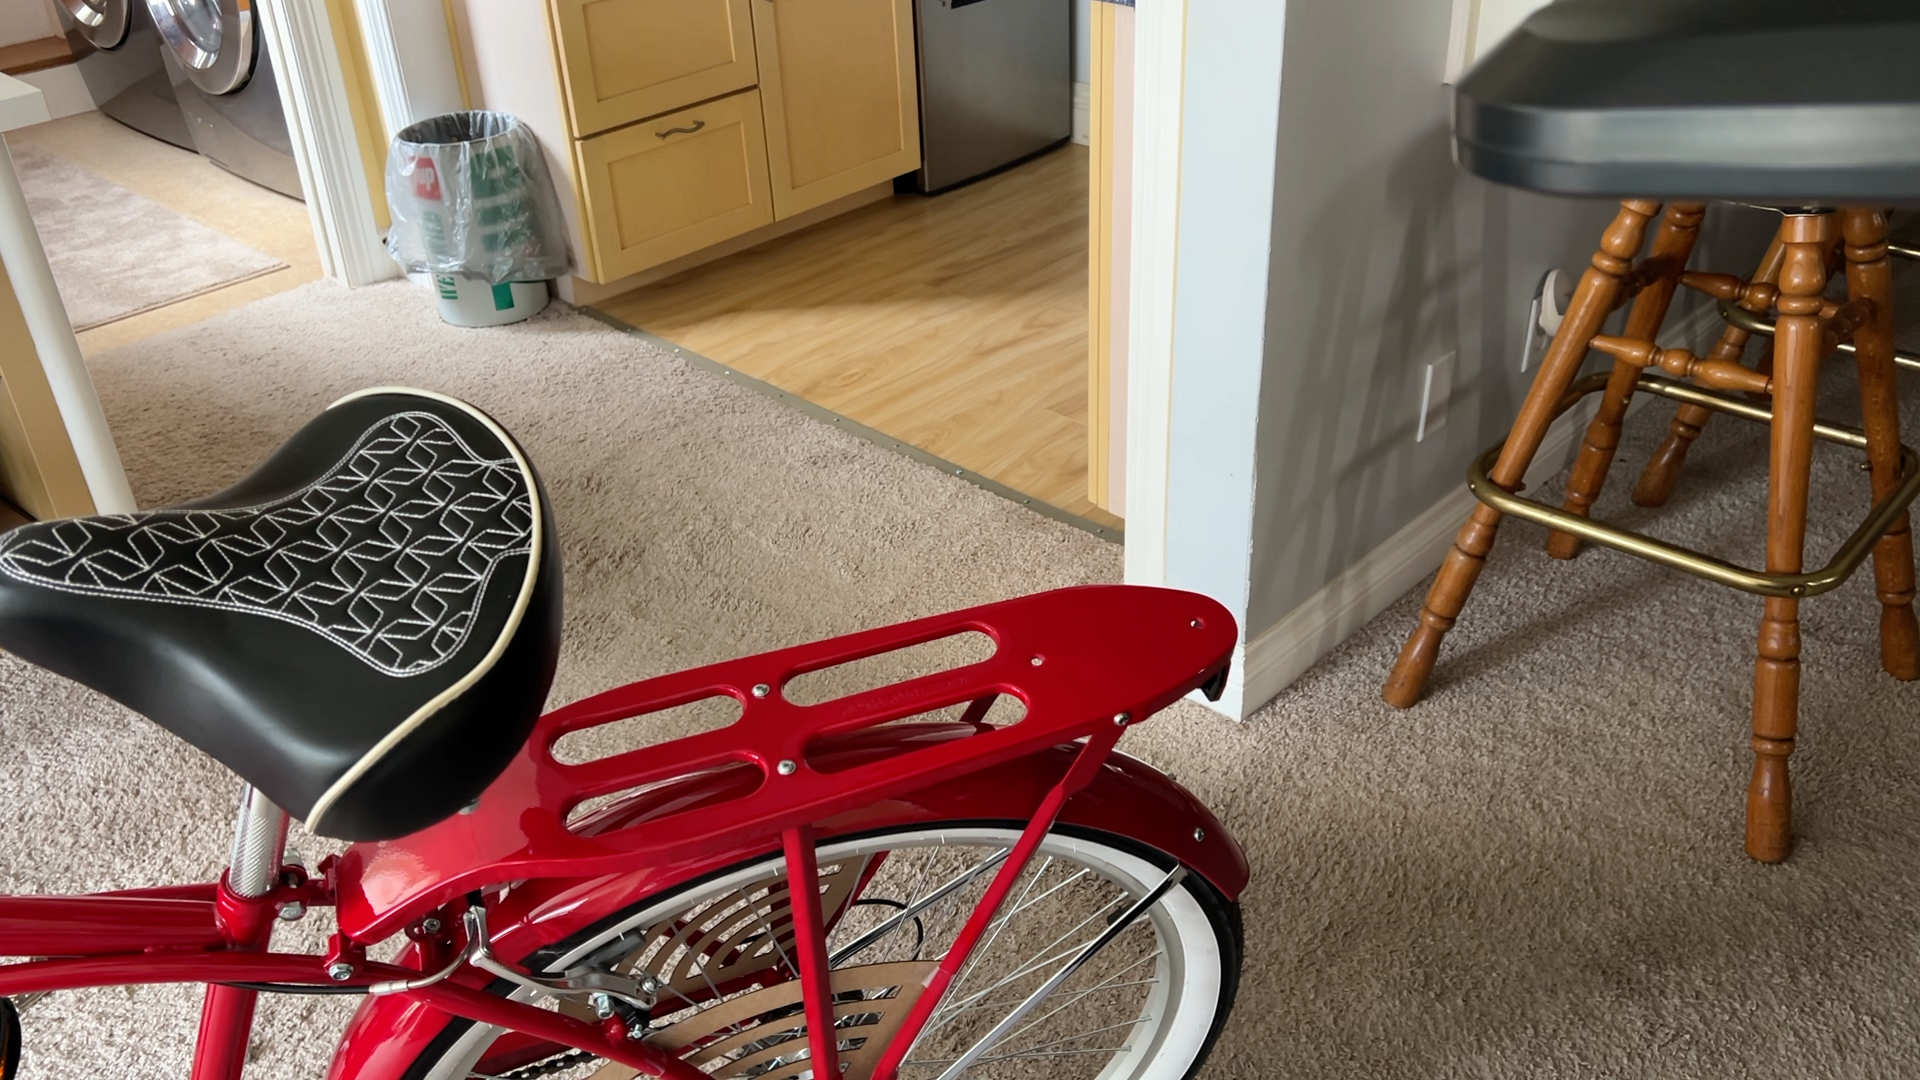
Step 5: Install the Rear Wheel Covers
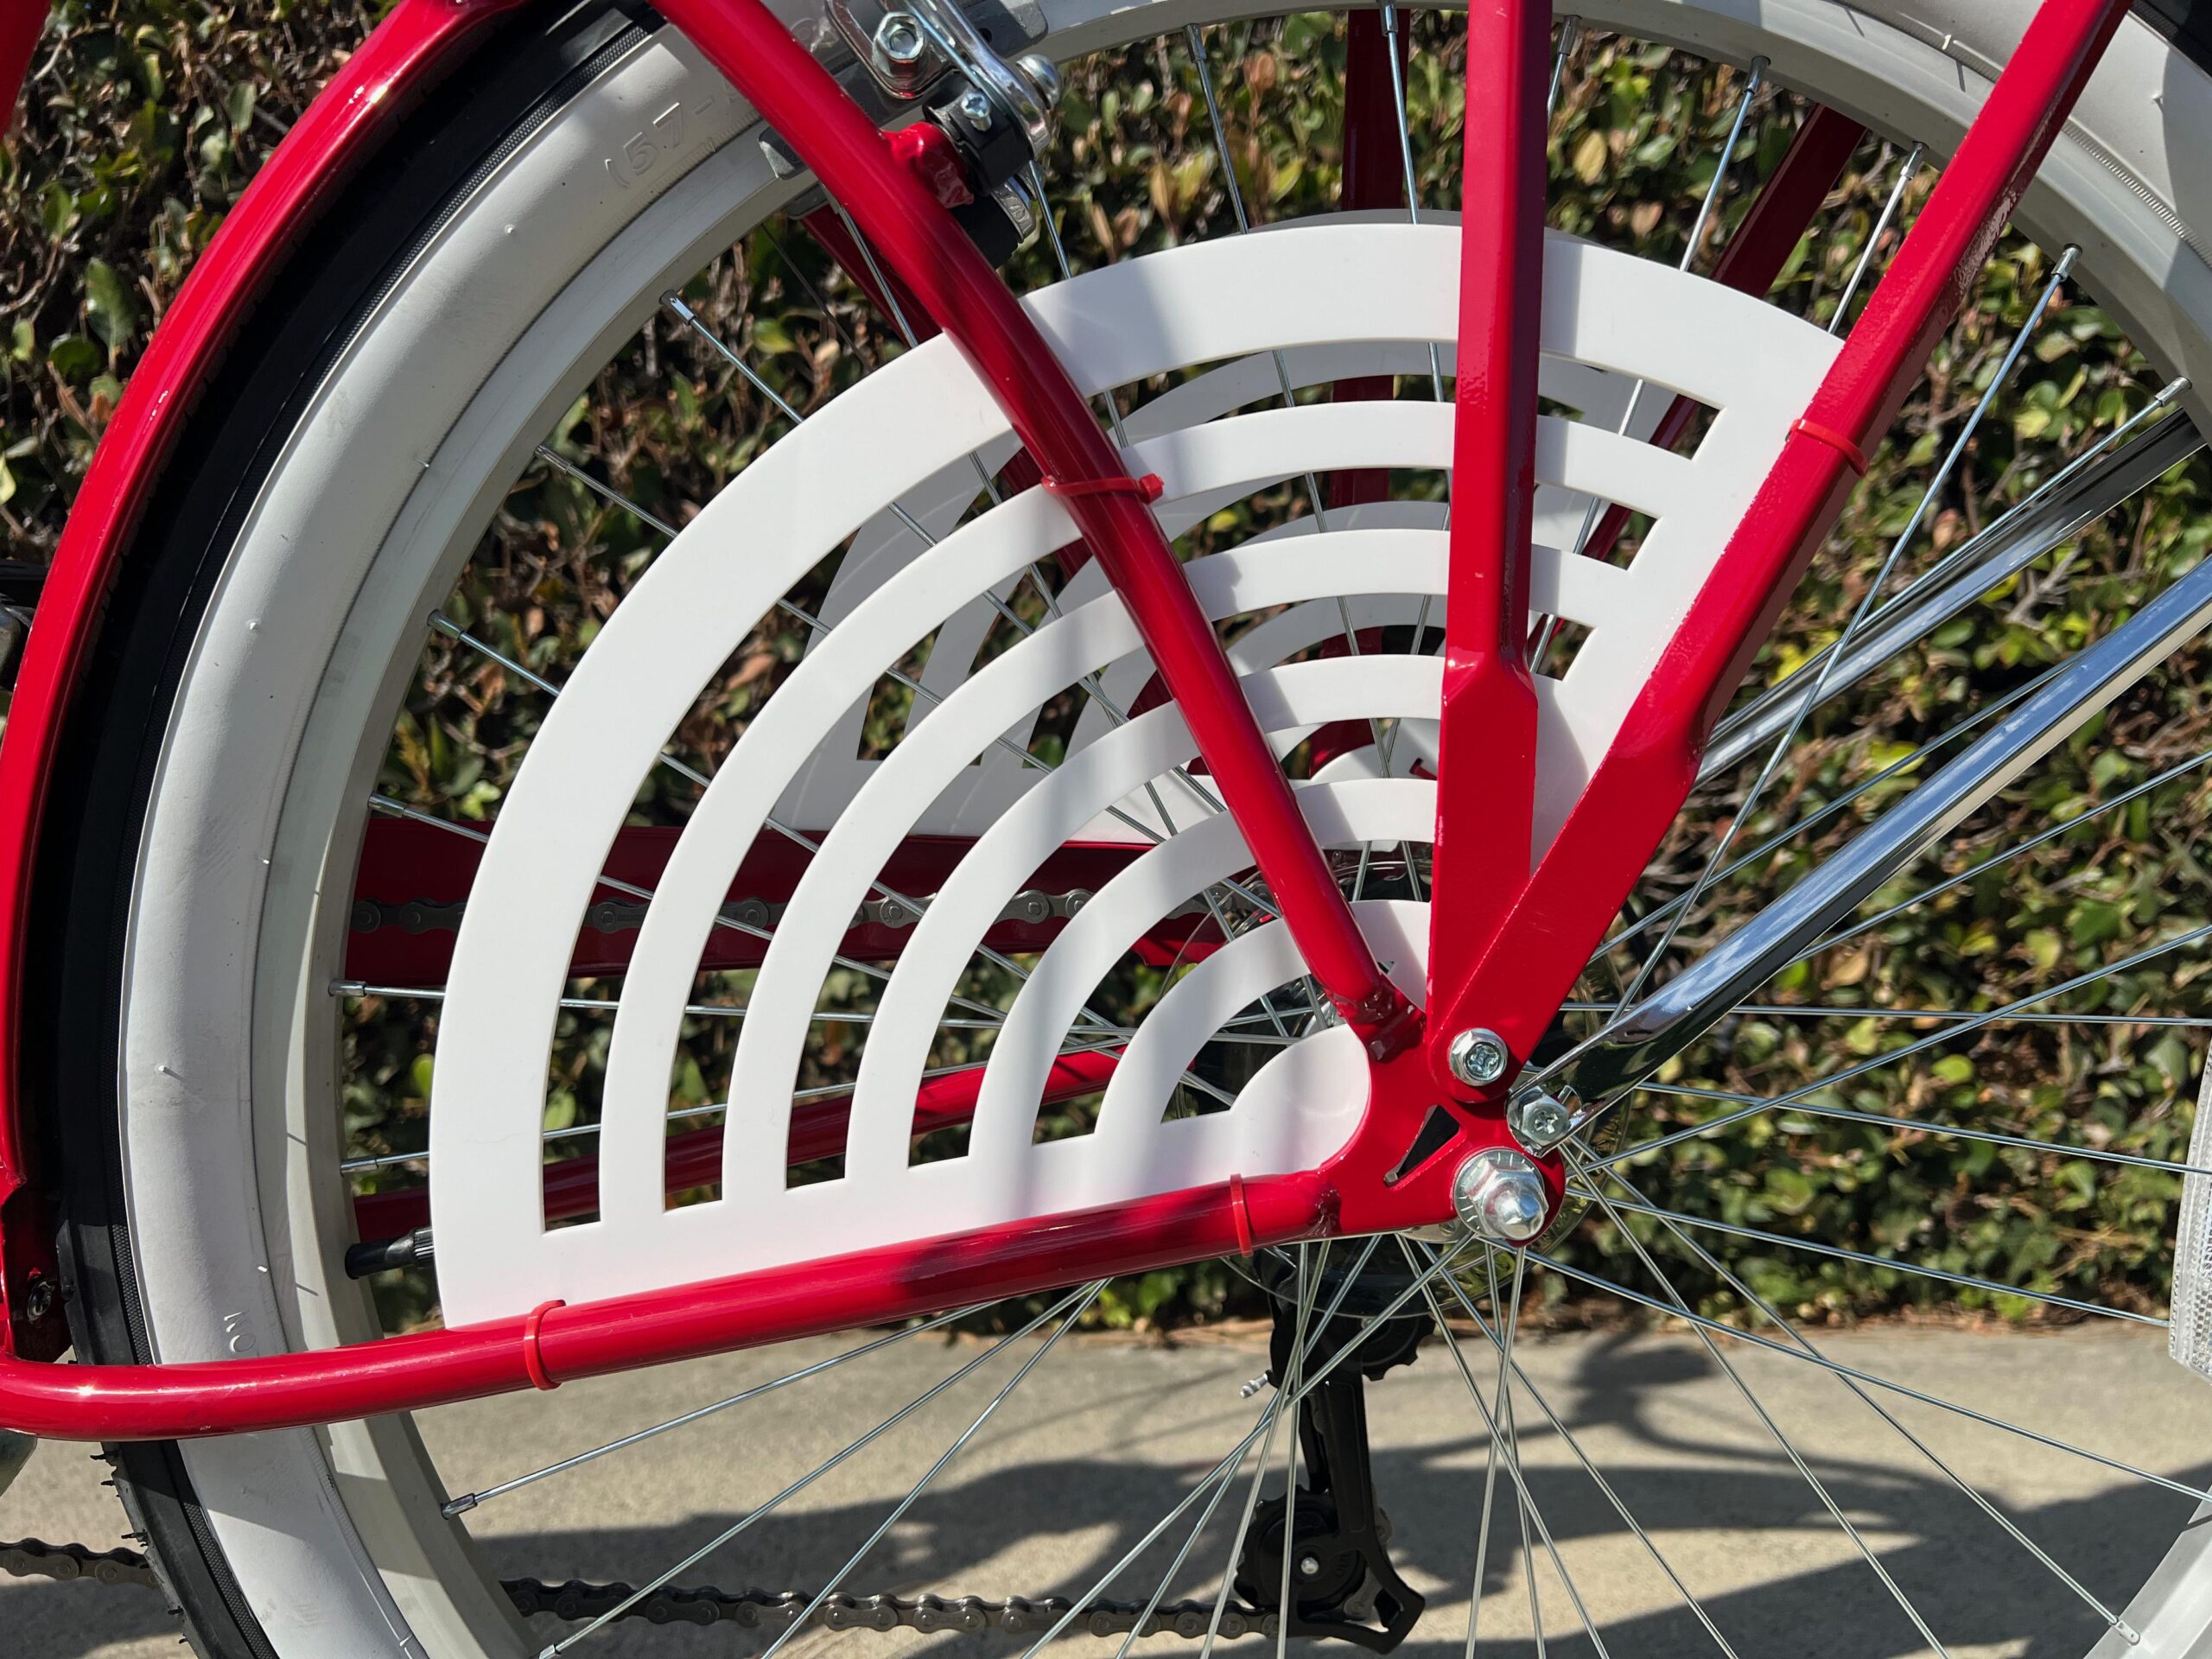
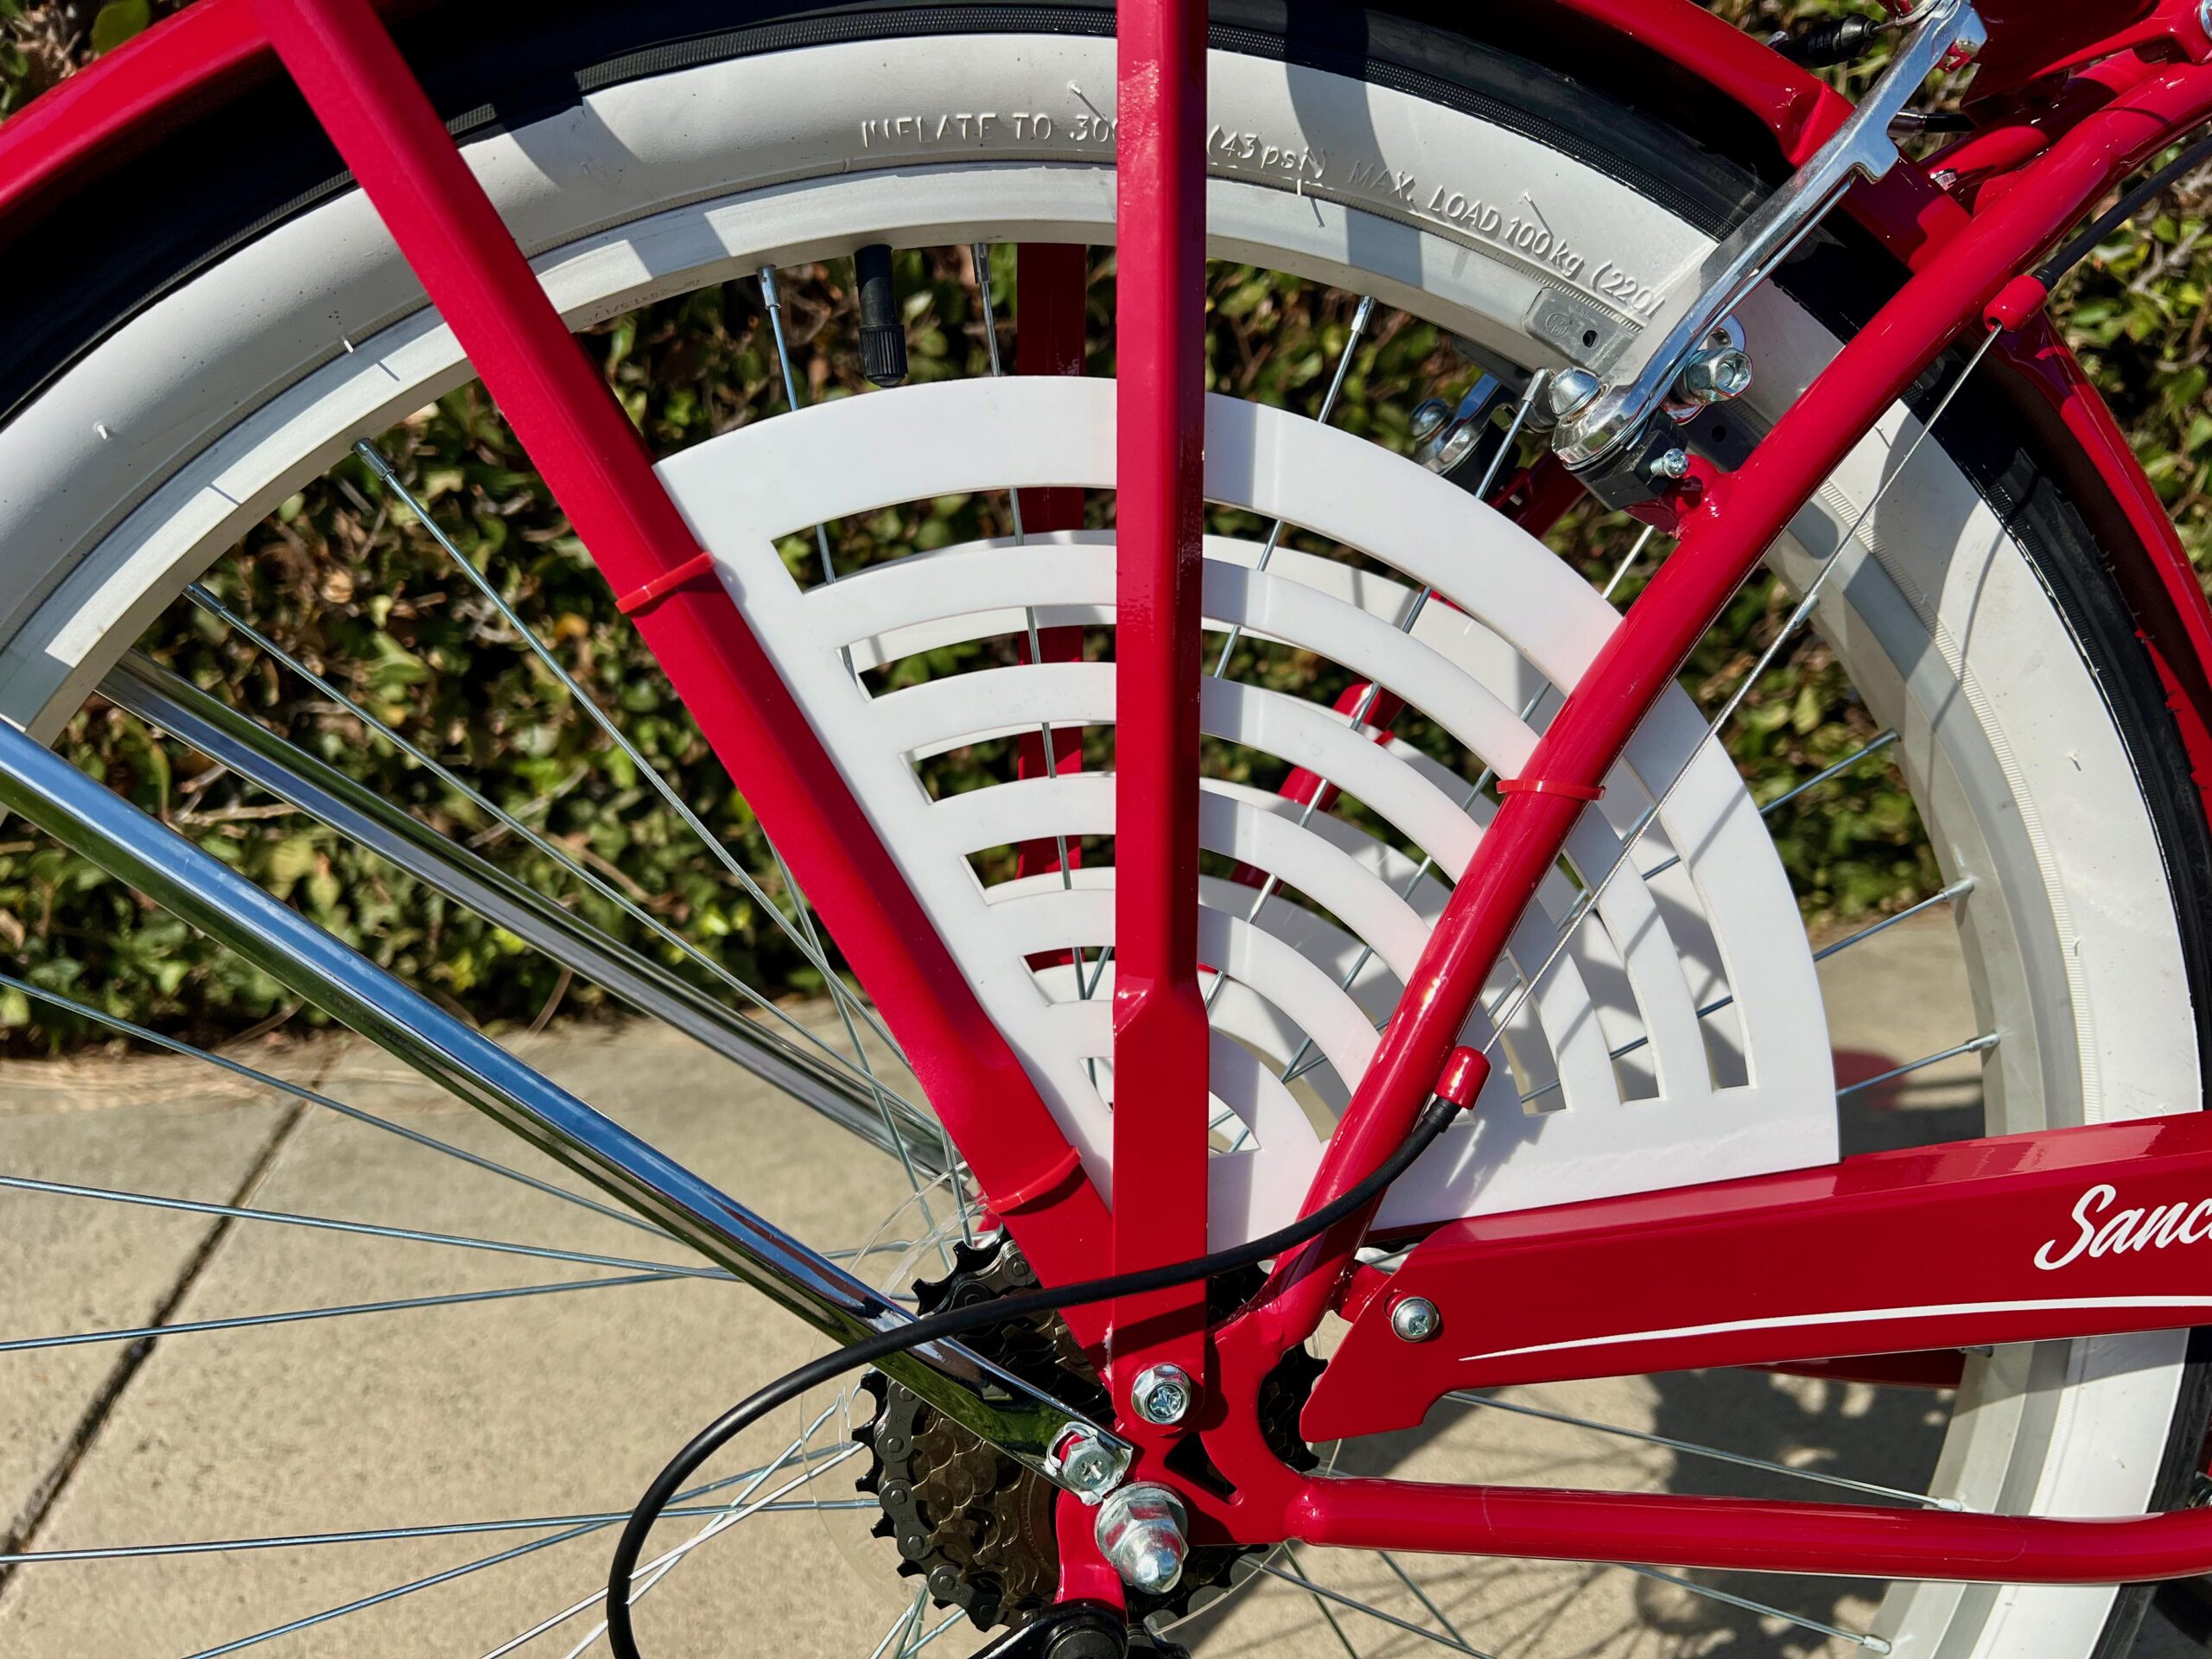
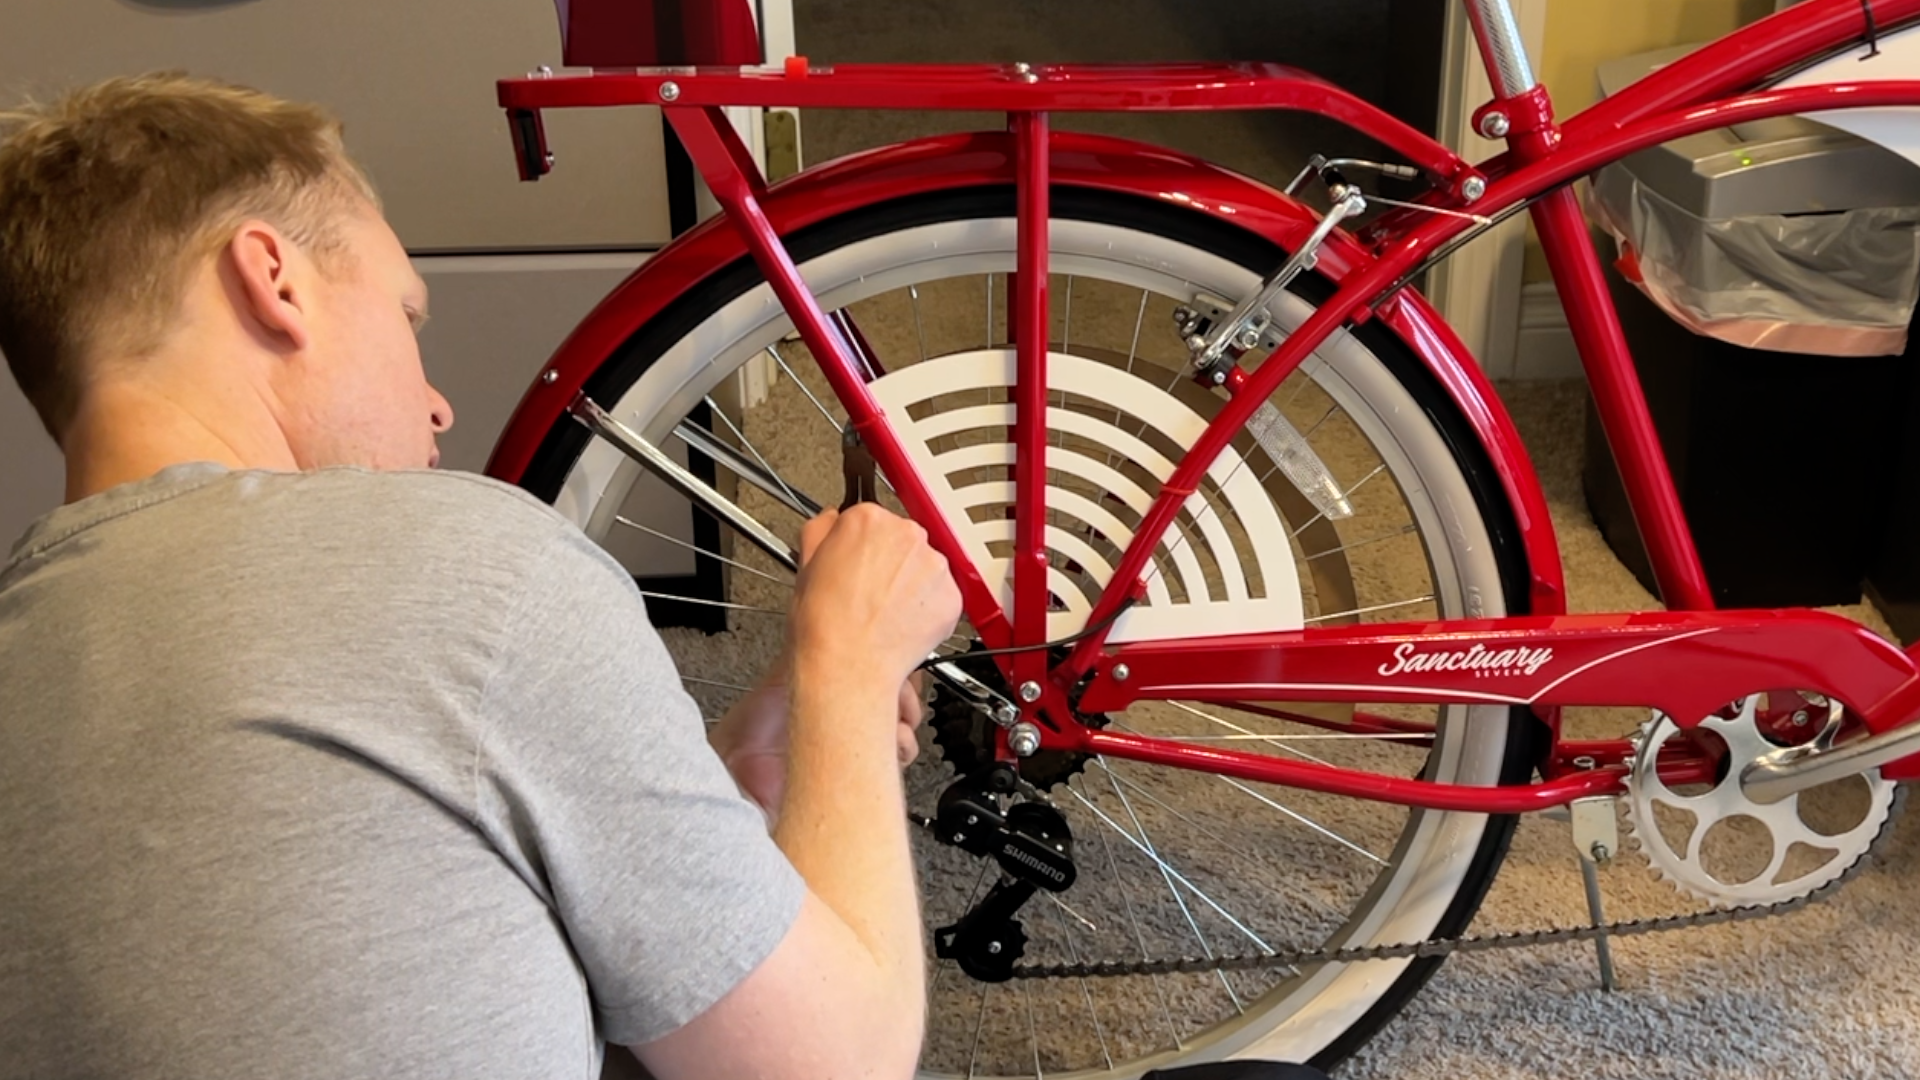
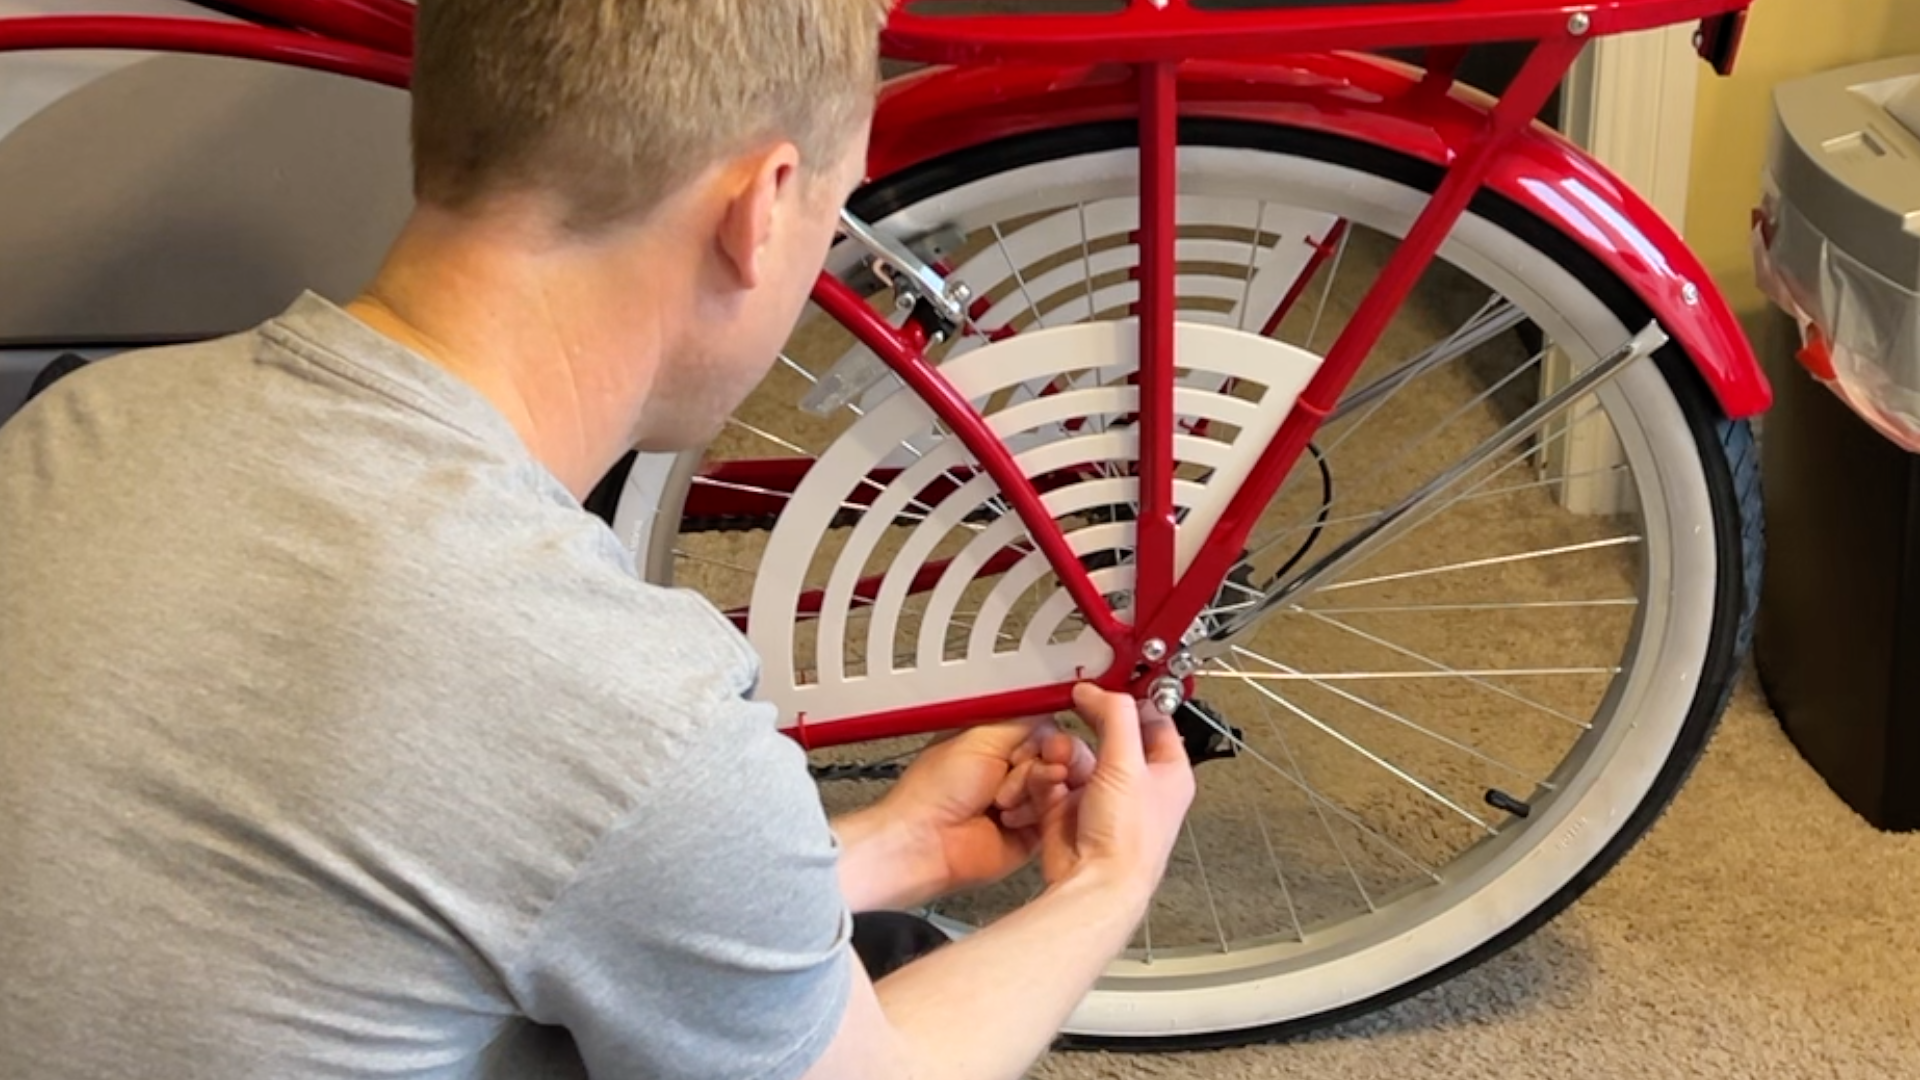
These slot into place around the back wheel.
Use zip ties to secure them to the frame at the designated attachment points.
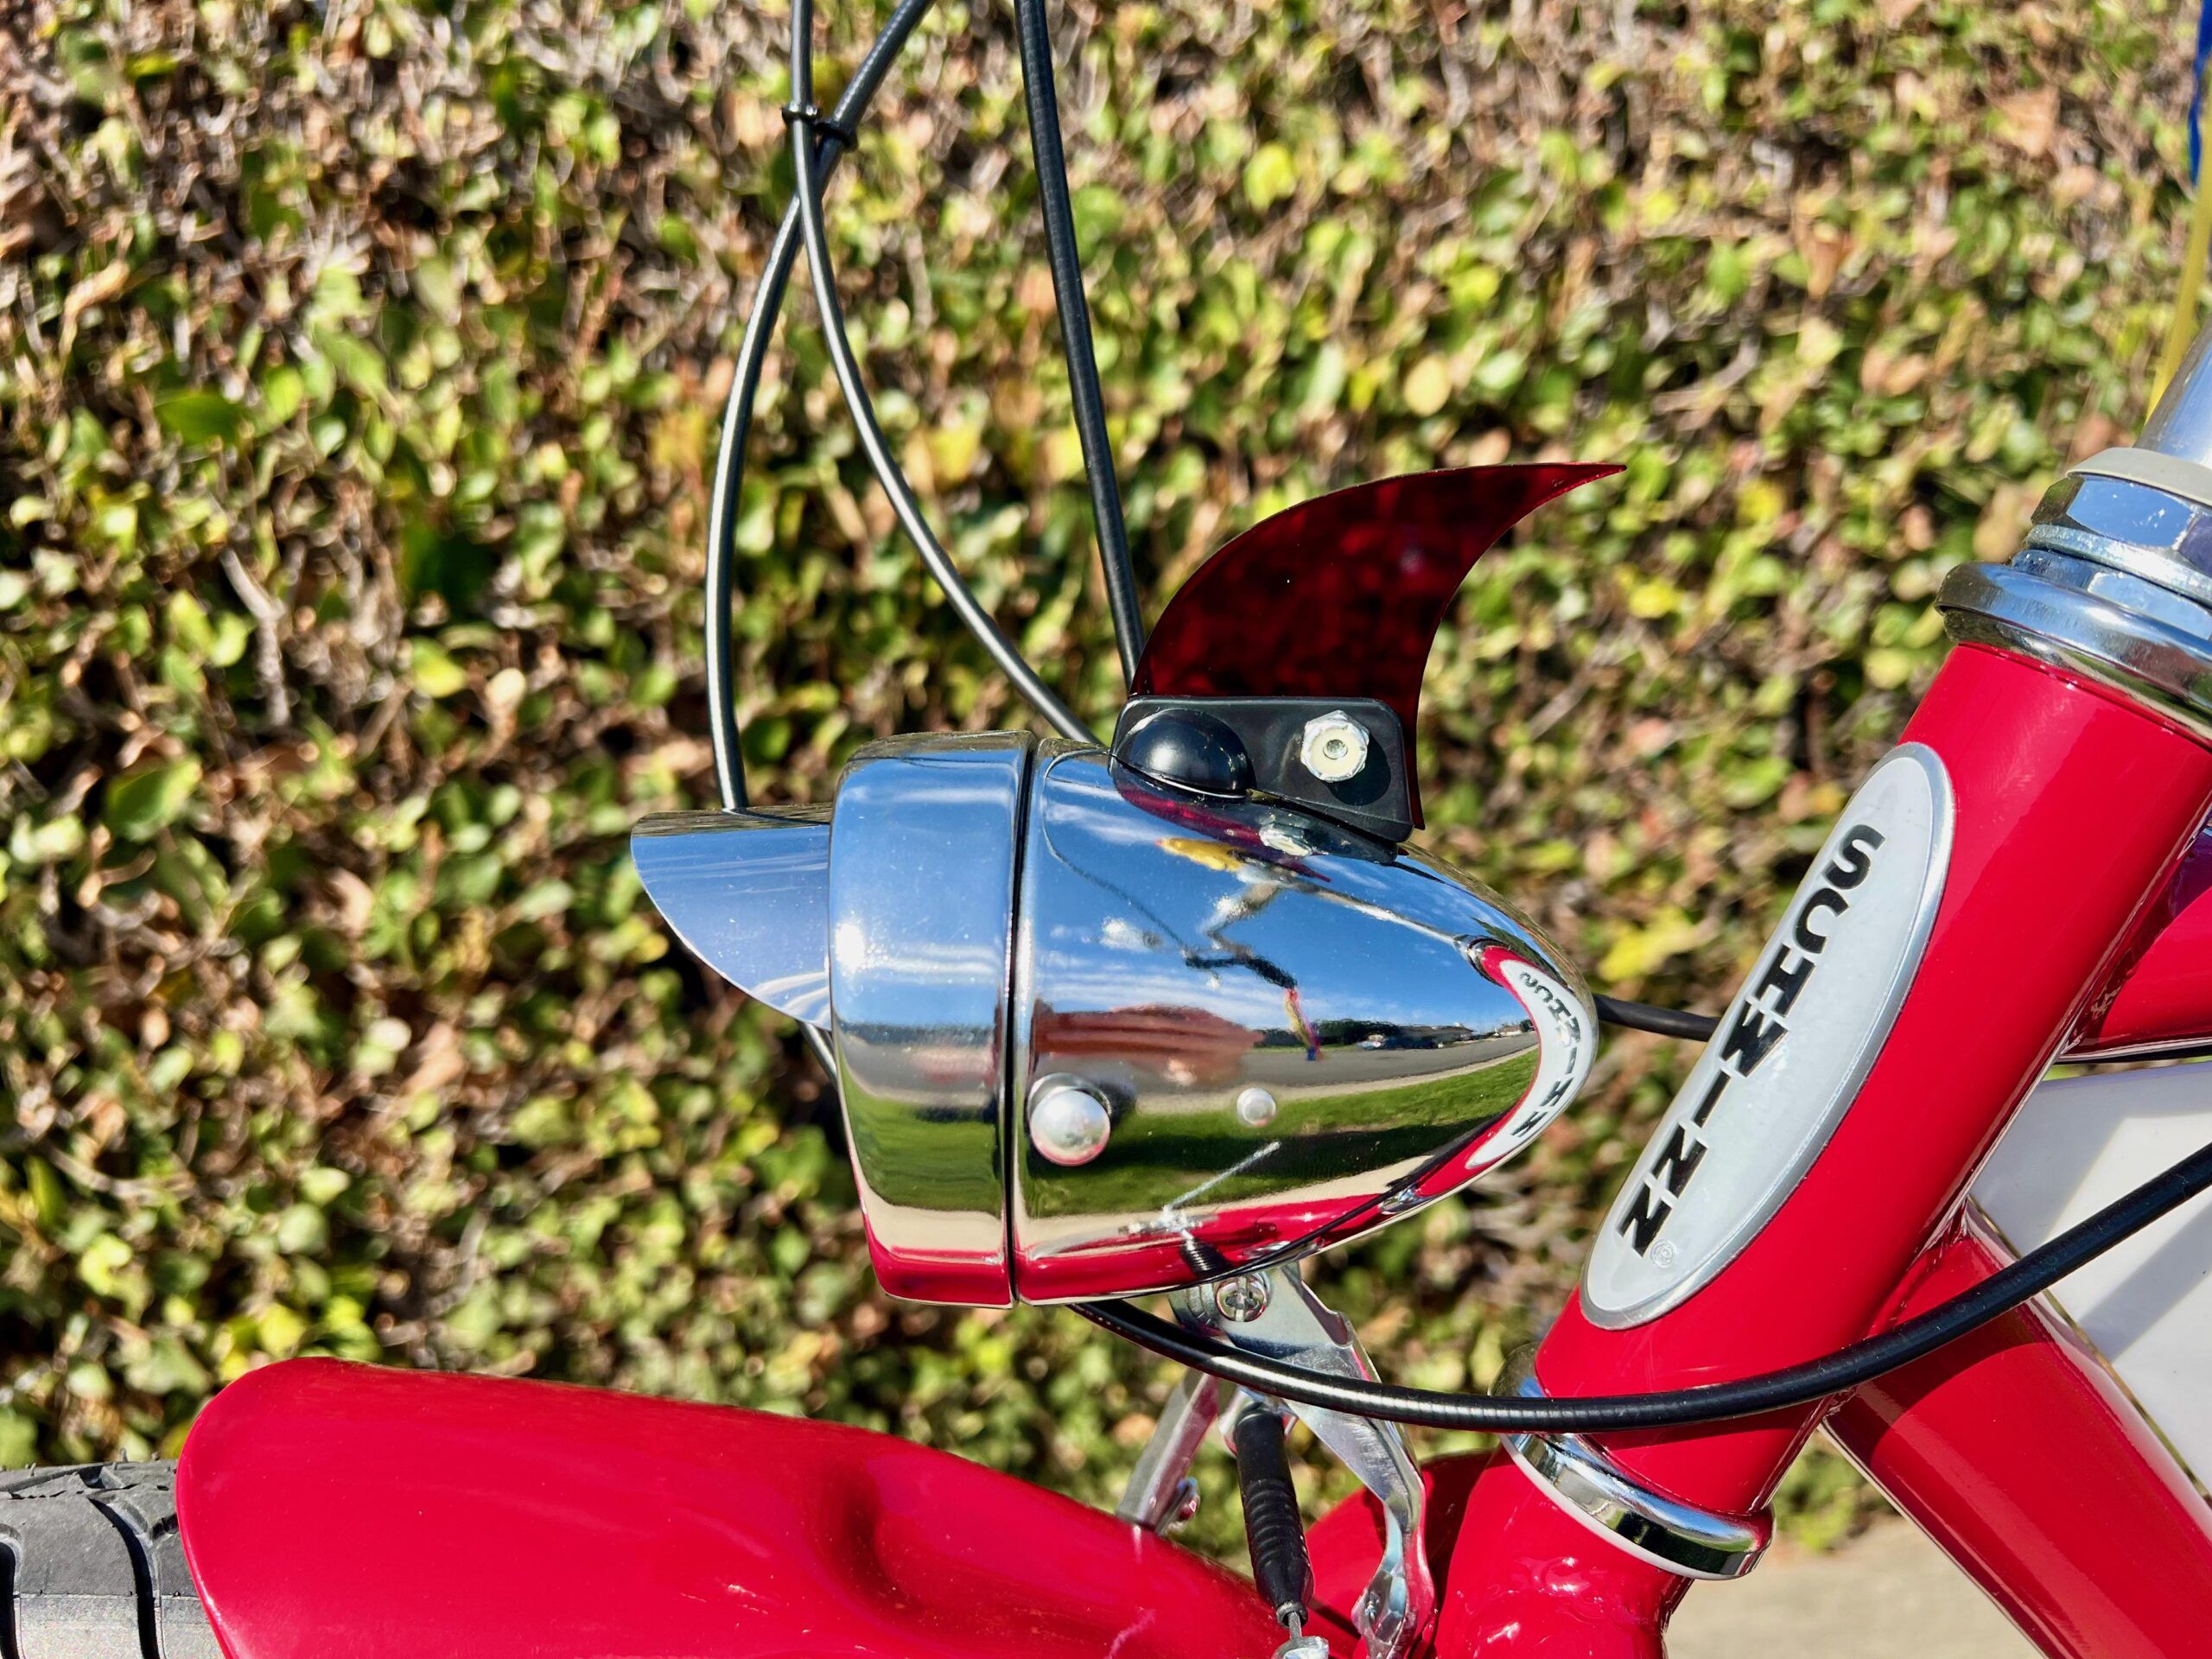
Step 6: Install Retro-Style Headlamp
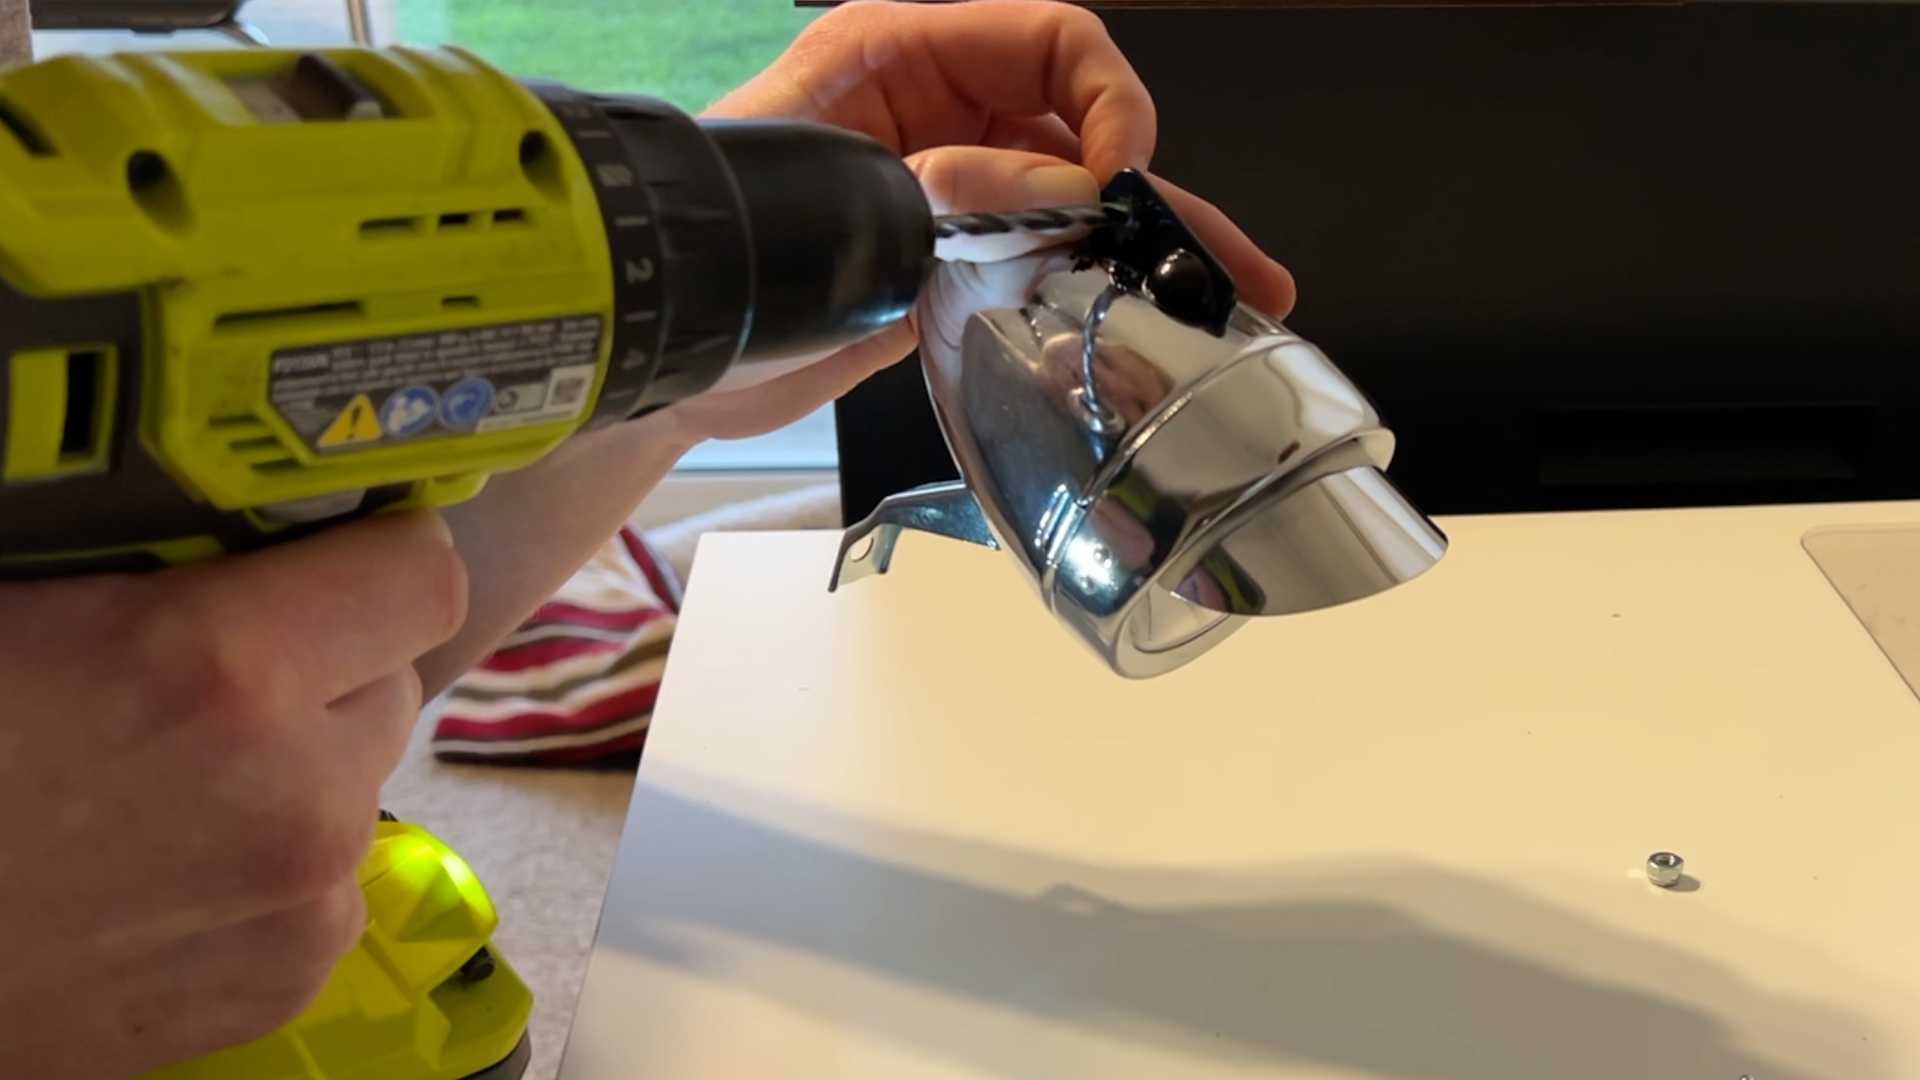
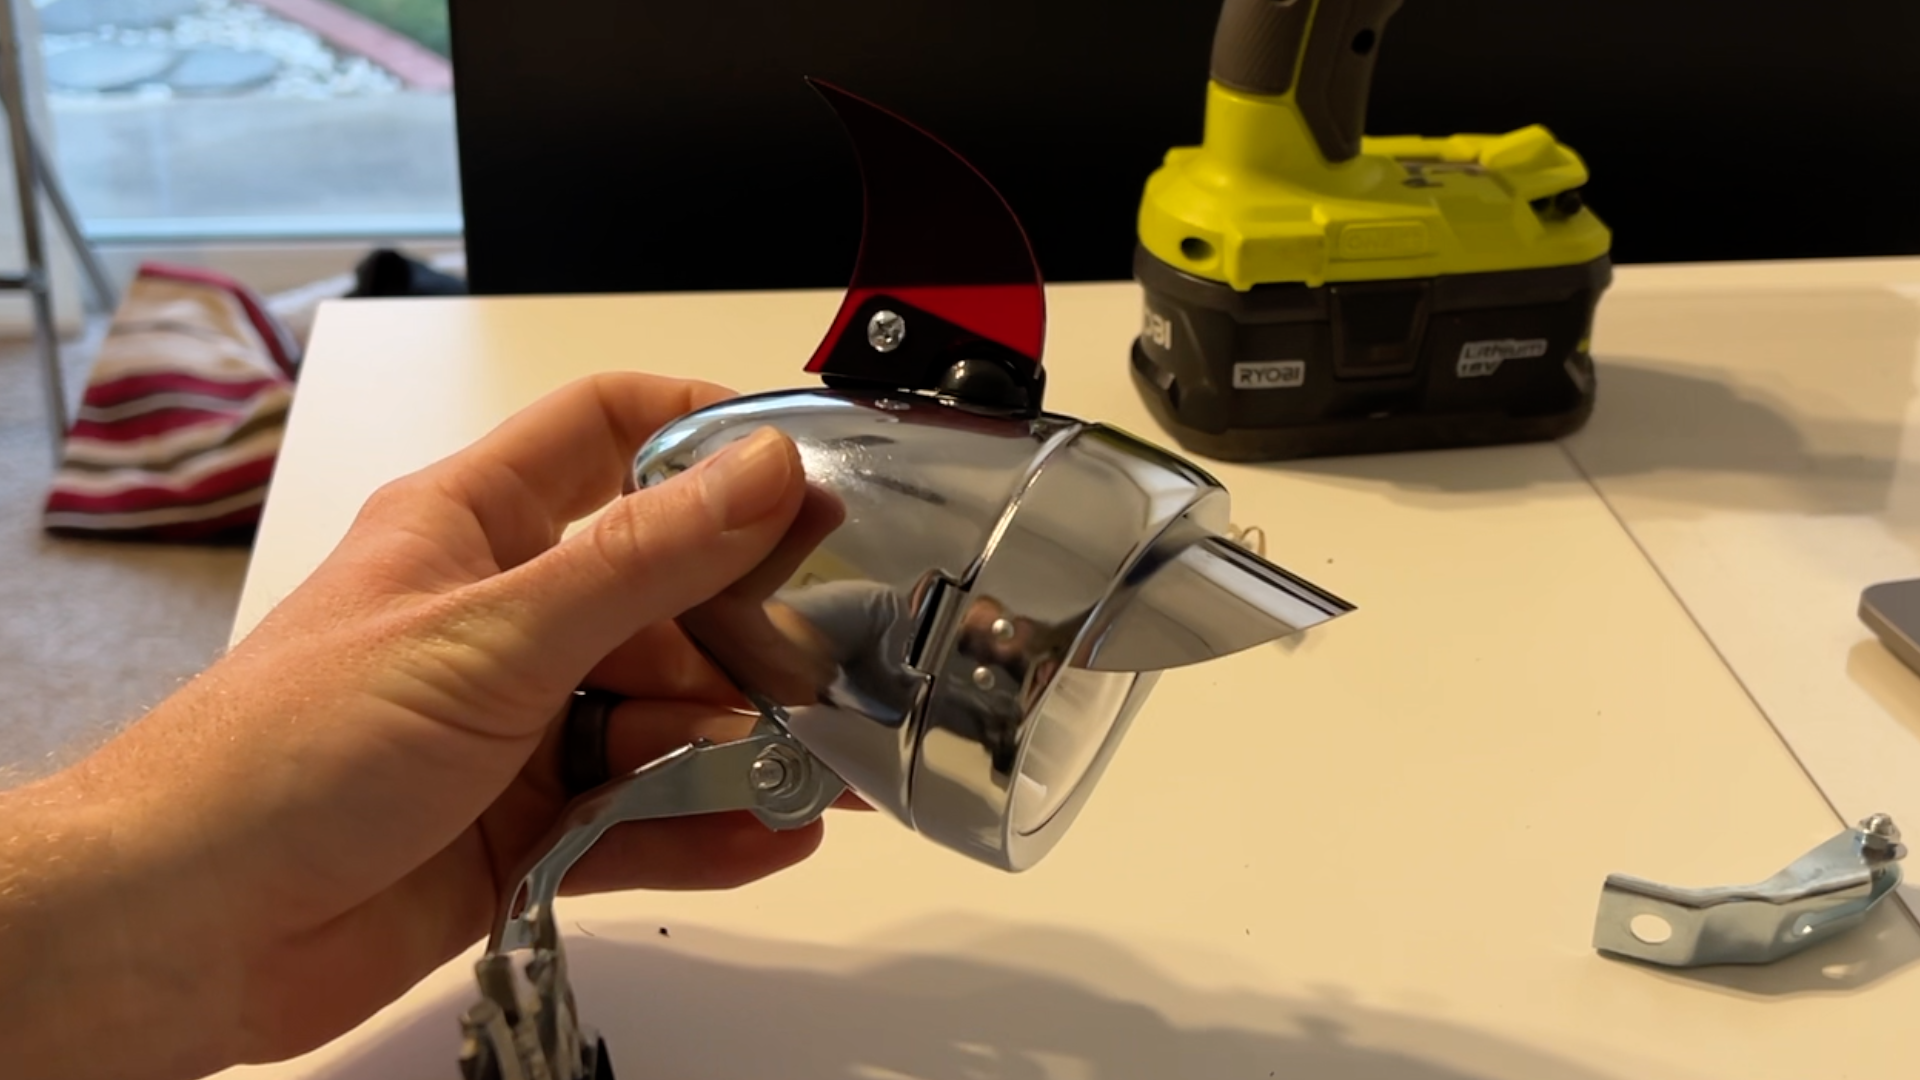
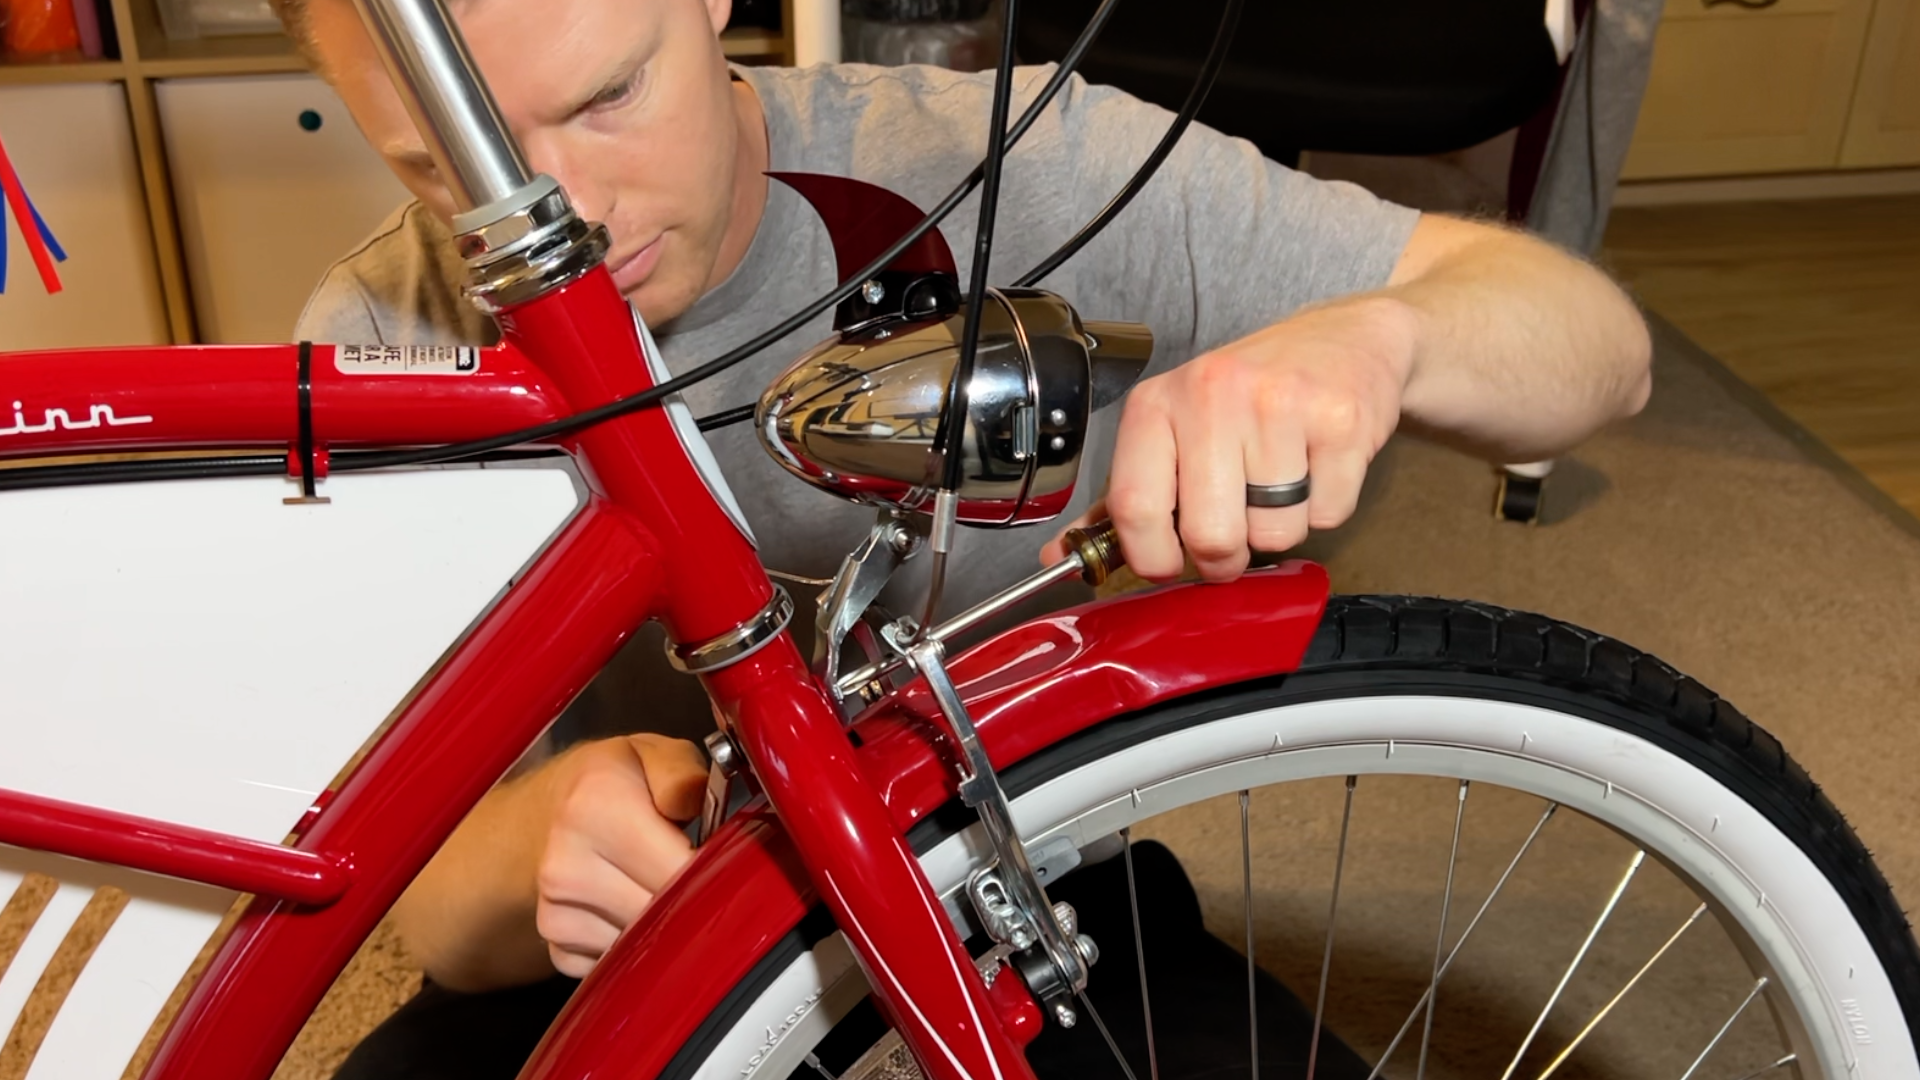
To match Pee-wee’s bike, I added a red acrylic fin.
The light has an on/off switch on top, so I drilled a hole through it to mount the fin and attached it with a bolt and nut.
Once the fin was installed, I mounted the whole light onto the bike.
Step 7: Add the Final Accessories
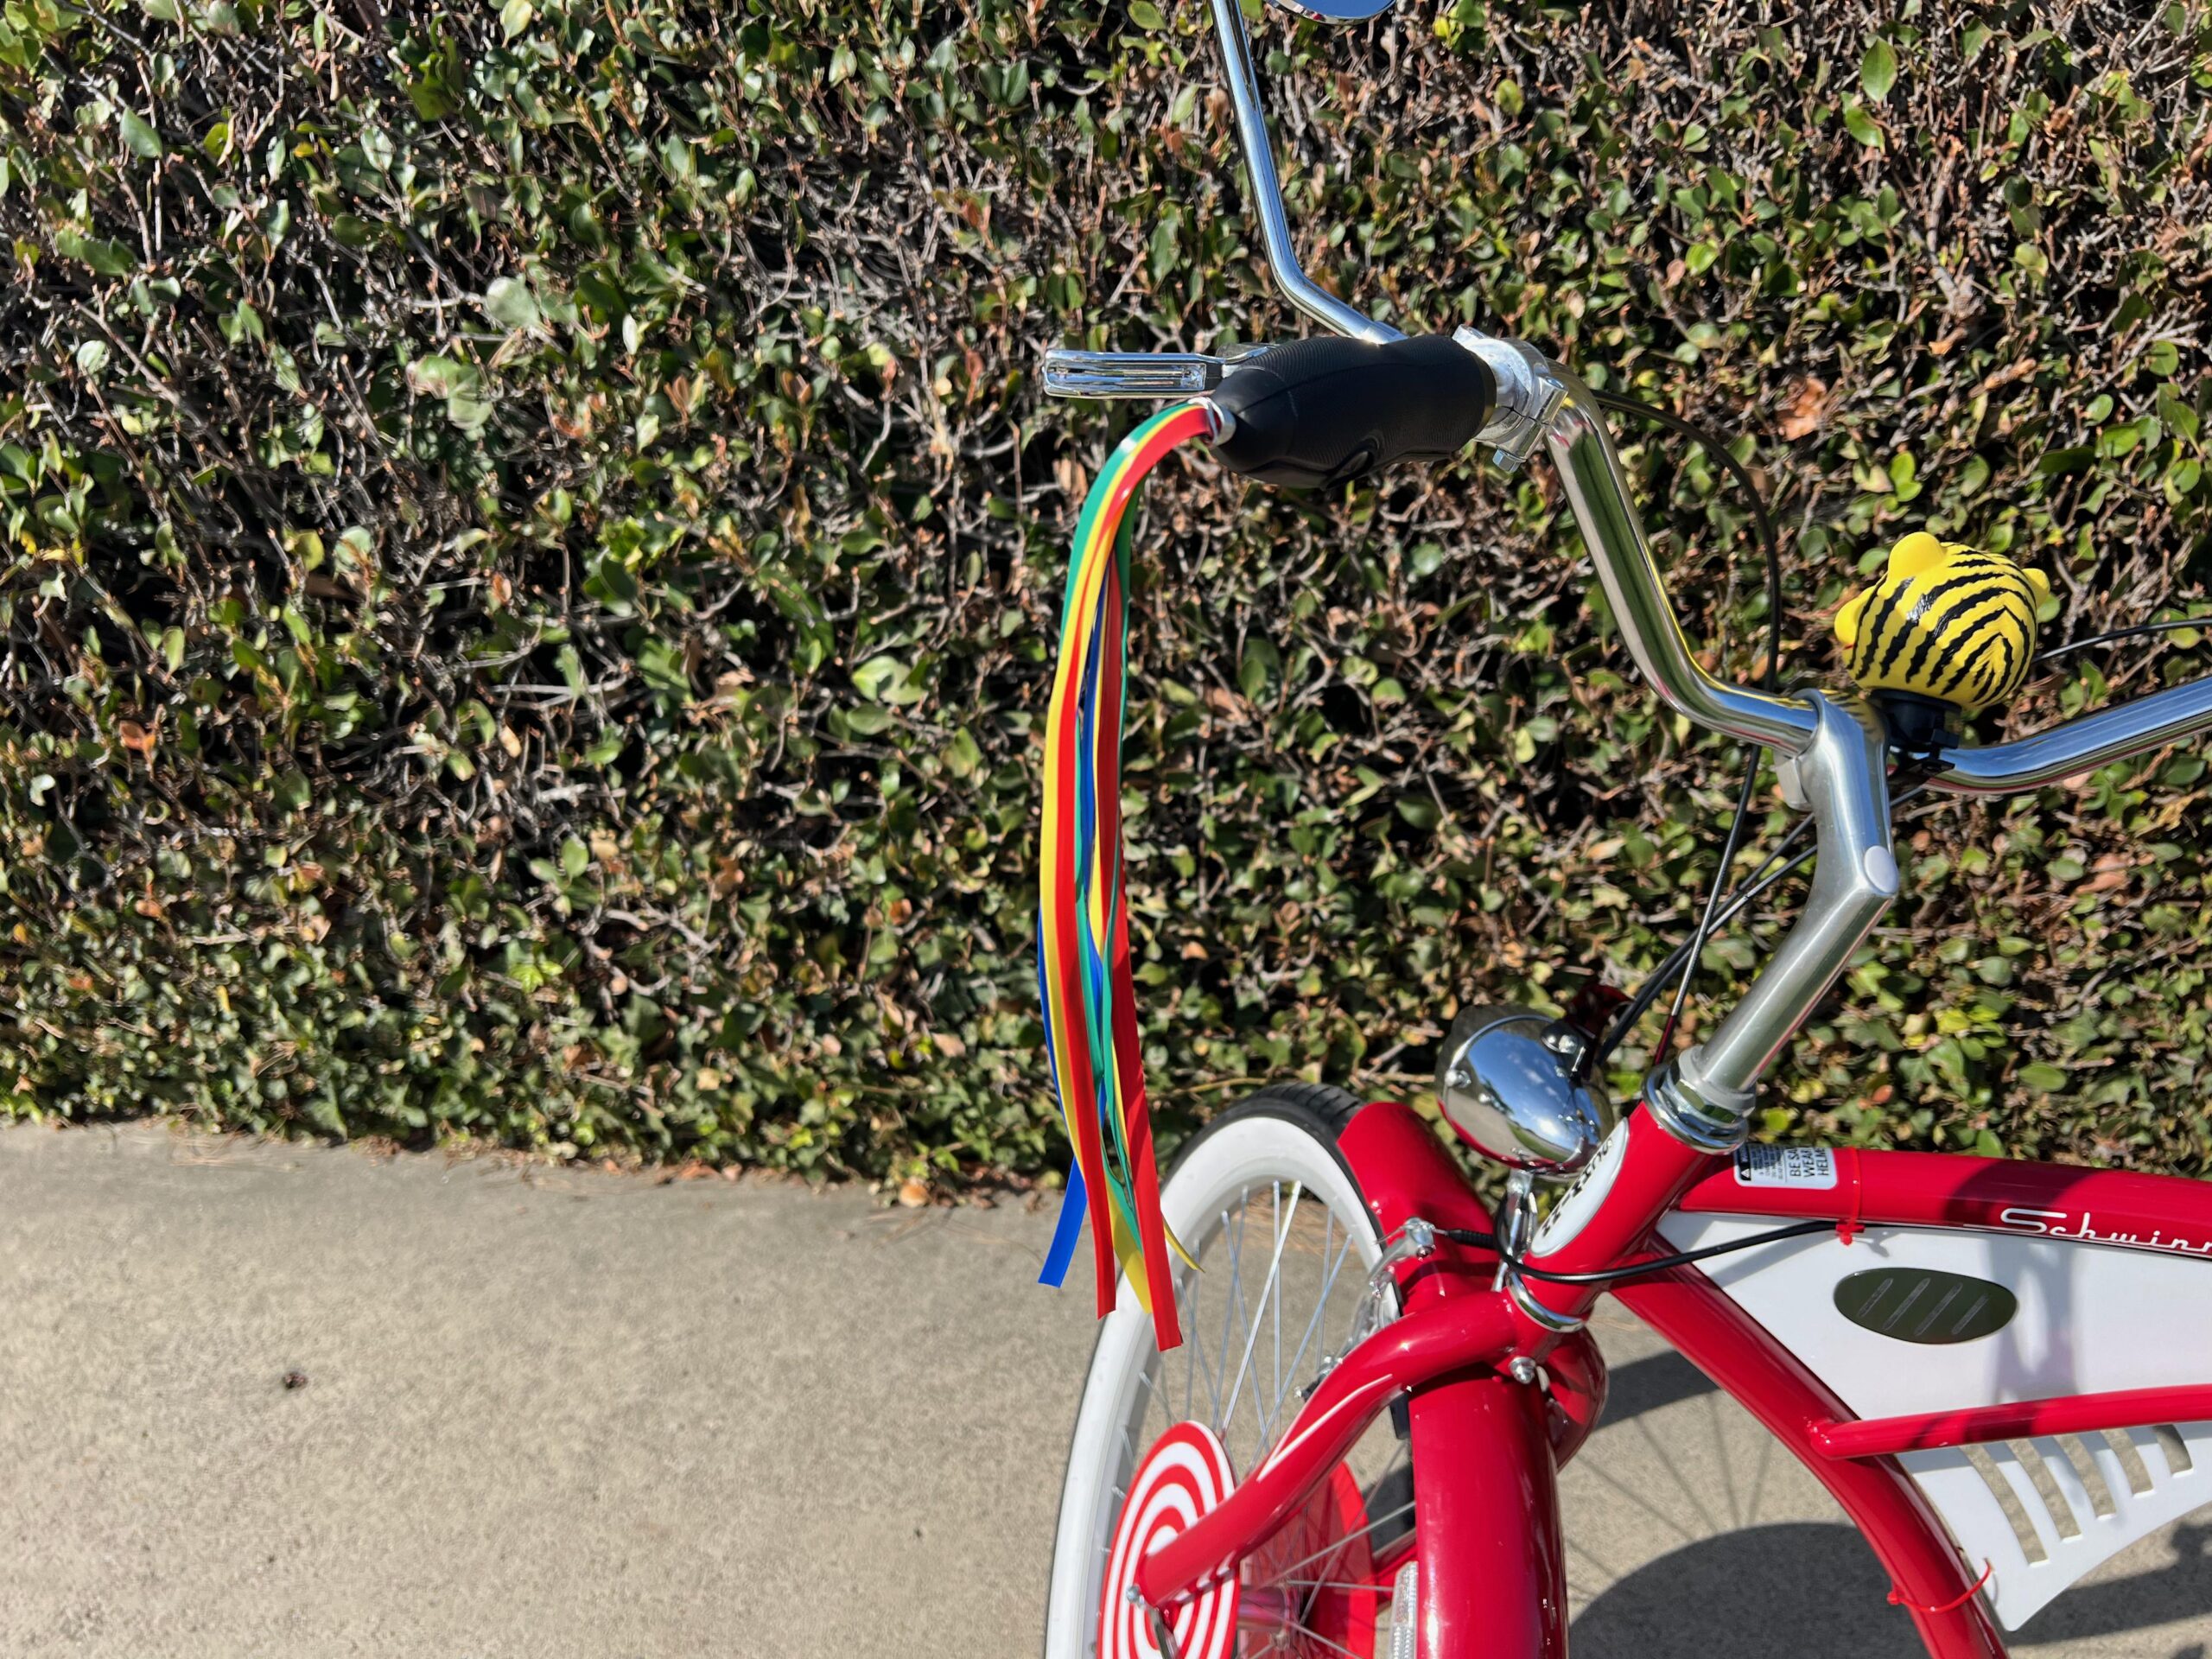
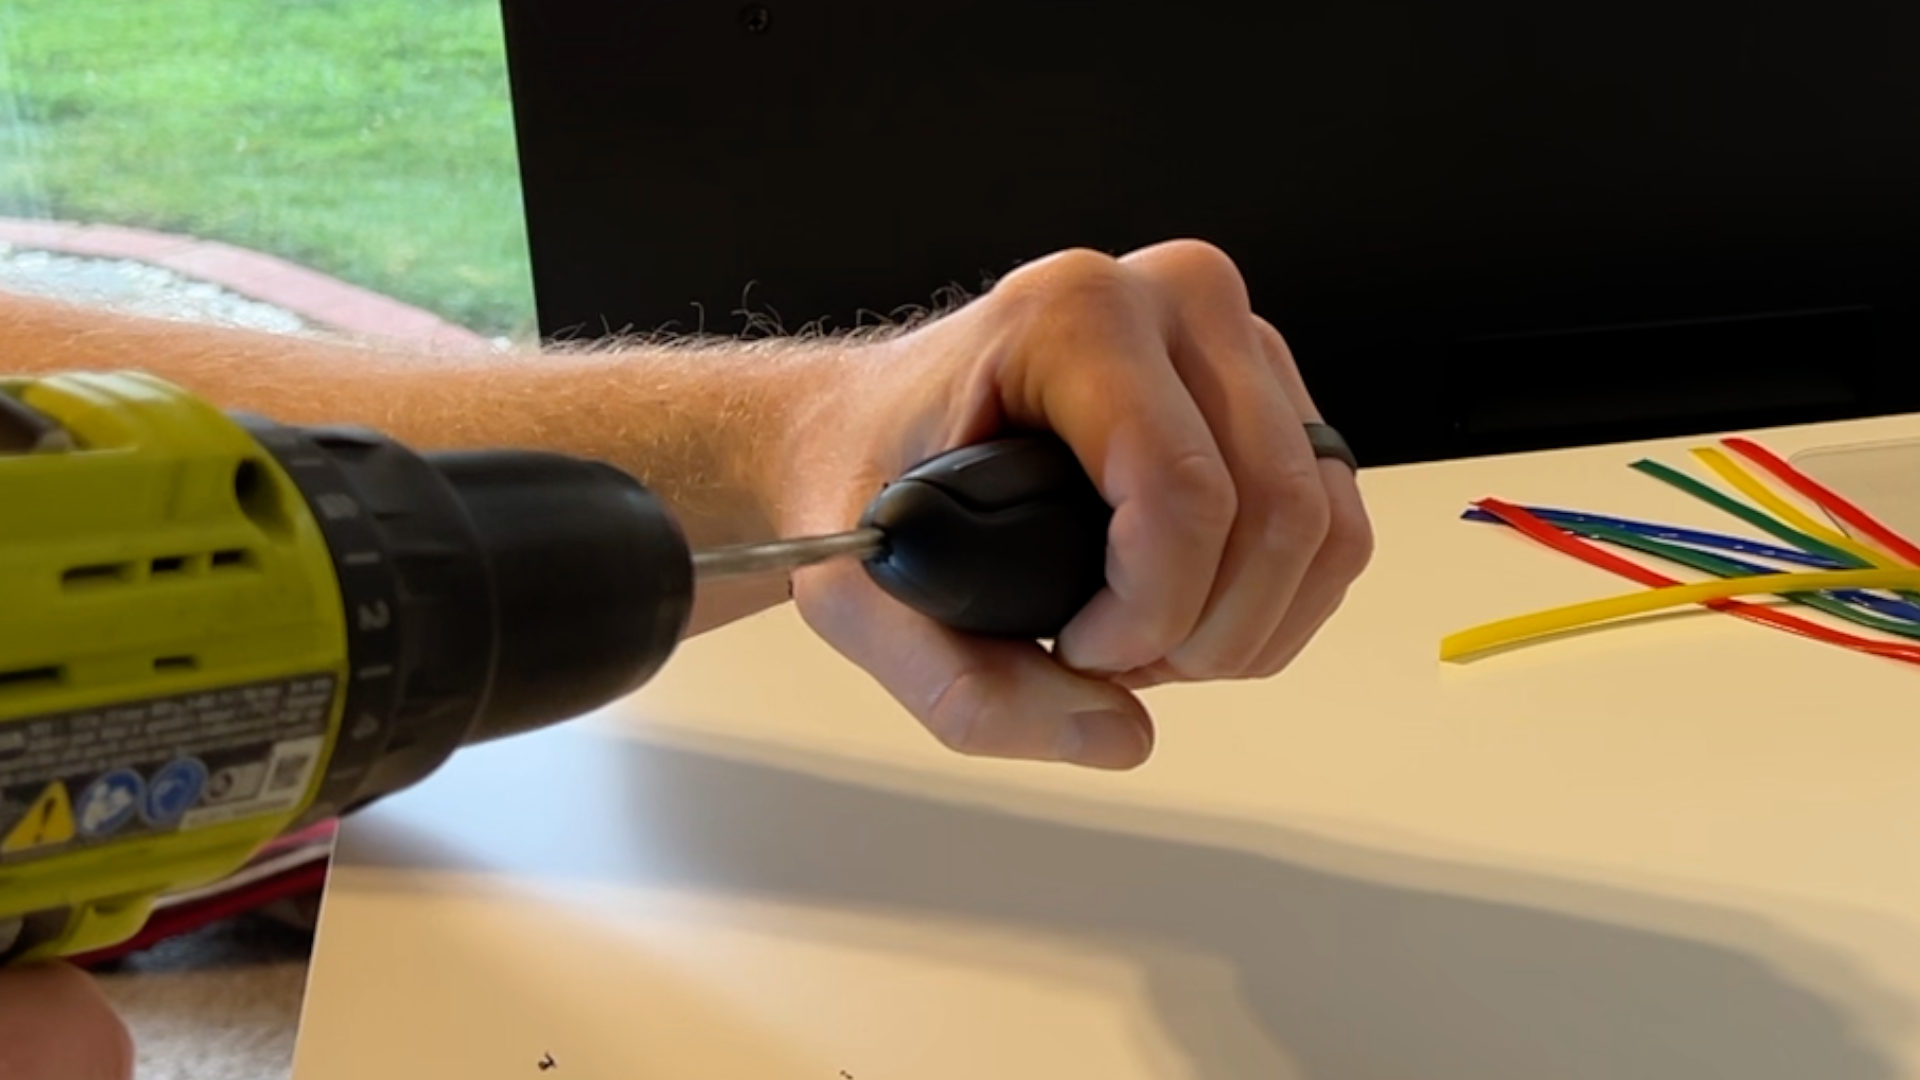
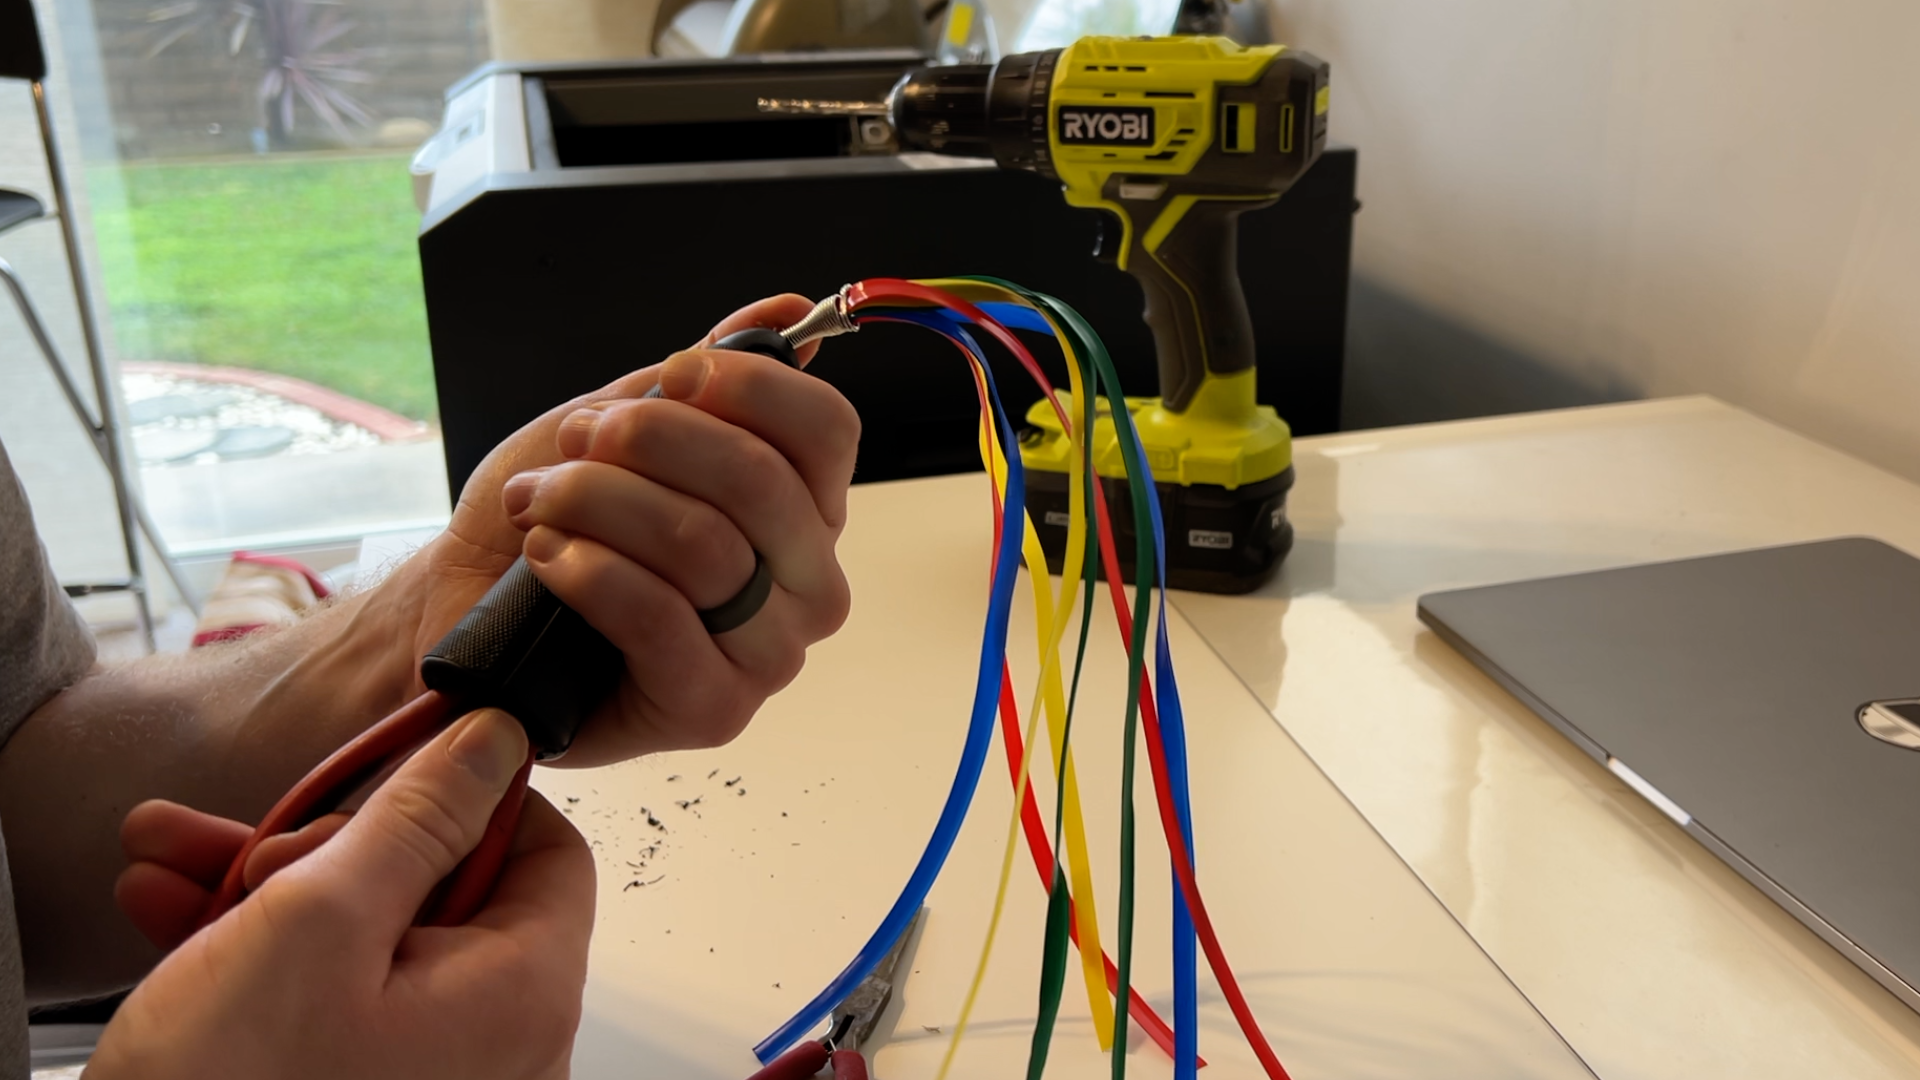
Handlebar Streamers
- The grips may need slight modification—I had to drill a larger hole for the streamers to slide in but was able to get them in with some pliers pulling from the inside.
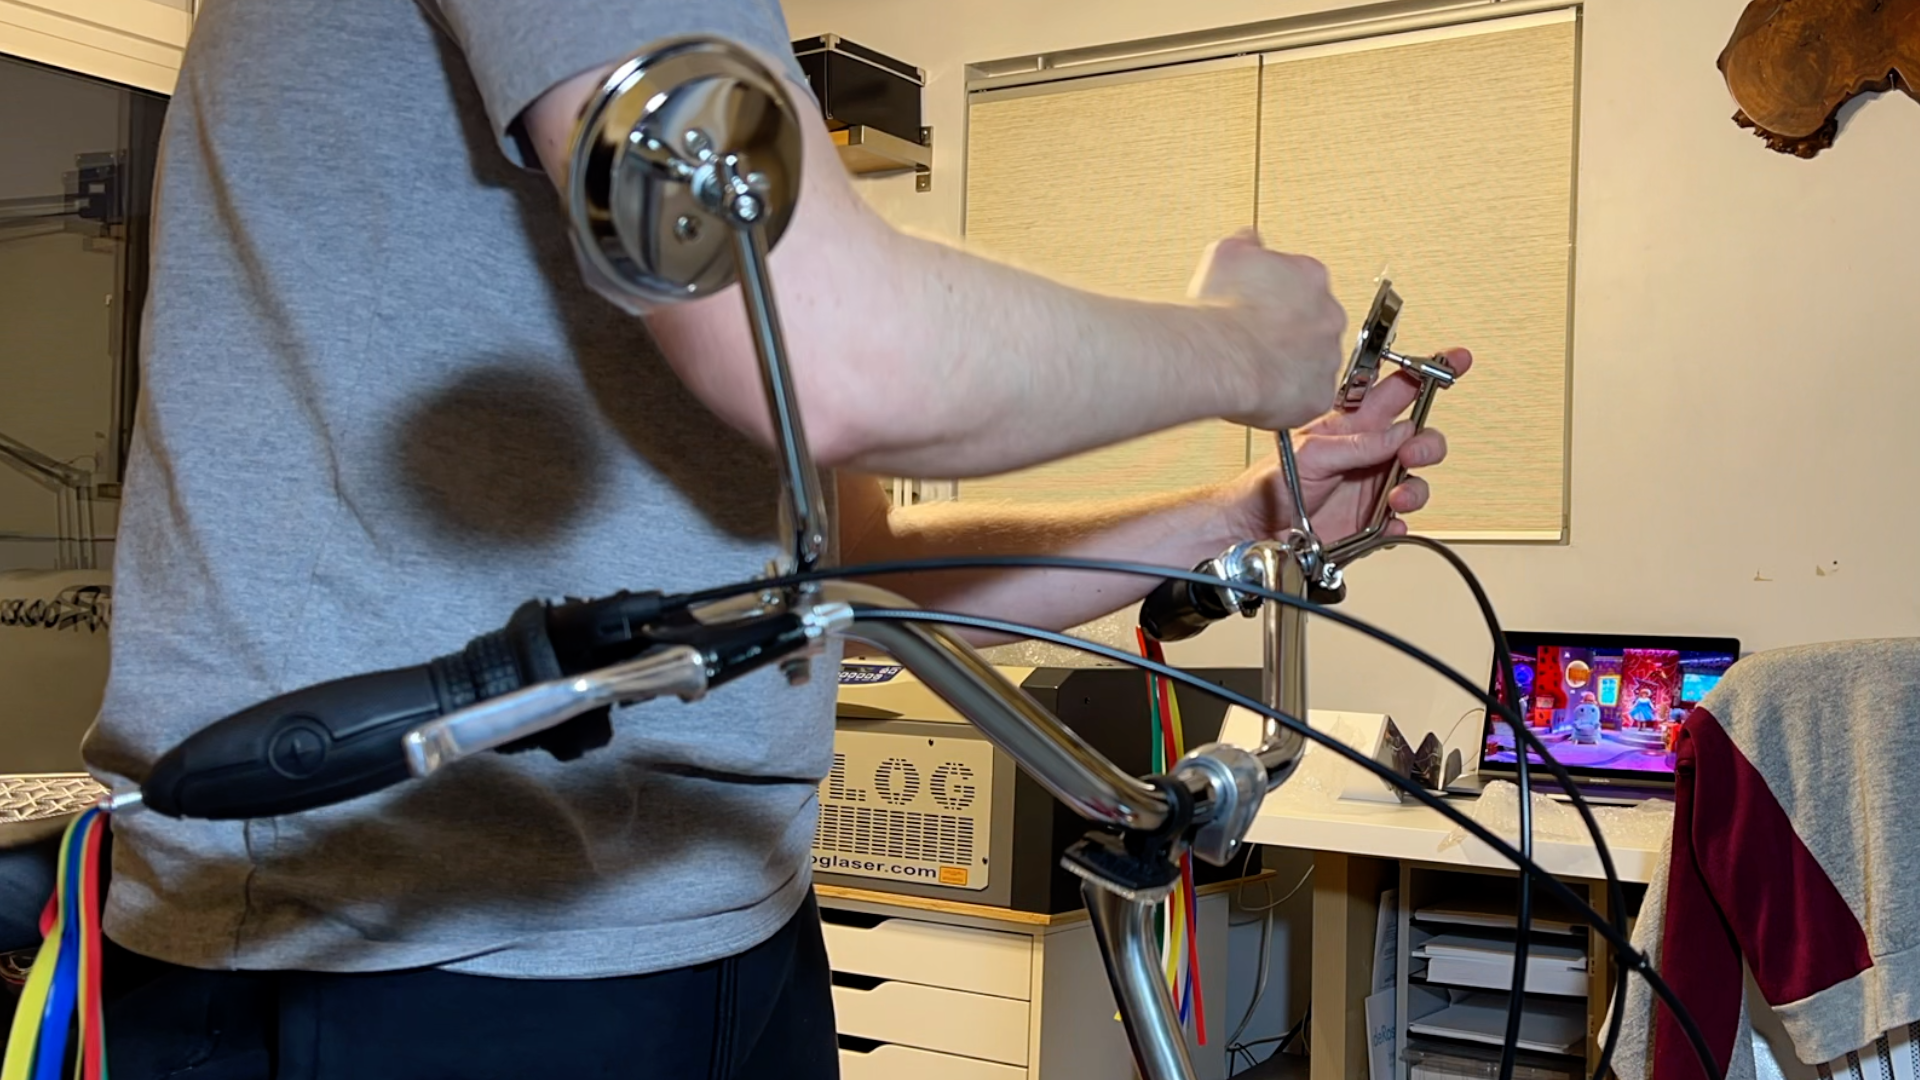
Rearview Mirrors
- Install these according to the instructions
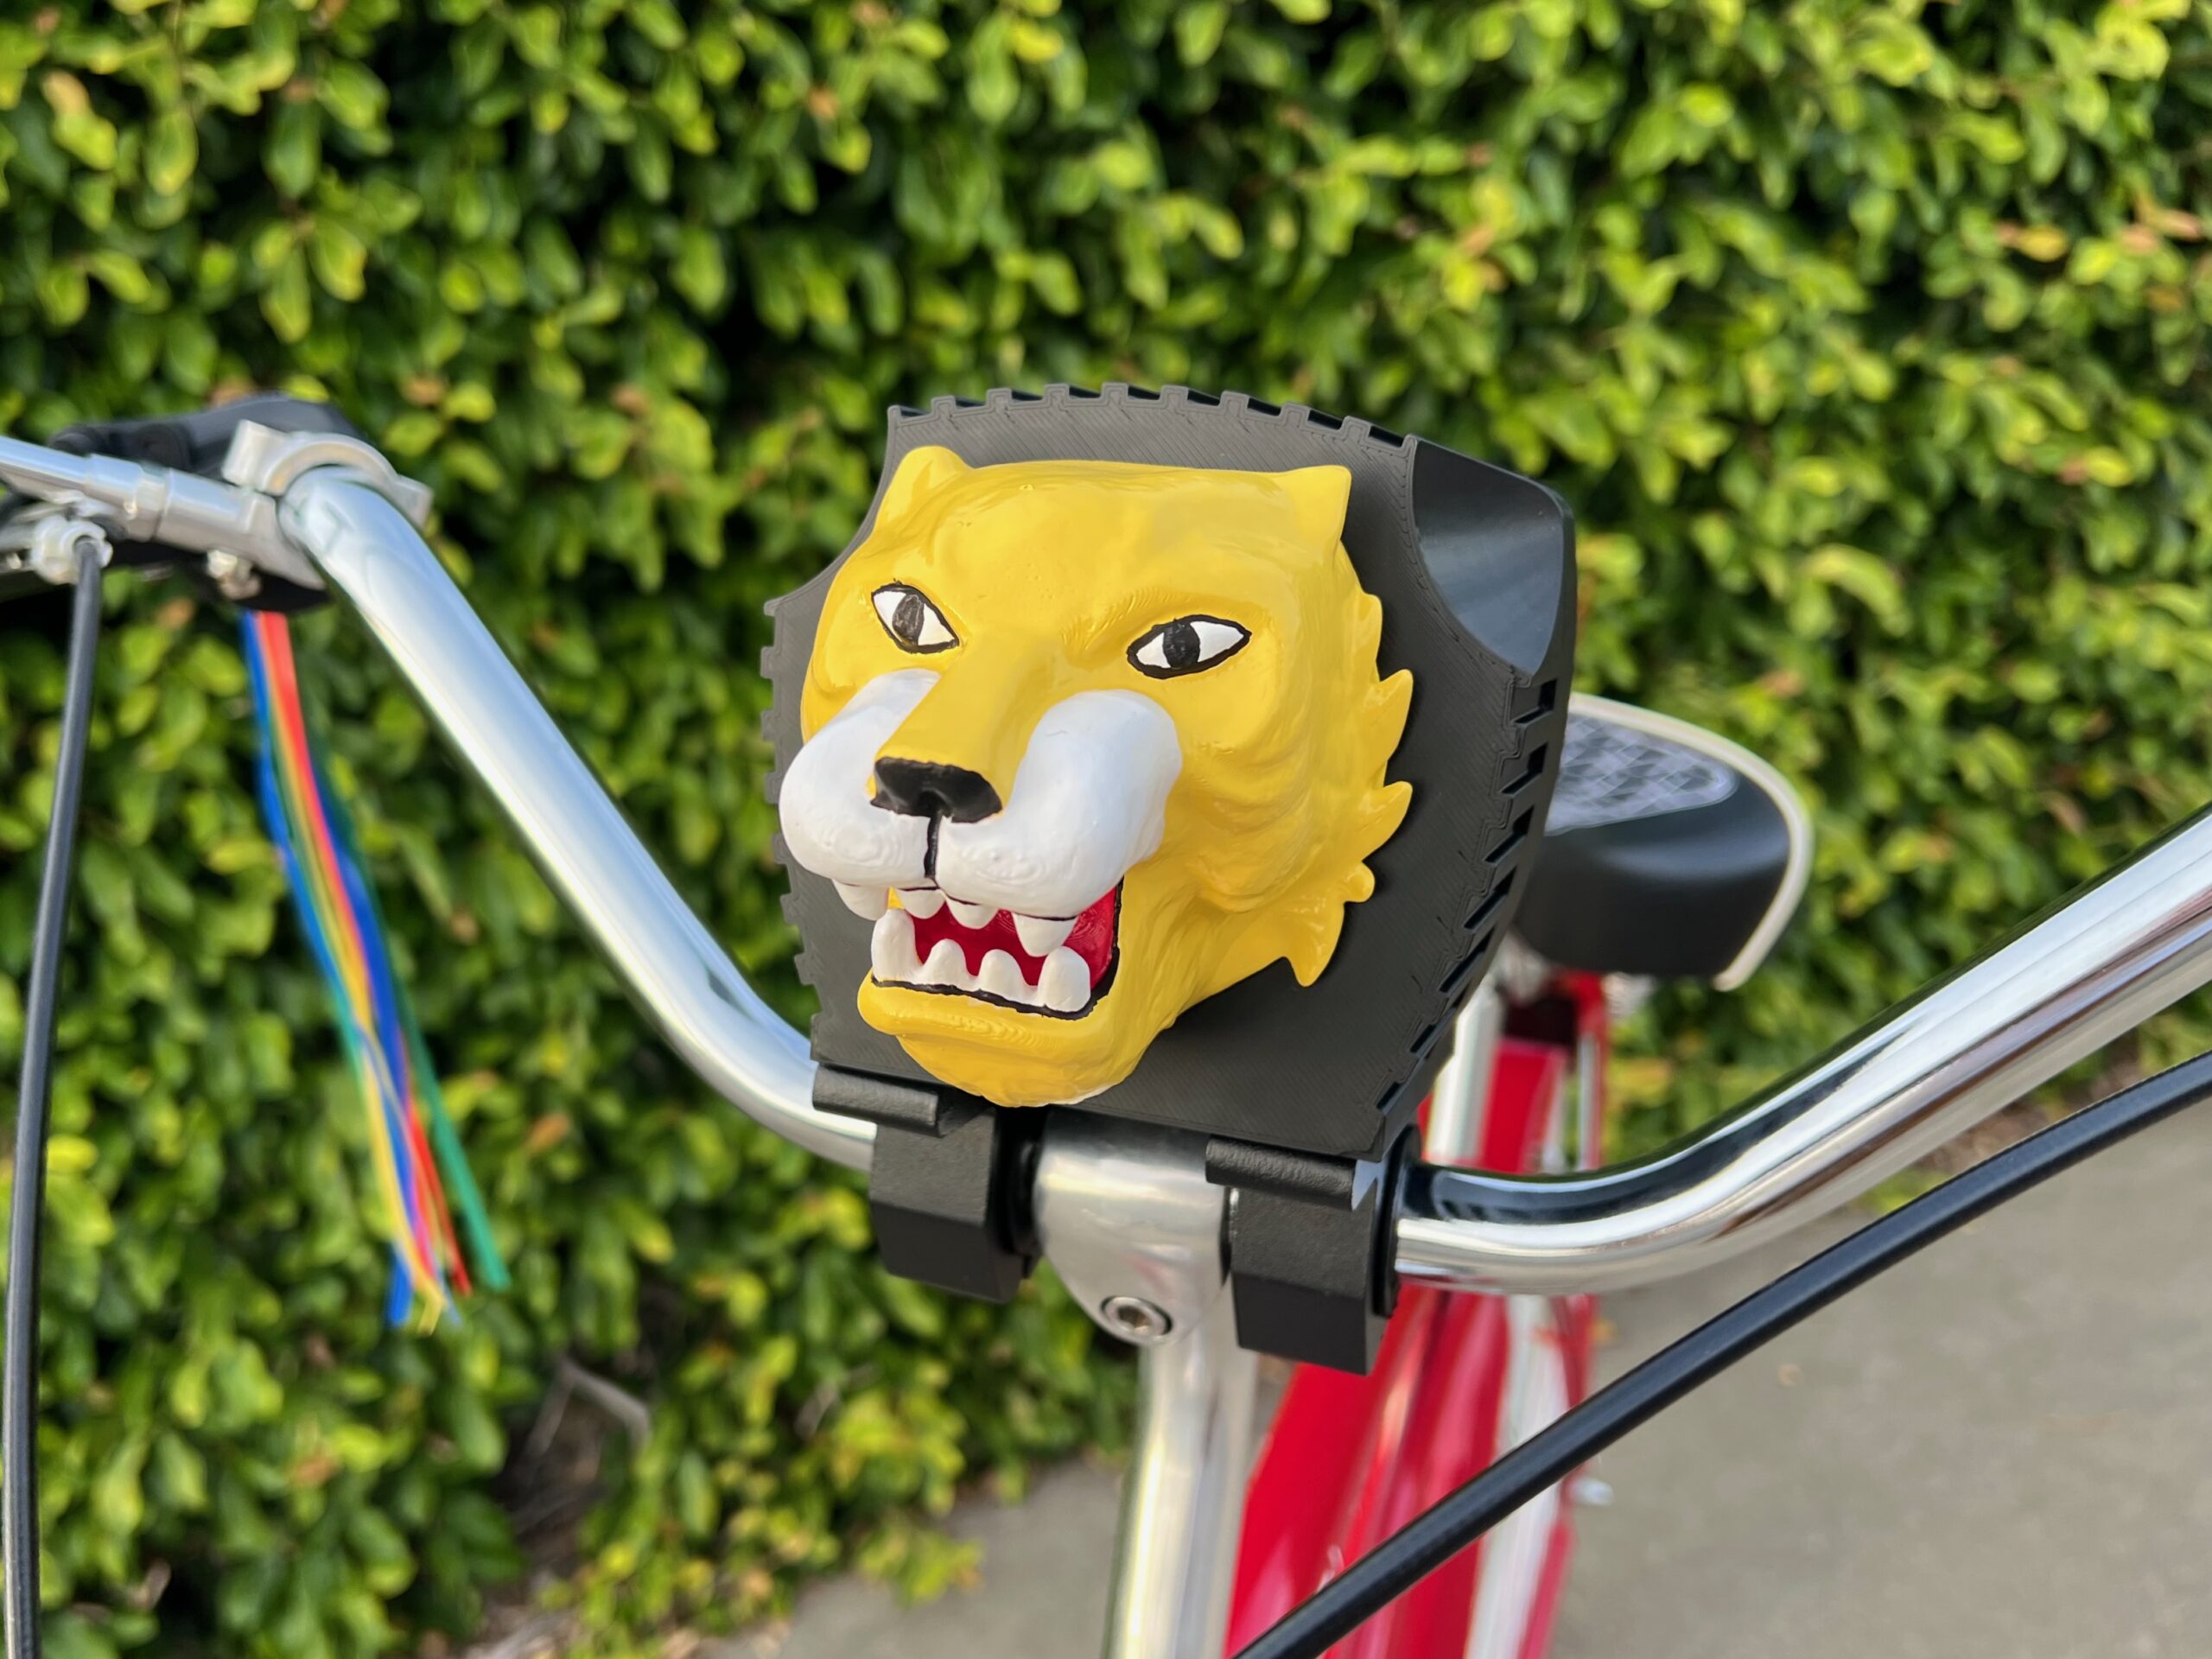
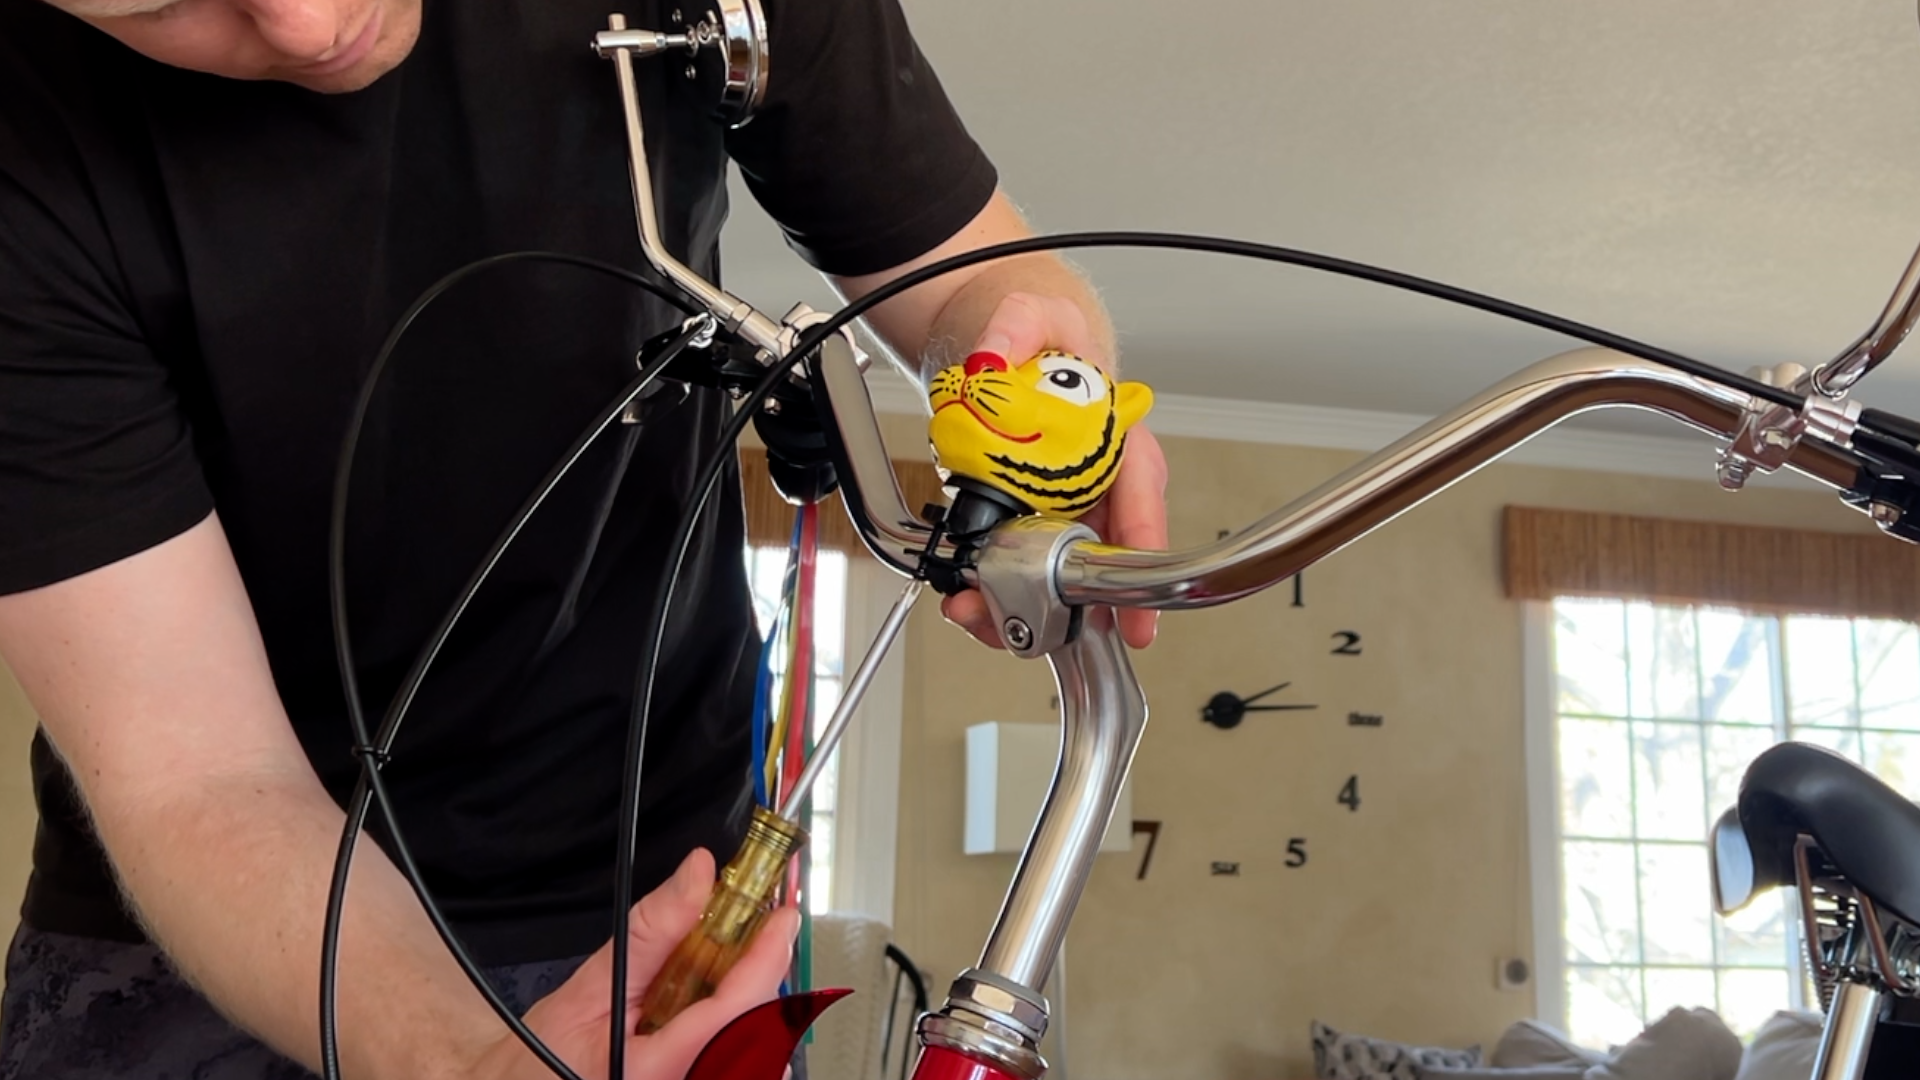
Tiger Head Siren
- Bolt on the Tiger Head!
- Find it on my website: https://derosedesign.co/product/pee-wee-tiger-head/
- Or on my Etsy shop: https://travisderose.etsy.com/listing/4479961087
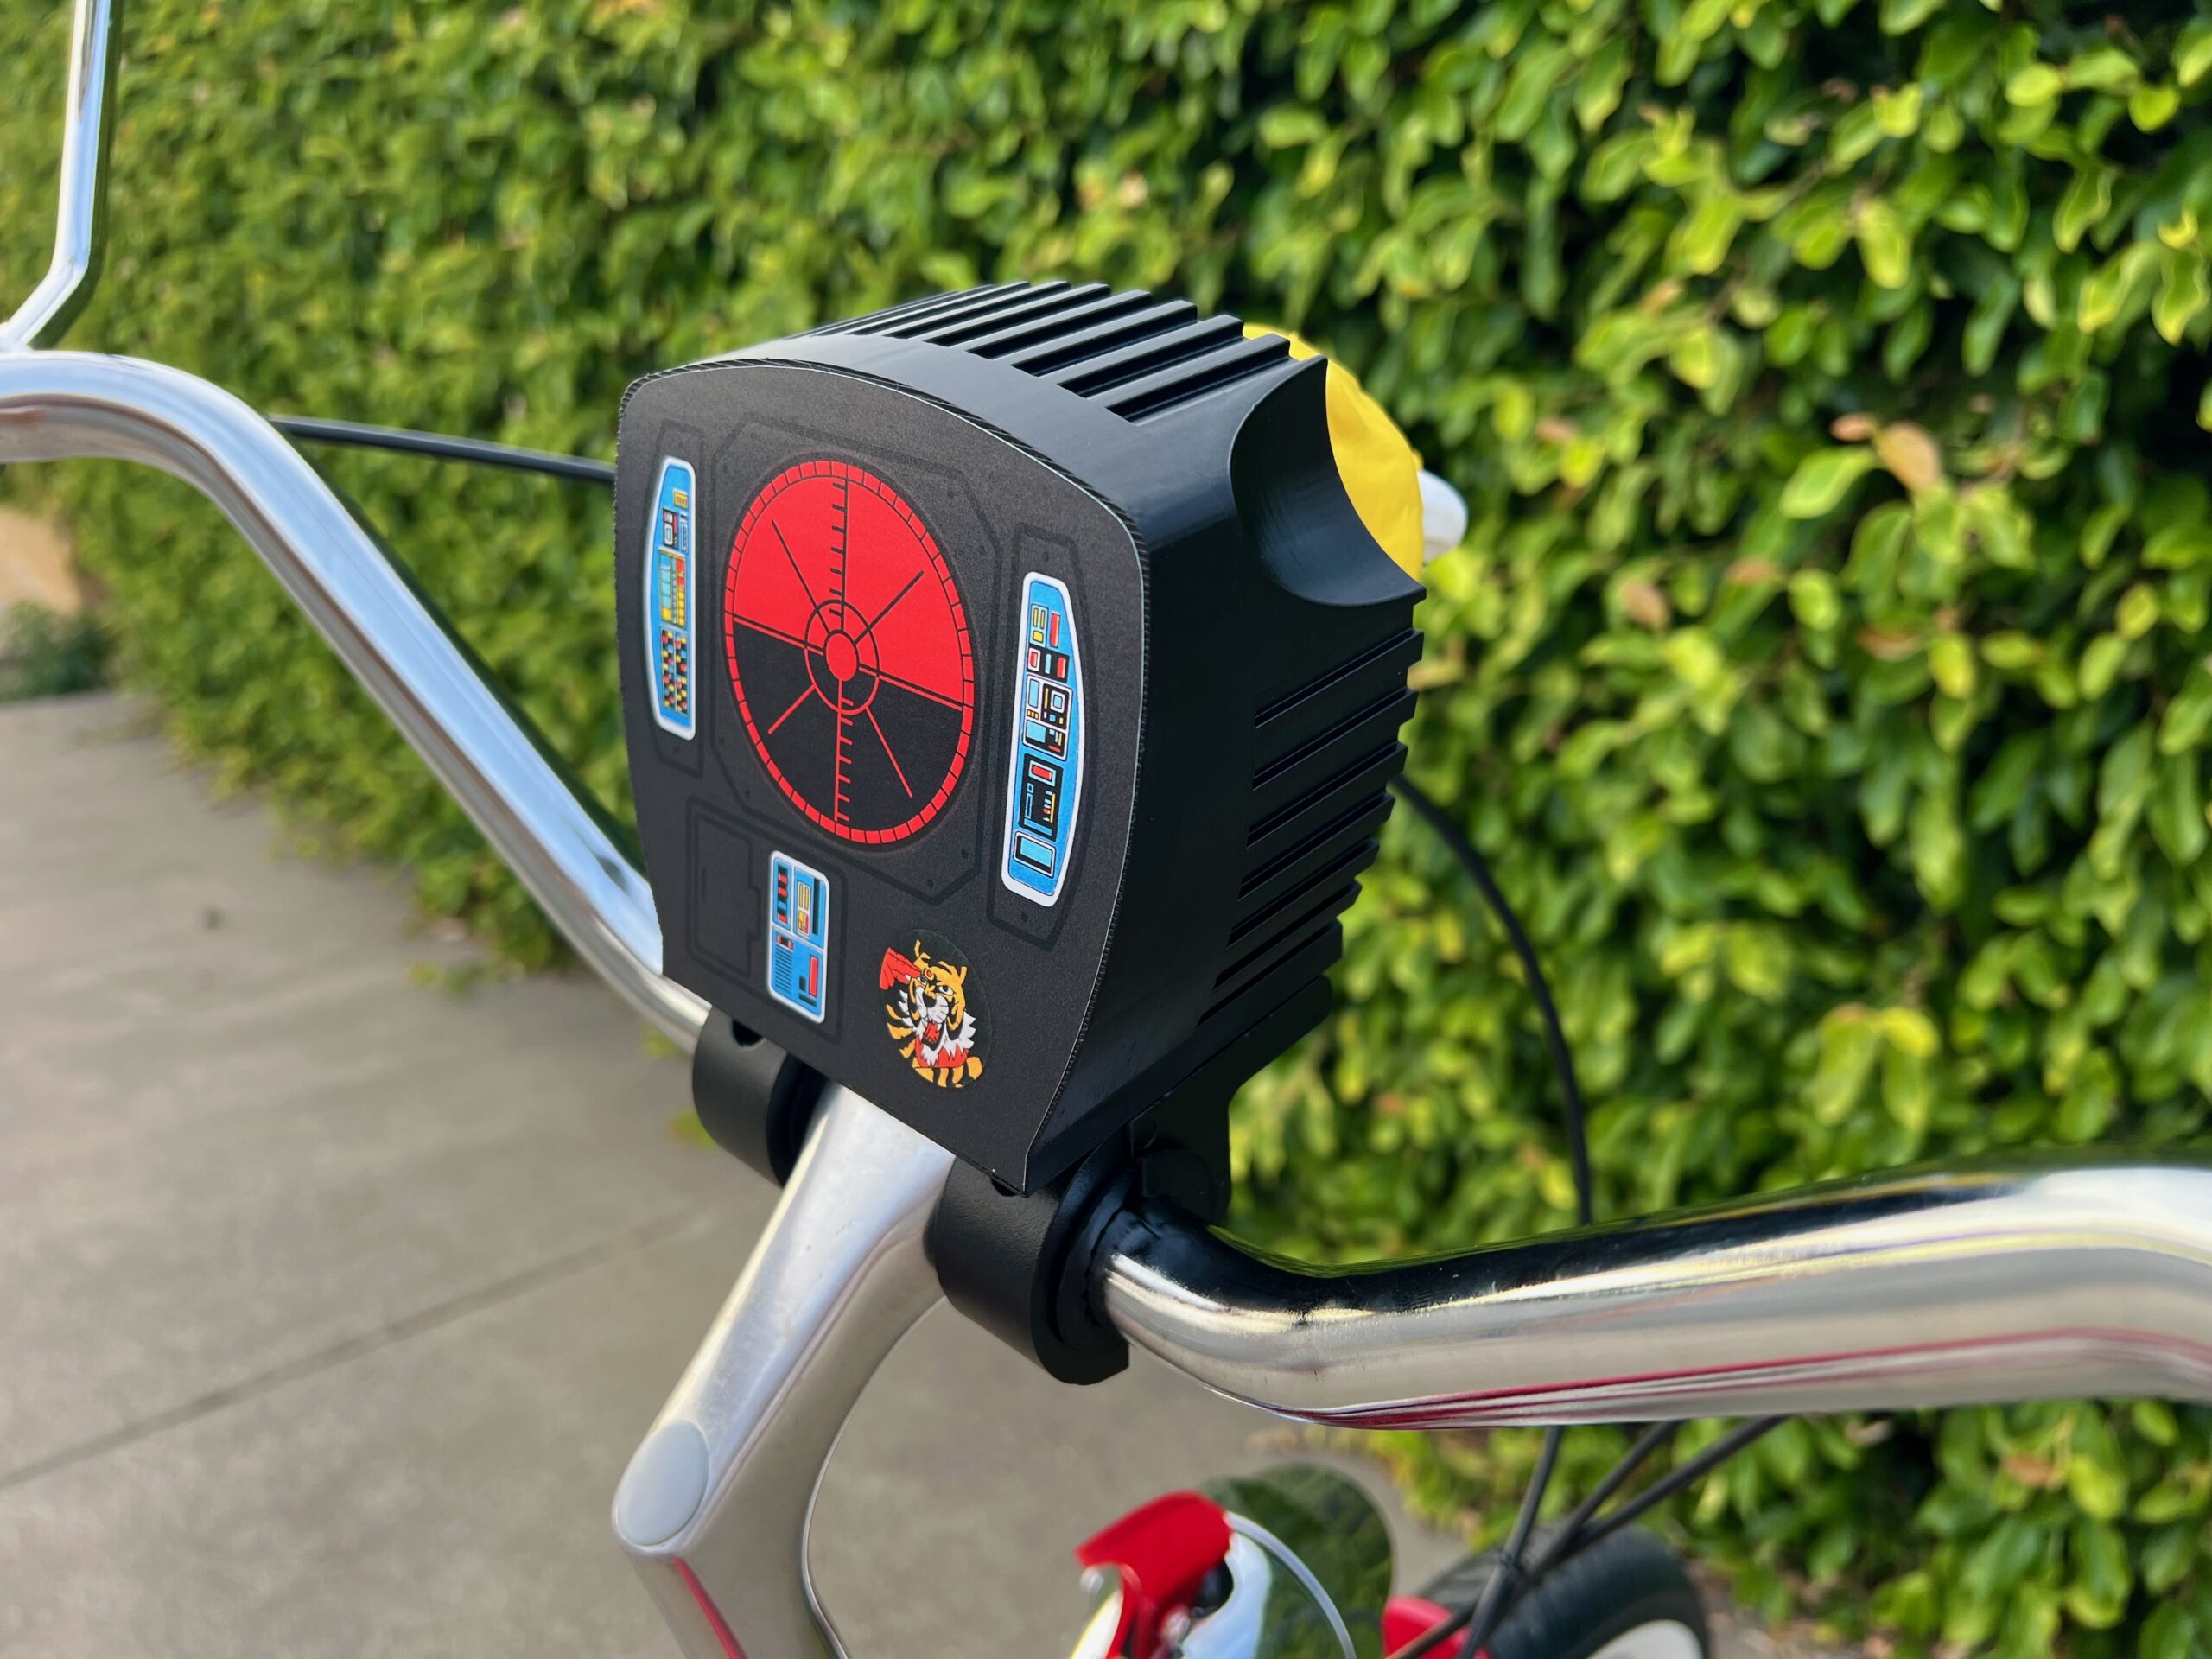
- Or install the squeeze horn as a budget stand-in for the classic tiger siren.
Step 8: Install the “Property of Pee-wee Herman” Sign

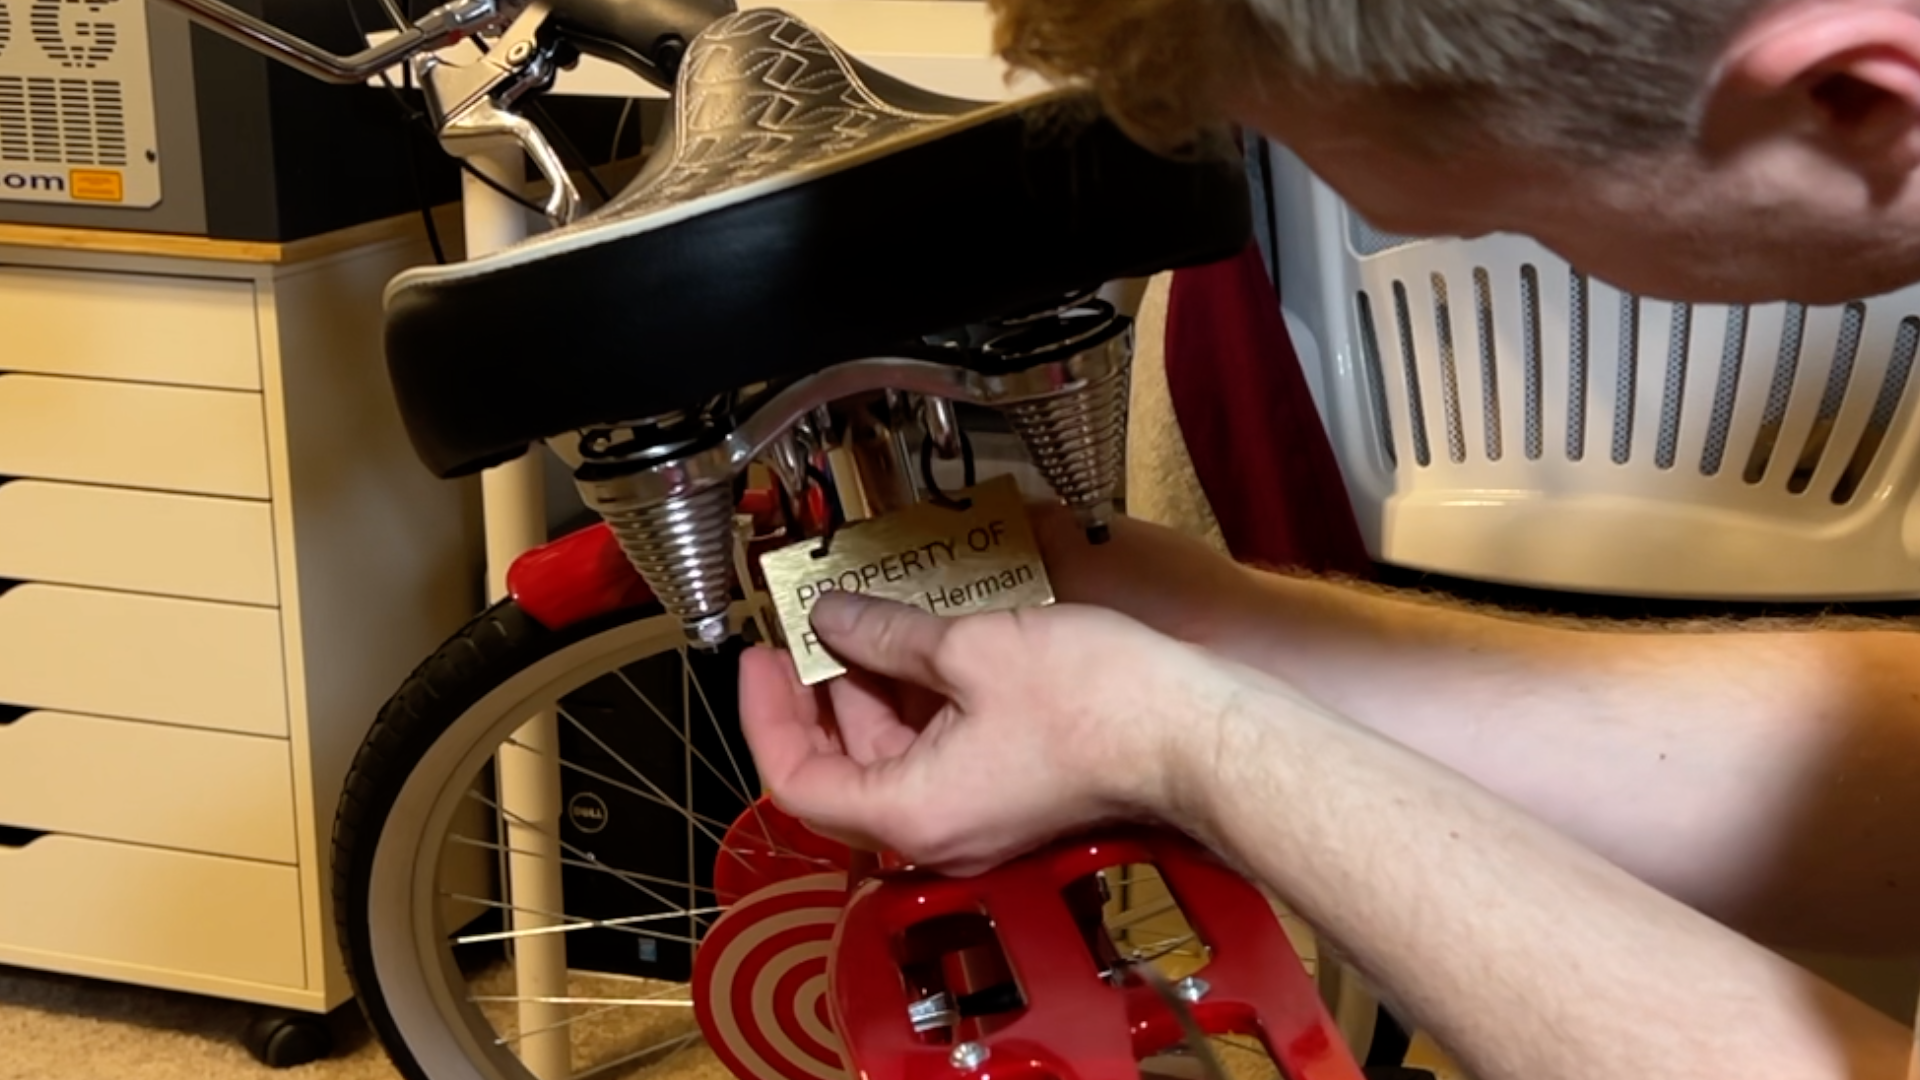
This final touch ties everything together!
Zip-tie the sign to the back of the bike seat.
Step 9: Ride and Enjoy!
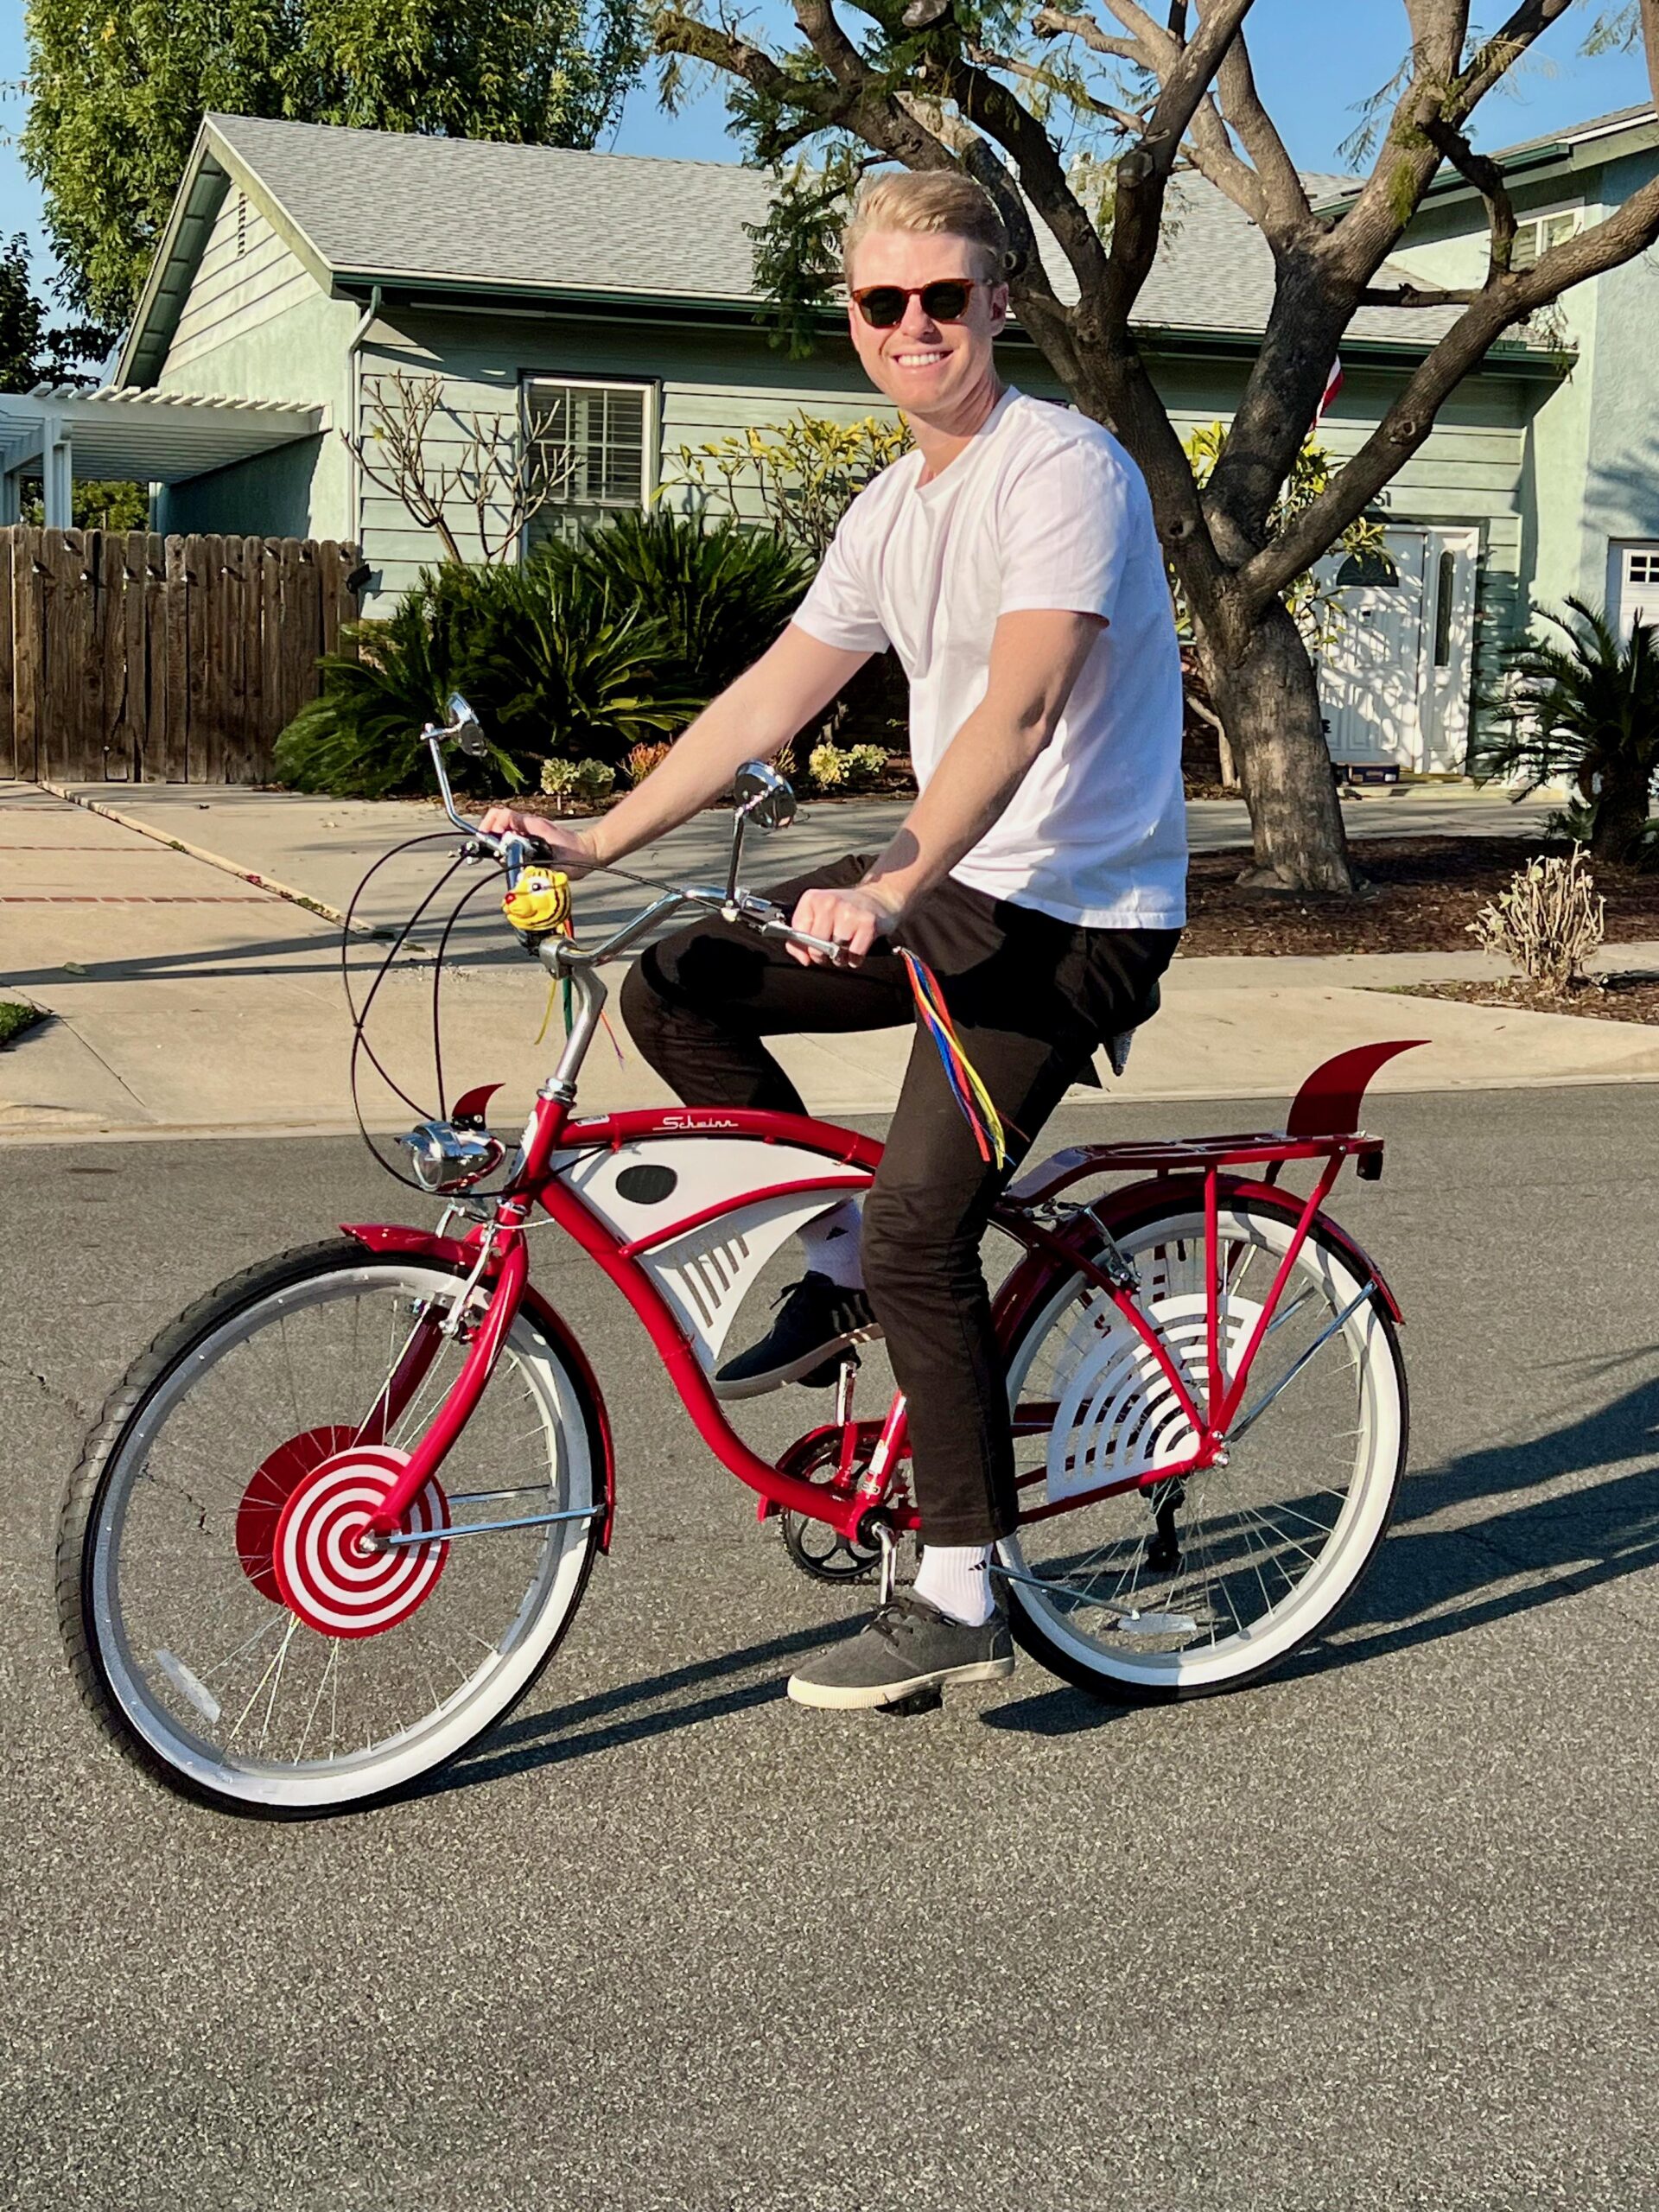
That’s it! Your Pee-wee tribute bike is complete. It’s fun, rideable, and way more practical than a full replica. You can actually take it out to visit Chuck’s Bike-O-Rama without worrying about scratches or theft!
I tried to make this the easiest, quickest, and cheapest way to get your hands on a Pee-wee bike! With all the parts ready, I think you can really put this bike together in under a day!
Let me know what you think! Any ideas for improvements? Let me know in the comments.
I’ve also got completed bikes available for sale if you don’t wanna bother building one yourself:
- Available on my website: https://derosedesign.co/product/pee-wee-herman-replica-bike/
- Or on my Etsy shop: https://travisderose.etsy.com/listing/1876222346
You can find me at @travisderose on Instagram, YouTube, and TikTok for more projects like this!
-Travis
You May Also Like...
Iconic Cereal Box Airtight Food Containers
Bring iconic cereals from movies and pop culture straight into your pantry! With this fun and functional DIY, you’ll...

7ft Chucky Box Photo Booth (Collapsible & Swappable Design)
I wanted to build a life-size 7-foot-tall toy box photo booth for people to take photos in and enjoy. My goals for the...